Sheds Guides & Resources

Trending Searches

Plumbers

Dentists

Hairdressers

Electricians

What is a Rafter?

What is a Rafter?

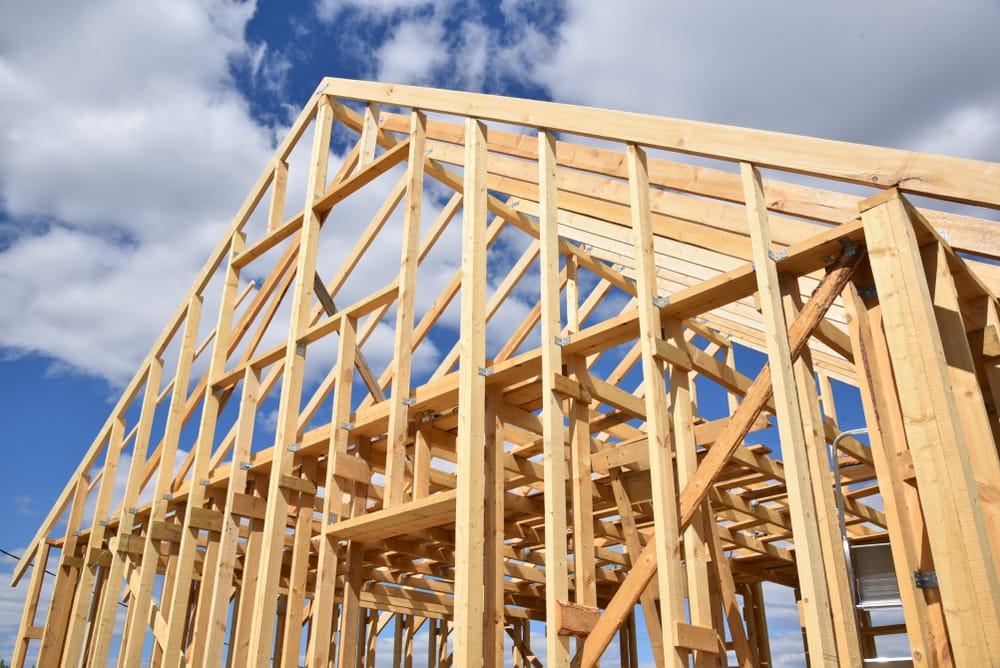
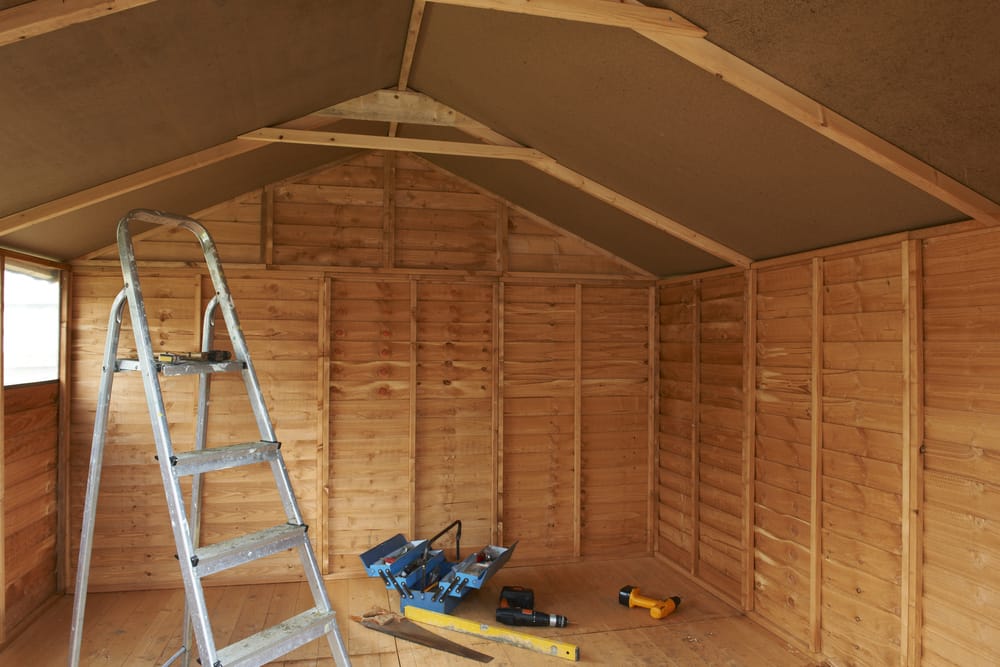
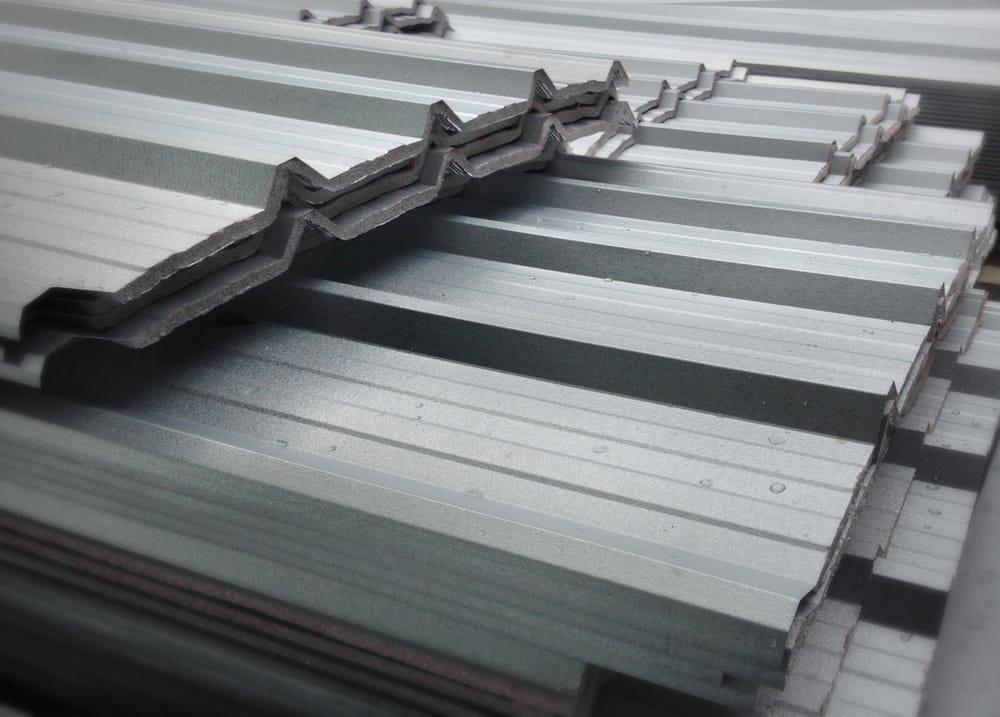
A rafter is a sloping beam in a roof truss assembly that supports the weight of other components, such as a ceiling or roof. The rafter's sloped shape is what allows roofs to be supported over long spans. The vertical edge of a rafter is called the plumb cut. The bottom tip is referred to as the bottom wall plate height and the top tip is referred to as the top wall plate height. Each rafter has plumb cuts on both ends. Rafters usually terminate above a ceiling, at a ridge, or in some other way that allows them to support an upper structure such as a roof or ceiling. A horizontal structural beam supports the weight of any structure above it such as joists, studs and provides headroom under the structure it supports. A rafter can be made of wood, steel, or aluminium. The top tip is known as the roof peak. A tie beam often supports a rafter at the foot where no support from an upper storey occurs, or if there is no tie beam, then it rests directly on a wall plate. Roof trusses can be assembled using wood or metal depending on the use of the building. Most residential construction roof framing sections use wood rafters, whereas large-scale commercial projects use metal or related materials. ## What rafter types are available? The truss assembly supports the roof structure of any building. The design of the house will determine the type of rafters that your building will have. ### Common rafter Common rafters run from the ridge beam and connect to the top plate. The roof of a house with a basic design, such as a gable roof, will only have common rafters in its roof trusses. The battens onto which the [roof is fitted](/guides/sheds/how-to-frame-a-shed-roof) are nailed on the common rafters. Further, in the gable roof design, the outermost rafter that forms the roof eave (overhang) is called the barge rafter. ### Principal rafter The principal rafter lies below the common rafter beneath the purlins. It is stronger than the commons rafter because it supports the entire roof deck. It connects directly to the king post, the tie-beams, and the struts. If roof loads are extreme, an auxiliary rafter can be added to support the principal rafter. ### Hip rafter In a hip roofing design, the hip rafter runs from the ridge beam to the top plate of the hip roof section. Hip jack rafters connect the hip rafter to the top plate. A king rafter serves the same purpose in a hip rafter as the king post does in a principal rafter. ### Valley rafter Buildings with a valley roof have a section that connects directly to the main building structure. This is the case for T or L-shaped houses. The valley rafter is found where the roofs meet. ### Cripple jack rafter This type runs from either the ridge board or hip rafters to the valley rafter. ## What is the difference between a rafter and a truss? A truss is a structural member composed of simple members such as straight beams and triangular shapes designed to support associated loads in tension and compression. The simplest form of a truss is known as a king post. In a building, a rafter is a sloping beam in the roof truss assembly that supports the weight of other components, such as a ceiling or roof. The vertical edge of a rafter is called the plumb cut. A truss can be made up of wood, steel, or aluminium according to its application and local custom. A truss often consists of beams at angles joined together to form triangles. The triangular structure of the framing members in a roof structure makes them very strong. Triangular designing of rafters is common in roofs and bridges where spans need to be longer than normal. Roof trusses types include Howe (or common) truss, queen post truss, arch-braced (or bowstring), round (or wagon), tied-arch, steel I-beam, Warren (or box) truss. The design or the truss assembly affects the attic space or how much [storage you can use](/guides/sheds/how-to-organise-inside-a-shed). ## What is the difference between a rafter and a joist? A joist is a horizontal structural beam used to support flooring, while rafters are sloped beams supporting the roof structure. The word "rafter" refers specifically to an individual triangular or rectangular truss in beamed and plasterwork ceilings, whereas "joists" refer to longitudinal beams of similar materials but without these features. However, there are instances where both terms can be used in reference to residential architecture; for example, if one were building out the attic into individual rooms with their own roof space (either dormers or separate), then [insulated walls](/guides/sheds/how-to-insulate-a-shed-wall) would need to be supported by some means. These vertical supports would need to be attached. ## How does a rafter work? Rafters support the weight of other components, such as a ceiling or roof. Rafters usually terminate above a ceiling, at a ridge, or in some other way that allows them to support an upper structure. A horizontal structural beam with one end face upright (or nearly so) and one long edge (the lower edge when standing) on which it rests; it supports the weight of any structure above it, such as joists, studs, and provides headroom under the structure it supports. A rafter can be made of wood (lumber), steel, or aluminium according to its application. The top tip is known as the roof peak. A tie beam often supports a rafter at the foot where no support from an upper storey occurs, or if there is no tie beam, then it rests directly on a wall plate. The rafters for your house must meet your area's building codes. If the roofing needs of your project are complex, consult a structural engineer. ## What is the difference between a girder and a beam? A girder (also called a bearer) is designed to spread loads onto other structural components such as girders, columns, piers, whereas beams carry vertically downwards only. Girders tend to be widely used in reinforced-concrete construction, while beams are most common in timber frame buildings. They are both similar in that they support an upper structure and transmit the load from one point to another. The primary difference between a beam and a girder is that beams rest on their own base, which can be top or top and bottom flanges, while girders often have multiple supports. A column does not need vertical supports because it carries its load by resting on the floor. ## What is a rafter tie? In traditional timber framing, three main types of rafter ties are used to resist their uplift forces: collars, trucks, and principal purlins. In addition to these, which transmit rafter forces directly to the collar beam, principal rafters may be supported on a mid-span horizontal tie. All of these elements help prevent excessive endwise movement under wind loads or seismic interferences. ## How long does it take to build rafters? It depends on the design, materials used, and tools available. For example, log cabin rafters can be built in 4–6 hours by one or two people with basic hand tools. A load-bearing timber-framed roof could take 15+ hours to build by one builder using a chainsaw mill to rough cut lumber for rafters. WorkSafe ACT has a handy guide to staying safe on [all kinds of roofing work](https://www.worksafe.act.gov.au/health-and-safety-portal/safety-by-industry/building-and-construction/roof-work). ## What is the best timber for rafters in Australia? Tropical hardwoods such as yellow bloodwood, tulipwood, and ironbark are great for construction rafters. These timbers have a nice tight grain that resists movement over time due to gravity loads, effects of high winds, temperature changes, moisture content of the air, or snow loads during winter. The best timber for ceiling framing is usually plantation grown softwoods such as rimu or pine, where strength and stiffness aren't required. Some of the most common timbers used for this purpose are yellow bloodwood, white beech, backwoods, ash, and spotted gum. The choice depends on your budget and availability in your local area. These all work well but will last longer if kiln-dried to 10% or less moisture content. This reduces the risk of warping over time due to changes in relative humidity levels.

Sheds Guides & Resources

How to Install a Garden Shed

How to Install a Garden Shed

A garden shed is a great solution for storing all your equipment and can ideal place to relax on warm summer days. But before you start building the garden shed, it's important to decide how big should it be and if there are any zoning or other regulations in your city that apply to sheds. Garden sheds must be strong to withstand strong winds and storm. Make sure not to make the three common mistakes below when installing your garden shed. ### Too many windows It is an attractive addition to almost any structure, but placing [too many windows in a shed](/guides//how-to-install-a-window-in-a-metal-shed) may result in excessive weight. Before adding new another one or skylight, take the time to consider the weight of each window and skylight placement. ### Improper ventilation Improper ventilation can cause a plethora of problems in your garden shed, such as nuisance pests, high humidity levels, and mould. If you have adequate space on one wall for the ventilation, be sure to leave at least 2 feet in between it and any exterior doors. This allows for airflow throughout the structure. Each window should be fastened by screws and also include a latch that automatically closes shutters when no longer needed. ### Unused space You may regret adding all those extra storage cabinets if you don't use them after construction. If you are adding a large number of cabinets and other storage units, make sure to leave enough space for people to walk through the structure. This will prevent accidents and increase overall ease of use. Here's how to [organise inside a shed](/guides/sheds/how-to-organise-inside-a-shed) efficiently. ## Do you need a foundation for a shed? A shed is not the same as a house and it will not need the same foundation. What you do need is a flat and level surface to place your shed on. This may require some prep work such as levelling the base or installing concrete slabs or blocks for support. A concrete foundation for a shed is next-level and elevates your shed off the base. Consider adding a concrete foundation for your shed if it will be placed on uneven base or subject to moisture or flooding. If your shed is not going to get wet at all, and you aren't concerned about termites, ants or other wood-destroyers that can take up residence in the ground below your structure, then you can probably make do with just the floor of the shed. Ground cover around the base of the walls will help keep water out and away from any buried electrical wiring. A less permanent alternative would be some type of decking material such as pressure-treated lumber or composite boards. These materials are lightweight but sturdy enough to support most garden sheds while preventing excessive moisture from seeping into your wooden floor. ## Is it cheaper to build or buy a garden shed? It might be cheaper to buy an already built shed, but building one yourself can save you even more money in the long run. Ready made garden sheds save time and effort since all you need to do is perform an assembly by following the instructions. If you choose to buy a shed, you are going to have to [pay for labour and shipping costs](/guides//garden-shed-installation-cost) as well as the price of the shed. If you build your own, you can save by doing much of the work yourself. Depending on how advanced your skills are with carpentry or home-improvement projects in general, an in-ground wood frame shed could cost anywhere between $1,000 and $5,000 for materials alone. Add the cost of additional products (if any). You also need to take into account excavation costs and garden products (optional) if your yard isn't already prepared for a shed foundation. Tools you need include: - Spirit level. - Screws of different sizes. - Rakes. - Wall frames. ## How do you set up a garden shed? Using gravel as a base enables you to have a firm bed for your shed, and it will also help with drainage. It is essential that the base underneath is flat before you start building your shed, as the uneven surface may cause instability in your shed. Make sure to add some additional storage space and areas. Sheds are meant fort the long-term, so consider using proper tools to work on the project. There are plenty of guides available, such as this one on [how to install a shed door](/guides//how-to-install-a-shed-door).

How to Install a Shed Door

How to Install a Shed Door

It might sound like a daunting project, but building shed doors are actually quite simple. The most important thing to be aware of during the installation process is that your shed door must be level when you attach it to the frame. If it isn't level, then your shed door will look crooked and have a rough opening. As the old saying goes, measure twice and cut once. ## Putting a shed door on Building double shed doors is much more complex than a single shed door. A double shed door needs har wood that remains intact for a longer time period. [Garden sheds](/guides/sheds/how-to-install-a-garden-shed) need smaller and lower weight doors. Shed plans are always carried out in a way that the sheds have stronger shed doors, with doors opening quite easily. Here are some easy instructions for attaching a shed door. 1 Install your door on the frame and lock it in one corner of it with one screw. 2 Attach a level to the top of the frame, making sure that it's completely even. Measure the length and width by using a pencil or chalk to mark where the studs are on both sides of the frame (on either side of your door). This will ensure that when you attach your shed door, it will be fixed at exactly 90 degrees. 3 Start drilling holes into each stud that you marked previously. Drill equal amount of holes you need for fixing your frame securely in a proper position to the wall frame. 4 Screw each corner into place, making sure that it's securely attached and level. 5 Install whatever locking mechanisms you intend on using onto the other side of your door (this step may not apply if you simply want to have a simple shed door without any locks). 6 Attach the door to the door frame and look if it is fixed to the door jamb. 7 Test your door to make sure that it is opening and closing properly, the bolts are fixed, and the door not hanging. It is a common practice to install the doors of your sheds on a locked hinge so that you can lock them from the inside. This ensures that you are going to protect your belongings in case someone tries to break in. ## Installing hinges on the shed door frame The first step in installing the door hinges is to determine their location on your door frame. It is best if you line them up with the studs which are installed into the shed wall, but it isn't necessary. Use a level to make sure that your hinges are level and then mark each one of them using chalk or a pencil. Use a drill bit that is slightly smaller than the diameter of the screws you're going to be using. Use 2 or 3 screws per hinge to make it secure, depending on how thick it is and how much weight you think your door will need to hold. A level is typically used to ensure that your door is level as you're installing each screw. Securely tight the screws to prevent the shed door hinges from hanging. It's a good idea to try out your door and make sure that it is opening and closing properly before moving on to the next step of installing the latch hardware. ## How to brace a shed door Bracing a shed door can be done in a variety of ways. The most common solution is to simply install brackets on both sides of the door frame. These brackets will then hold up sturdy boards which will prevent your door from opening too wide and falling off its hinges or swinging open when it gets windy outside. Brackets can be installed at the top and bottom of your door frame or just one side if you already have enough boards to brace it securely. You must ensure that your shed door is securely fastened so that it is prevented from rough opening when someone suddenly pushes it too far inside your shed. Now you have your door installed, [why not consider insulating the shed](/guides/sheds/how-to-insulate-a-shed-wall)? Install a door handle in the correct position for easy opening of the doors.

Shed Installation Cost

Shed Installation Cost

One of the most popular shed sizes purchased by Aussies is the 7' x 5'8" (2.1m x 1.7m) design. Installing a new shed may seem like a daunting task but with careful planning and some helpful tips, its an easy project. The first step is to measure the area where you plan to install the shed. The shed installation cost will be based on the size of the shed so it's important to know how much space you have to work with. When measuring, make sure not to forget any access areas such as doors and [windows for the shed](/guides//how-to-install-a-window-in-a-metal-shed). You'll also need to consider if there are trees overhanging the garden shed in that area or any structures that could interfere with installation. The second step for a person is to mark on the ground where you want to put your garden shed by using stakes and string. If possible, install this before you order the shed. ## Shed installation costs Shed sizes are usually listed on the outside of the shed itself. Measure from your starting point (where the walls will go) to make sure that each wall is equal distance away from the next one and reference this when looking at different sheds. The most common measurements are 8x6, 10x8, 12x10 and 14x14 although they are available in almost any size imaginable. The information on shed cost and their price range based on the area is as follows. | Size of shed | Average cost | | -- | -- | | 2m x 2m | $500 | true | | 6m x 6m | $5000 to $6000 | true | | 9m x 6m | $7000 to $8000 | true | | 12m x 6m | $8500 to $9500 | true | | 12m x 9m | $10,000 to $11,000 | true | | 16m x 10m | $15,000 to $16,000 | true | The below information on the cost of shed installation is an estimated cost per square metre. - Open front $25. - Fully enclosed $75. - Concrete slab $80. - Insulation $25. - Roof venting $25. - Skylights $25. - Concrete Walls $70. ## Is it cheaper to build a shed or buy a shed? When you build a shed, the design and style are usually up to your own judgement and preferences. You get exactly what you want when you create your own. When creating your own shed plan, keep in mind how much space you need for the storage of tools and lawn equipment. Add any extras, [such as insulation](/guides/sheds/how-to-insulate-a-shed-wall), that will make your shed more comfortable. [Pre-packaged garden sheds](/guides/garden-sheds/garden-shed-installation-cost) can be pretty and come with assembly instructions, but these models are usually expensive. ## Cost of pre-packaged sheds The price of a pre-built shed is determined by the size of work space, materials and a host of other factors. | Type of shed | Estimated price | | -- | -- | | Double door garden shed excluding installation. | $1199 | true | | Small zincalume shed | $289 | true | | Single sliding door shed installed | $1040 | true | ## What's the most popular size shed in Australia? The most popular size of shed in Australia is the 7' x 5'8" (2.1m x 1.7m) design, with this being a highly versatile choice for those who are looking at storing bikes, cars and various amounts of gardening equipment in their backyard garden shed. Typical pre-packaged shed sizes scale from 2' 9" x 1' 10" (0.8m x 0.49m), to a huge size of 20' x 13' (6m x 4m). ## Common shed sizes - 8' x 8' (2.4m x 2.4m) - 286 square foot (26.6sq m). - 7' x 10' (2.1m x 3m) - 711 square foot (65,91 sq m). - 7' x 5 in 8ft (2.1m x 1.7m)- 228 square foot (21 sq m). - 7' X 4 ft 6 in(2.1M X 1.37M)- 194 square foot (17,5sq m). ## How much does a 10x12 shed cost to install? The price to install may differ based on whether it is being installed to an existing concrete slab or by placing down a new concrete pad. If you're adding a shed onto an existing slab then typically one can expect to pay between $1,200 and $2,500 for labour costs alone - this also includes basic plumbing work if needed. If you're planning on having a new concrete slab poured, then the cost of labour can vary from $1,800 -$3,000 depending on where your location is. ## What can I use as a floor in my shed? The most common choices for shed floors include: ### Plywood sheets Easy to cut and install quickly, plywood sheets can be easily secured directly onto joists or furring strips with lag bolts. ### Laminate flooring Laminate flooring is a more expensive choice than plywood but has an easy installation process and low maintenance cost over time. ## Rubber tiles or mats Rubber tiles are easy to clean and require little work to install. Tiles can also provide comfort when walking through the shed if you don't want concrete beneath your feet as well as helping to protect against any moisture damage that may occur in the future from water that gets trapped between them. Typically, rubber tiles would be laid on top of a plywood or laminate floor in order to give it a softer surface for walking on. ## How long does it take to install a shed? The best way to figure out how long it will take to install your shed is by doing an 'as-built' plan on the size of shed you're looking at purchasing. These as-builts give you a guide on what materials and tools are needed for installation, including the time frame that should be expected before finishing the job. They generally have very easy instructions for the basics, like [how to build a shed roof](/guides/sheds/how-to-build-a-shed-roof). For those who are installing their own pre-made sheds they can expect it to take anywhere from one or two weekends if building alone with no prior experience in carpentry. Services by a skilled carpenter could have this job done within a day, however most people will need at least 3 days to complete the project to completion - so there's always room for extra help when tackling any DIY projects like these.

How to Install a Window in a Metal Shed

How to Install a Window in a Metal Shed

Customising a shed is not at all difficult or time consuming, it just requires the right tools and approach. The only type that will work in this way is tempered glass because it can support its own weight when used as a single pane without the aid of other materials. You could use laminated glass instead, but again, it would rely on additional strength from the frame or assembly that supports it to prevent breaking. Tempered glass is designed to break into large, blunt chunks that will not shatter into dangerous shards when broken. Measure the location where your window needs to be cut out of the wall panelling using an accurate tape measure and ensure the opening is 4-5 feet above the floor. Use this measurement on your tempered glass panel (or laminate) and mark a cutting line using a pencil. Also take measurements of the top plate and bottom plate, four corners, two studs (required), the size of the wall, windows, and the frame. The frame width and length should be accurately measured. If your [shed is brand new](/guides/sheds/how-to-put-up-a-shed) and no framing or interior wall panels have been installed (there are no existing studs), you only need to trim out the window opening and fit structural wood panelling material. Simply cut the piece of wood you will use as a sill (the bottom edge of your window) first. You can mark this measurement on your tape measure too if it helps keep track. Then, cut out the rest of the opening using that same measurement. Use a file to smooth down the rough edges of the wood sill. This will help prevent wear and tear on your window glass over time or when it is installed. Next, position, install, and secure the actual window in place using window clips and sealant to hold it securely against the sill you just created. Keep the window straight. Make sure it is clean and dry before you begin putting the window in. You may want to use a small piece of scrap wood underneath each side of the sill to give yourself a better working surface. Next, seal the open space in the edge of your window glass with clear silicone caulk to prevent water from flowing in through the sides of the window. Over-caulk the window at each side, but don't smooth the excess caulk out. It will be easy to trim it away later with a utility knife. The end result may not be as expected if taken reference of a DIY project. The stud, header and siding are important when you install a shed. The header should be over the door as leaving a door without a header is dangerous. A bead and stud on the shed adds to the strength. Siding can be added to the edges of the shed. ## How do you modify a metal shed? Repair or modification of a shed is not at all difficult or time consuming, it just requires the right tools for the job as metal requires a little more finesse than the [typical wood shed](/guides/sheds/how-to-build-a-wooden-shed). You will require specialised metalwork tools such as a hacksaw and metal snips. You will also need a metal drill and you might benefit from a Dremel tool. Additional requirements for this project include the below. - Hammer. - Nails . - Screws. - Good quality timber. - Paint. ## How long does it take to install windows in a shed? In truth, it depends on the type of shed you have and what kind of window you are putting in it. A panelled shed with windows already installed will be considerably easier to install into than a brand new shed with no interior structure. A good guide is to allow a few hours for installation if your window does not require any cutting or drilling. Use a circular saw if the opening design is circular. ## How much does it cost to install a window in a metal shed? The price for installing a window in your shed will depend on the size of your window. It might also depend on where you live (shipping costs may come into play) and whether you choose to hire professionals or do the job yourself. Typically, steel framed windows can range from under $100.00 to over $400.00, depending on the size of your window, what type of glass you choose and whether you purchase a custom cut piece or pick one that is already sized and ready to install.

How to build a wooden shed DUPLICATE ARTICLE

How to build a wooden shed DUPLICATE ARTICLE

Building a wooden garden or storage shed is not rocket science, but it can be overwhelming figuring out how to do it right. The first thing you need to realise is this is not a one-day project - you will have to plan your time accordingly and take things step by step. ### The planning stage Make sure to jolt down detailed instructions before beginning the work. If you're going for a DIY garden sheds, then you can start by making shed plans for the size and shape of the garden shed. Once that's done, decide on what kind of wood most suits your needs. Planning should include creating sufficient free space and easy access to all the corners including front and back wall. Measure the area where the shedding will be built so that you can purchase everything according to specifications. Make a materials list that's necessary for building the shed itself (flooring, walls, windows) and additional stuff like lighting and electrical fixtures if required. This can include a circular saw, concrete slab, wall frames, tape measure, spirit level, and more. You can also make a separate tool list and list for other materials. It's suggested to check what materials are already present in the house because using spare parts is not a bad idea. ### The building stage Build the roof frame then give the flooring and walls a protective layer of paint before assembling them together. Use nails or screws to attach everything together correctly and leave no gaps for water to enter the shed. Now, build the roof using wood planks as well as shingles made out of aluminium or poly-carbonate sheets (for sheds in areas where there's high moisture). Attach all your fixtures: lights, electrical switches, windows etc. When building a new shed, make sure to nail holes especially at the corner posts, bottom plate, and top plate. The roof should be able to withstand heavy rain. ### The finishing stage Now that your shed is ready to be used, you can start with the finishing touches. You will have to put a coat of paint on all the wooden surfaces and cover up any gaps in order to protect it from moisture. Install shelving up high (for garden tools and other items you want to keep out of sight) and generally [organise your workspace and storage areas](/guides//how-to-organise-inside-a-shed). You can paint the entire structure and also build floor joists, flooring and single or double doors. ## How to save money when building a shed from scratch Deciding to build a shed from scratch is a huge undertaking but you can cut back on your costs by doing at least some of the work yourself. Research different plans and blueprints online. This will give you an idea of what to do, and how much supplies cost you'll need. Checking out hardware stores for deals on lumber, roof shingles and plywood etc., will help you save money. You could also consider buying pre-cut pieces that have been de-nailed (which will save time). ## What is the best wood for building a shed? If you've decided to go DIY, then you need to consider the type of wood that's best for building a shed. The most popular types in Australia are pine, cedar and cypress. All three kinds of wood share something in common: they are weather-resistant and durable. Each of them has its own characteristics though. Pine is the most affordable option out there and it's a good choice for first-time DIY builders. It is not as strong as cedar but it lasts a long time, even when exposed to harsh weather conditions Cedar wood costs a bit more than pine, but it holds up extremely well in moist environments. The downside is that cedar takes longer to build with because it cracks easily – so assembling your shed might take more time. Cypress sheds are hardy against insect infestations and rot. ## Do I need council planning permission for a garden shed? Some states in Australia have very strict building restrictions laws about building sheds, especially when it comes to the size and location of them (like NSW and WA). You will have to consult a professional planner or arrange for an inspection with the council before you begin building your shed. You might need to obtain a building permit. Council regulations vary from area to area and state to state so it's better for you to check out the laws of your local council before starting. ## How long does it take to build a wooden shed? The time to build and or install depends on where you live and what type of shed you're building. If you're only putting up a basic structure or installing a small garden shed (without windows or electricity), then 2 days is enough for the entire install process. If there are more intricate details (like a garden room or gazebo) involved, then plan on spending about 1 week working on your project. You will also need time to paint and finish everything off once the construction part is over with. Time will be taken to assemble the parts but the most time-consuming process will be the installation. A single door or a shed with one large door will take less time to finish. If building in a low lying area, extra measures for water drainage may increase building time. ## Do I need a foundation for a wooden shed? You don't need a foundation if you're only putting up a small shed (like an 8 x 4 foot garden room) on a frame. If your structure is much larger, then consider building it on concrete frame so that it will be more stable. It's important to level out the ground before laying down the slab or blocks. Either way, you will want to make sure that the shed is well-supported by the ground.

How to Build a Slanted Shed Roof

How to Build a Slanted Shed Roof

Most sheds in an urban setting are built at a 30-degree pitch because they are easier to make and still provide adequate rain runoff. Slanted roofs as a patio cover can be a great addition to any house. A slanted roof allows rain to run off easier than a flat roof and with the overhang of the roof, you can still feel as though you are outside in the rain without getting wet. The best way to build a slanted shed roof is with trusses. A truss is a framing system where an assembly of wood or metal beams join together to form triangular units and are used to bridge longer spans. Trusses are usually designed by engineers because they have to withstand quite a bit more stress than [regular framing systems](/guides/sheds/how-to-frame-a-shed-roof) and can be made out of many different combinations of materials such as wood, steel, or aluminium. The benefit of using trusses for your roof is that it will increase the amount of weight you can put on your roof compared to shingles alone which tend to sag under any kind of pressure. ## Where to start building a slanted roof shed? Firstly, measure the area you are looking to cover. Then, using those measurements and a calculator (or rough estimate) determine how many trusses it will take to span your length. Once you have your truss size, you can move on to picking the roofing material that best suits your needs. Not only you need to consider the cost of the material and ease of installation, but also how long it will last. The best roofing materials for sheds are asphalt shingles which are relatively inexpensive, lightweight (important when [building a shed roof](/guides/sheds/how-to-build-a-shed-roof)) and easy to install. Gable roofs and skillion roofs are pitched roofs that create more space for a storage shed as well. ## Building a gable roof For all the shed roof plans, such as gable roofs, roof materials such as fascia boards, siding panels, common rafters, are very much important to meet the gable ends. For easy installation, the manufacturer's instructions in the building plan are essential. Gable roofs are the best solutions to high wind areas. ## What products do I need to build a slanted roof shed? Building materials depend on the desired shed roof plans. You will need timber to build a slanted roof. You will be using two by fours and two by sixes for the rafters of your roof. You have to make sure that they are not warped and are straight enough to support the weight of the roof when it's done. Scrap wood is ideal to use for the gussets in between your trusses. Gussets prevent the wood from splitting when it comes under any kind of stress. After joining the trusses with the rafters and joists you need to put the roof sheathing on the structure. The fascia rafters i.e. the horizontal rafter of the outer edge of the overhang has fascia boards that hold guttering and the last row of shingles of a pitched roof. You need concrete piers to hold the floor frame which contains wall plates of floor joists where wall studs would be placed between the top and bottom plates. A chalk line, a circular saw, a carpenter's square, and some anchor bolts are also required for the assembly of a new shed. [Cladding is ideal](/guides/sheds/how-to-clad-a-shed) if you are looking for weatherproofing or insulating your shed. You will also need metal brackets for the joints between the trusses, galvanised nails, screws, and possibly an underlay for putting down before you put your shingles over it. ## What angle slope do I need for a shed roof? The more slant you have on your shed roof, the higher your peak will be. Depending on how high you want your peak, is going to change what angle you need for your roof pitch. Most sheds in an urban setting are built at a 30-degree pitch because they are easier to make and still provide adequate rain runoff and extra space. It is usually easier to get higher pitches on your roof so that you are able to have more headroom.

Sheds Informational Articles

How to Build a Wooden Shed

How to Build a Wooden Shed

Building a wooden garden shed or storage shed is not rocket science, but it can be overwhelming figuring out how to do it right. The first thing you need to realise is that this is not a one-day project. You will have to plan your time accordingly and take things step by step. ### The planning stage Make sure to write down detailed instructions before beginning the work. If you're going for a [DIY garden shed](/guides/sheds/how-to-install-a-garden-shed), start by making plans for the size and shape of the garden shed (square or rectangle). Once that's done, decide on what kind of wood most suits your needs. Planning should include creating sufficient free space and easy access to all the corners including the front and back wall. Measure the area where the shed will be built so that you can purchase everything according to specification. Make a materials list that's necessary for building the shed itself (flooring, walls, windows) and additional stuff like lighting and electrical fixtures. This can include a circular saw, having a concrete slab poured, wall frames, tape measure,a spirit level and more. You can also make a separate tool list and list for other materials. Remember that the floor and wall must not be left undone. ## The building stage Build the roof frame. Use nails or screws to attach everything together correctly and leave no gaps for water to enter the shed. Now, build the roof using wood planks as well as shingles made out of aluminium or poly-carbonate sheets (for sheds in areas where there's high moisture). Attach all your fixtures: lights, electrical switches, windows etc. When building a new shed, make sure to nail holes especially at the corner posts, bottom plate and top plate. The [shed's roof](/guides/sheds/how-to-frame-a-shed-roof) should, hopefully, be able to withstand heavy rain. Keep the rim joist tight and fastened. ### The finishing stage Now that your shed is ready to be used, you can start with the finishing touches. You will have to put a coat of paint on all the wooden surfaces and cover up any gaps in order to protect it from moisture. If you have bought a slightly larger than usual shed, then make good use of that area by installing shelving up high (for garden tools and other items you want to keep out of sight). You can paint only the front wall or both front and back walls. You may also build floor joists, shed floor (to store gardening tools), a small garden office, install single or double doors, etc. ## How to save money when building a shed from scratch Deciding to build a shed from scratch is a huge undertaking. You can cut back on your costs by doing at least some of the work yourself. Research different plans and blueprints online. This will give you an idea of what to do, and how much supplies you'll need. Checking out hardware stores for deals on lumber, roof shingles, plywood etc., will help you save money too. You could also consider buying pre-cut pieces that have been de-nailed (which will save time). ## What is the best wood for building a shed? If you've decided to go DIY, then you need to consider the type of wood that's [best for building a shed](/guides/sheds/how-to-build-a-wooden-shed). The most popular types in Australia are pine, cedar and cypress. All three kinds of wood share something in common: they are weather-resistant and durable. Pine is the most affordable option out there and it's a good choice for first-time DIY builders. It is not as strong as cedar but it lasts a long time, even when exposed to harsh weather conditions Cedar wood costs a bit more than pine, but it holds up extremely well in moist environments (a must in Australia). Cypress sheds are hardy against insect infestations and rot. ## Do I need council planning permission for a garden shed? It depends on where you live. Some states in Australia have very strict building restrictions laws about building sheds, especially when it comes to the size and location of them (like NSW and WA). You will have to consult a professional planner or arrange for an inspection with the council before you begin building your shed. You might need to obtain a building permit. Council regulations vary from area to area, and state to state, so it's better for you to check out the laws of your local council before starting. For those in New South Wales, you maybe exempt from requirement a [development green light](https://www.planning.nsw.gov.au/exemptdevelopment), however rules differ from state to state. ## How long does it take to build a wooden shed? The time to build and or install depends on where you live and what type of shed you're building. If you're only putting up a basic structure or installing a small garden shed (without windows or electricity), then 2 days is enough for the entire install process. If there are more intricate details (like a garden room or gazebo) involved, then plan on spending about 1 week working on your project. You will also need time to paint and finish everything off once the construction part is over with. Half time will be taken to assemble the parts. The most time-consuming process will be the installation. A single door or a shed with one large door will take less time to finish. To create a shed with several doors, build time will increase. ## Do I need a foundation for a wooden shed? You don't need a foundation if you're only putting up a small shed (like an 8 x 4 foot garden room) on a frame. If your structure is much larger, then consider building it on concrete frame so that it will be more stable. It's important to level out the ground before laying down the slab or blocks. Either way, you will want to make sure that the shed is well-supported by the ground.

How to Clad a Shed

How to Clad a Shed

Insulated walls greatly improve energy efficiency and walls that are too thin will transfer all the warmth to colder exterior walls and reduce your comfort. Cladding a shed is a relatively big project, and it can be very daunting for many people. However, with some basic hand tools like a circular saw and skills, anyone can do the job of cladding sheds in no time at all. Remember to wear safety gear to protect yourself. The first step when cladding garden buildings should be to choose between siding and sheeting. Siding comes in different wood colours and has little visual impact while sheeting gives your shed a more modern visual appeal. When choosing shed siding, make sure you take into consideration your climate as some types of timber cladding might warp or rot away faster than others. Warping can make fixing groove cladding quite difficult. The wood pieces may also not properly fall in line, depending on how you have [built your wooden shed](/guides/sheds/how-to-build-a-wooden-shed). The next step will be to choose how you want to attach the siding or sheeting. Depending on your choice of building material, you might either use nails, screws or both. Nails are usually used for lightweight timber. Screws are better at holding heavy weight wood in place on the timber frame. Upon choosing your siding type and preparation of wood surfaces, you can move on to fixing cladding. Most likely you will need help from a friend when installing larger sections but even small pieces such as windows can be done by yourself if needed. If cladding does not fit correctly you can use a pry bar to remove and adjust accordingly. ## Installing cladding to a shed When installing your cladding to the four walls of your new shed you will need to ensure that joints are properly cut and that edges fit tightly together. This will ensure easy installation and proper weatherproofing of the shed. Tongue and groove cladding helps achieve this. One edge, the tongue, slides into the groove of the adjacent board. This groove fitting is not perfectly attainable with overlap cladding. However, overlap cladding is cost effective and easy to install. Usually garden shed material is softwood timber. Some people also prefer using decking boards because they are thick, but these require more fixing work and can be expensive. The most common timber cladding is the shiplap and the feather edge. The feather edge is often cheaper than shiplap which has a better finish and a more contemporary look. Professionally fitted boards overlap well protecting the boards from elements. Installing sheeting usually involves nailing or screwing 2x4 pressure treated wood on top of each side of the wall and then attaching the siding to it using nails or screws according to choice. Nails should be hammered 6-8 inches apart while screws should be spaced every twelve inches for maximum rigidity. Should you choose plywood sheets for shed cladding, adhesive can also be used between them and the wall surface. You can put additional wood supports at lower levels if needed. Insulated walls greatly improve the energy efficiency of a structure. Walls that are too thin will transfer all the warmth to colder exterior walls and reduce your comfort. Insulation comes in two main types, fibreglass and cellulose. Fibreglass insulation is a better choice if you don't need a special vapour barrier or fire resistance for your structure. ## What type of shed cladding should I choose? There are two main types of cladding, sheeting and siding. When choosing to install siding you will have to consider your climate and budget. A lot of people tend to choose wood based treated timber panels for their sheds because they are most visually appealing and easy to paint. If you live in a cold area you might want to look into more modern alternatives such as vinyl or metal sheets which come with [added insulation properties.](/guides/sheds/how-to-insulate-a-shed-wall) When purchasing cladding boards, get clarification on thickness. This is because, before the boards are planed they will be thicker. Therefore enquire about the final thickness after planning is done on the boards. The amount of board required will depend on the total wall area less the window and door space. Cellulose insulation is a great budget-friendly alternative to fibreglass. It's made of recycled paper and has the ability to keep heat in but let it escape through thin walls under pressure. The best part about cellulose is that it's non-flammable, unlike fibreglass which can be combustible in the worst case scenario. Sheeting, on the other hand, comes with its own problems as well as benefits. Vinyl and aluminium sheets for example are very lightweight but they also come at a premium price over wood planks. On the other hand metal, especially steel, offers excellent durability and fire resistance (unless you're installing galvanised steel). These features, along with additional insulation properties make metal sheeting an ideal choice. ## Can you clad a shed with plywood? Plywood is a great building material for sheds. It's easy to work with, water resistant and non-combustible. It does have one main drawback. Plywood siding can be considered too lightweight in comparison with other materials such as metal which offers some of the best cladding options. That shouldn't discourage you from installing plywood sheets on your shed because they are relatively inexpensive.

How to Build a Hay Shed

How to Build a Hay Shed

A proper hay shed or hay barn requires an overhang that prevents rain from falling directly onto the bale. Designed for long-term use with an expected lifespan of 25 years or more, a well-made hay shed is designed for durability and a low maintenance expense. The walls can be constructed of concrete block, wood frame with plywood sheathing or metal stud framing with aluminium siding. Because hay sheds are highly durable, most people prefer metal hay sheds as they require little maintenance. Hay shed designs using concrete blocks or timber studs offer [additional insulation](/guides/sheds/how-to-insulate-a-shed-wall) from cold winds in winter and hot sun in summer. To start building a hay shed, first determine the total size of the shed you need. Measure the length and width of the area in which you want to locate the shed. Allow a minimum of 10 feet between structures or trees so that tractors can easily pull large equipment into position. For longer sheds requiring a centre aisle, allow at least 20 feet between structures or trees. The dimensions of the shed will depend on the height of your hay bales and the size of your tractor. Allow for enough clearance to open doors on the front and back permanently and wide enough to pull containers in through each door. There should be ample area to feed the animals. ## How tall should a hay shed be? When constructing hay sheds, remember that a hay shed should be tall enough to store bales in a stack. An overhang for the hay sheds at the front of the building prevents water from running off the roof and falling directly onto the bales. This overhang is normally about 8 feet high but will vary depending on your climate and what suits you best. The overhang should extend from the top of the wall down to the ground. This overhang for the hay sheds should be angled slightly to allow a small amount of water to run off the front of the roof and also extend further forward than the rear extension of the roof so that water cannot collect on top. The maximum height for storing straw bale in hay sheds is 8 feet, but you can store them at any height up to this. For round or square bales, it is important to store them off the ground. Also, consider what kind of vehicle will be used to transport hay from the field into your barn. If it has tall tires or lifts high when loaded with hay, you may need to consider building a taller storage area. You might need council approval to build a hay shed, or even just a [large shed](/guides/sheds/cost-of-building-a-large-shed). ## How much space do you need to store 100 bales of hay? Typical round bales are about 1.2 meters in diameter and take up about 2.5 square metres or 3 square metres. A standard rectangular bale is about 0.7m x 1.2m x 1.75m, measuring 4 cubic metres. The hay bales can be stacked in hay sheds in rows four high on an average width aisle to take up 16 cubic metres of space, which means 80 bales per stack or 160-200 bales in a two-aisle structure with 6 stacks on each side. Sheds or barns should also have areas to store machinery. Generally, farmers create pallets in a barn to protect the fodder from moisture.

How to Insulate a Shed Wall

How to Insulate a Shed Wall

Shed insulation is a great idea to keep your tools and equipment safe from temperature extremes and make it more comfortable for cold weather tinkering. Shed walls do not require as much insulation as those of a house or garden shed. Just one inch is sufficient for most sheds. You can insert fibreglass batts between the studs or you can use other products like wall panels or rigid foam board to improve insulation. ## Installing shed roof insulation The best way for shed roof insulation is to use rigid foam board insulation as this product is inexpensive and easy to install. Rigid foam boards are relatively thin so if you decide to mount them against the inside walls of your wooden shed, there will be plenty of room for shelves or other storage items. Shed insulation is a must for protection against various factors. Ceiling insulation can be done in many ways. Rigid insulation can prove to be very dangerous in many places. Underfloor insulation requires a breathable membrane to avoid overheating. Breathable material is the best material for insulation because it allows heat to outflow in any case and keeps the temperature normal. The number of boards depends upon how much insulation do you need in the shed. It is one of the best ways to insulate your shed into a comfortable space. Energy-efficient rigid foam boards contain expanded polystyrene which has the best insulation as they form a protective cover around the internal walls and reduce heat loss and control moisture. It is an inexpensive way of insulating your shed and any easy task to achieve if you are [framing your own shed roof](/guides/sheds/how-to-frame-a-shed-roof). You can also use rigid foam boards to insulate around pipes and ducts that enter your shed. These thin materials, just like fibreglass batt insulation, wrap up easily and you can install them yourself. Bubble wrap can also be used for insulation as the air pockets within it reduce heat loss. If you decide to use flexible batts of fibreglass insulation, it is important to choose the proper size for your specific shed. If there is extra space between the studs in your walls, thick batt insulation, having extra fibreglass wool, should be used instead of thinner rolls. Always purchase enough for each side including the ceiling or roof, if possible. Fibreglass foil-faced batts are more expensive than unfaced ones but they provide better protection due to the aluminium foil against air leaks as well as adding R-value against loss or gain through the walls. ## Which insulation should I use in my shed? Rigid foam insulation boards are a great choice for sheds. They provide adequate R values, prevent damp and are easy to cut and install without much difficulty. Fibreglass batts work well, although they offer less air sealing and thermal resistance than rigid foam insulation boards. You can also use fibreglass loose-fill insulation in your shed but the problem with this product is that it might not always provide enough protection where you need it most. If you choose to use insulation, follow the manufacturer's instructions and their recommendations for application. It is easy to customise to fit many different [styles of shed roof](/guides/sheds/how-to-build-a-shed-roof). Choose the right insulation thickness for your specific shed. Always check the space between the studs for the perfect solution. ## How much shed insulation do you need? The type and amount of insulation depend on the climate you live in and how well you want your shed is sealed. If gaps in your shed are completely covered, insulated, and doors or windows properly installed, you may not need additional insulation. If you live in a region that is cold and want to avoid spending extra cash on your energy bills, more thickness or more thermal resistance is needed for your shed. On the other hand, if you live in a warmer area, thinner batt insulation is ideal because it allows air circulation to regulate the temperature inside your shed. Building material stores offer different types of insulation that are easy to install. Fibreglass loose-fill insulation, for example, is also called blown-in insulation and it comes in bags or rolls. You will need special equipment like an air compressor or blower because this type of insulation must be blown into the walls and the ceiling of your shed. Depending on the thickness you choose, blow-in insulation can add up to 3 R-value points to your walls so if they don't look properly insulated enough by themselves, consider adding some batt insulation after covering them with wood siding as exterior sheathing, which may add a great look to your [wooden shed](/guides/sheds/how-to-build-a-wooden-shed).

How to Level Ground for a Shed

How to Level Ground for a Shed

If you are thinking of how to level ground for shed, you might need to dig new foundations. If you are thinking of how to level ground for shed, you might want to make sure that your foundation is level. This will help reduce problems with the shed later on down the road. You can build a shed foundation on the ground that is not level, but it will be harder to get the surface even. You can use a laser level to check for level once you have begun digging your footings. If your property does not have flat land or if you just want a perfect looking spot to set your shed, then there are a few ways to make a level spot. One way to make a level spot is to build up the low side of your foundation. This can be done by driving large rocks or dirt into the lower part until it is at an even height with the rest of the area. If you are not prepared for this step, then you will need help from someone who has heavy machinery. This might include dirt or rock, depending on what you are using to fill the area. The next and most important step to build your shed is to inspect the land for excavated area. Draw stakes into the ground to ensure the graded area. The whole area needs to be properly levelled for good construction. Draw first stake, then move on to put next stake in the ground. Draw second stake and third stake as required to level the top layer. A level surface is required to make a solid foundation to [build your shed](/guides/sheds/how-to-build-a-wooden-shed). During the construction, pay special attention to the process of levelling the shed base. Building a shed or structure on the uneven ground represents serious concerns over the strength and longevity of the construction. For convenience and standard practice, you should dig down the ground to about half of the shovel's head. Many tools are used to make the solid base for shed building. Ground tamper, and hand tamper may also be needed to completely level the top soil and ground. There are some other factors involved in this process. Also, remember not to position the shed too close to the retaining wall because you would not be able to gain access. Having a measuring tape can help you from running into these kinds of problems. You can use rocks, soil and even concrete blocks to level the uneven ground. Concrete blocks add more strength and rigidness to the ground and structure as well. Another option is to dig out the high side of your foundation. This will give you a spot that is level with the rest of the ground. To do this, begin digging about one foot away from where your shed walls will be located. Dig down three inches and then move over six inches and continue digging in these increments until you have dug all along your foundation wall. If needed, make sure to fill in small holes left behind with extra dirt or rocks so that everything is even when finished. If you are not prepared for this step, then it may be best to hire someone with heavy machinery or wait until you have access to these things before beginning construction. A perfectly level surface adds to the beauty and strength of a structure. It is important to critically analyze the ground conditions of your shed site where you want to build your shed. You can use pea gravel around the shed area to add beauty and a rocky look to your structure. Make sure to get full sun exposure so that the ground, concrete and spray paint become dry. Irrespective of the project type, you may need to grade the area even for the construction of a garden or lawn as well. The laying soil and ground can be levelled thoroughly by dividing the area into four rows or as many as you need. Then use a vibrating whacker plate to compress the soil and flat it down to fulfil your zoning requirements. ## What is the easiest way to level ground? The easiest way to level uneven ground is with a laser level. A laser level will give you an accurate reading of where your footing needs to go and make it easy for you to drive in posts and assemble the shed. It works by reflecting a laser beam to where the building will be and you can place stakes in the ground or use string to mark where your footings should go. You can find these at any hardware store, but if you want an accurate reading, look for one that is made for construction sites and has a rating of about +/- 1/8". Keep in mind that your shed is not just the dimensions. You need to have proper spacing between other structures and your property line to [build the perfect shed](/guides/sheds/cost-of-building-a-large-shed). ## What is another way to level ground? Another option for levelling ground would be carrying in the dirt with wheelbarrows. The best way to do this would be to create small hills around where your shed foundation will be so that it doesn't take as much dirt. Then just wheelbarrow load after load until it's even. This works well for smaller areas, but you might need help from someone if the area is too big to do on your own. However, be aware that some types of dirt pack down and you will need to add new dirt every couple of loads so that it doesn't become counterproductive. If it does start packing, then switch to using a shovel or post hole digger instead. This may take longer than the wheelbarrow method, but it will give you an even surface in the end so you can continue with building the shed foundation. ## How do I pack down dirt? Another option for levelling ground would be to pack the dirt down. You can do this with a plate compactor. If you are able to compact it, then do so in small areas at a time, about 6ft by 6ft at most. Then flatten the new area out using the end of a shovel or post hole digger and repeat until finished. If needed, water the new places every few loads to help settle the dirt faster Once you have done any one of these steps, your shed foundation will likely be level enough for your needs. You can use a spirit level to check the level of the ground. However, if you still feel that there is too much of an incline or decline on opposite sides of your building site, then use some landscaping rocks or steel beams to level it out. When doing this, you will want to use a level and post hole digger to make sure the rocks or beams are placed at an even height. Make sure to measure the area with the help of measuring tape and set a specific depth level for your area in the square shape. You can also use landscaping fabric under these if needed so that they don't sink into the ground over time. This is especially important if there is water running through your area as it could eventually wear away at your foundation and cause it to go uneven or even collapse in some cases. Once you have used one of these methods to level your shed foundation, then you can begin assembling the walls and placing them on top of the footings (if needed), otherwise continue with steps like pouring concrete, putting up siding, etc. ## Do shed bases need to be perfectly level? You will need to make sure that the floor of your shed is level and on even ground so that it doesn't shift or break when someone walks in and out of it or if there is a storm with heavy winds. To do this, you will want to use landscaping fabric under where the footings for the shed go and any type of 2x4 lumber laid down flat across each of these areas (if needed). Then just assemble the walls and lay them on top of these pieces and screw them into place, making sure everything is flush together before beginning construction. If your shed had a pre-assembled door frame, then you may not need to do this. If it doesn't, then you will want to put this in place too before assembling the walls around it. You can increase the life of your shed by adding a weed membrane. ## How to build a level base for a shed? One of the most important things when it comes to building a shed is that it's built on level ground. Generally, this means that there will be no change in elevation across the width of your foundation (e.g., one side doesn't go up while another goes down). If you do find your ground isn't level, then you can use landscaping stones or steel beams to make sure it's even, otherwise continue with steps like pouring concrete, putting up siding, etc. It is important to understand this point that ground level must be appropriate in order to continue the construction process. Before you start serious work, you may need permission from the local council. [Tweed Shire Council](https://www.tweed.nsw.gov.au/development-business/building-renovating/home-renovations-do-I-need-approval/garden-sheds-gazebos) has a handy guide, but check with your local council. ## What are the benefits if my shed is on level ground? The main benefit of having all surfaces of your foundation level is that your shed will be far more stable. If one corner of the shed is higher than another, then this could cause it to shift over time or even lead to damage if there are strong winds or other weather conditions at play. Having a level foundation also allows you to build things like doors and windows that can swing open without ripping down part of your wall in the process If you do find your ground isn't level, then you can use landscaping stones or steel beams to make sure it's even. For further construction, you can use wooden planks to build the structure of your shed. Once the foundation for the shed is done, you can use any type of material such as concrete, gravel, pea gravel or wooden stakes to design your shed appearance. [Insulating your shed](/guides/sheds/how-to-insulate-a-shed-wall) is a great idea. ## Why doesn't my shed floor seem to be level? There are many reasons why your shed might not be entirely flat. This usually happens when there is a slope to the ground near your shed, so you will want to try and build a flat area before continuing. To get the front and rear block at the same height, stack the blocks and use full 8-inch or 2-inch concrete blocks. Lay your planks along different lengths to identify the high and low areas. A common solution for this is to use landscaping stones or steel beams as levelling guides, then assemble your walls on top of them. If using stones, then be sure not to go under more than 1ft in height as anything steeper could cause water damage over time. Use a level to help you accomplish this task and make sure that the stake is perfectly straight. Use a flat object to compress the soil and level the ground. You can also use landscaping fabric under where the footings for the shed go, which slows down how quickly water gets through it. This is especially important if there is water running through your area as it could eventually wear away at your foundation and cause it to go uneven or even collapse in some cases. Another reason why your shed might seem slanted is that you have used the wrong type of foundation. For example, if you are using ground pier footings instead of an adjustable or pre-assembled shed base, then this could be why it doesn't look even. Ground pier foundations can often cause problems over time as they sink into the ground. The bottom plate on these types of sheds needs to be clear of any weight or pressure at all times, so it's important to get everyone walking away from your shed until the concrete has fully dried and hardened properly before putting anything in place. Once you have used one of these methods to level your shed foundation, then you can begin assembling the walls and placing them on top of the footings (if needed), otherwise continue with steps like pouring concrete and putting up siding. You can also add a few inches of pea gravel to each support location to keep the gravel level. If you're using a gravel base as your shed pad, it should be 1'-2' larger than the shed. It is often easier to [build your shed roof](/guides/sheds/how-to-build-a-shed-roof) separately.

How to Put Up a Shed

How to Put Up a Shed

Whether you have purchased a pre-fabricated shed or intend to build your own from scratch, you can always use a little help with the shed installation. Sheds are not known to be complicated structures and you want it done right and properly the first time. Most of the sheds can be easier to install - finding a good place for your garden sheds is a priority. ### Find a good location Don't forget that before you begin putting up your shed, you will need to find an ideal location for it. This is one of the most important steps as you do not want your shed to be exposed in all four directions without protection from the elements and other unwanted visitors. ### Preparation The first thing you will need to do is prepare the site or area where you intend to put up yours or have it put up by someone else. A perfectly levelled and flat surface is called for so that the shed may be installed correctly once it arrives at your premises. This entails removing all debris from the yard such as sticks, rocks, gravel, and anything else that may interfere with the construction of your new shed. ## Anchors Once you have your ground levelled, you will then need to install the anchors that will hold the shed in place. You should anchor it from all four corners into the ground as this prevents shifting and allows for a safe standing structure. This is why hiring professionals may be necessary even if you plan on building one yourself. You may place concrete slabs beneath the shed floor. A concrete slab is rigid and tough and provides a good shed base. ### Assemble After putting up the anchors, you can now proceed with putting together your shed. This is usually done by putting the sides up first, including double doors, walls, and windows. You will also want to put [roofing in place](/guides/sheds/how-to-frame-a-shed-roof) prior to stacking the rest of the shed. This process allows you to be sure the shed is in good shape and every wall is straight before continuing on. You may also want to lay some roof panels on the shed. After assembling, you can finally paint your own shed and complete it. ### Put up shelves A shed can serve as much more than just an area for storing your lawn tools and can have many benefits. You can create extra storage space by installing shelves and racks where you can store and [easily organise](/guides/sheds/how-to-organise-inside-a-shed) gardening instruments, brooms, or clothes hangers overnight with easy access. ## Do you need a foundation for a shed? You might think that a foundation is unnecessary unless you are building your shed on soft soil. In such cases, a concrete block or a wood frame will support and help the structure stay firm. You may attach the shed with nails with it. The main idea behind putting up a shed on a solid foundation is to protect the floor of your shed from ground moisture seeping in. This can damage floors due to rotting so it's better if you set them up on some sort of insulation like gravel or sand. This not only prevents future damages but also makes sure that your items stored in the shed won't be affected by ground moisture as wood will always rot when exposed to moist conditions. ## Can I put up a shed by myself? Putting up a shed is not easy work and time-consuming if you are not used to it so you may want to get some help from friends or pay for services from a [professional shed builder](/guides/sheds/shed-installation-cost). They are usually more skilled at the job and have access to special tools that will make the job faster and save time. For a small shed, you most likely won't need help but for a bigger one, it's better if you use some assistance from those who know what they are doing.

Cost of Building a Large Shed

Cost of Building a Large Shed

The base cost for shed construction only ranges from between $400 to $500. The cost of building a large garden shed varies from region to region and the size of the garden shed is also a factor. Large garden sheds can cost upwards of $4,000, depending on the quality of material used and the size of the structure. ## Cost breakdown of building a large shed Below is a list of some of the shed ideas and shed materials needed to build a large shed: The base cost of installing the shed usually ranges between $400- $500 (depending on the location, size and style). This is for shed construction only and does not include any other expenses such as windows, doors or electrical wiring. The foundation is generally an extra cost. A large 12x20 shed can range from about $30,000 depending on the quality of material used and the size of the structure. To add a little shine and make your shed look good you can coat it with a layer of polyurethane varnish which can cost a few hundred dollars. It will give your structure that desirable sheen but also protect it from moisture, dirt and UV rays. You can paint the outside with acrylic paint if you are not going to varnish it. Here's the answer to how much does a shed cost according to action sheds. [If you want windows](/guides//how-to-install-a-window-in-a-metal-shed) or glass doors fitted in the sheds then this could cost anywhere above $2000 depending on the style and complexity of the window in the sheds that you choose. The wood flooring for the sheds costs about $75- $150 per square metre and adding skylights will add another $500- $2000 onto your bill. ## How much would it cost to build a small shed? A small shed that can be built in a day with inexpensive materials would cost $500. Additional expenses can include council fees for council approval. Labour costs, installation costs, the price range of materials like steel zincalume from different suppliers, concrete footings, and more add to the expense. ## How long does it take to build a large shed? A large shed can take anywhere from 2 weeks to a month complete depending on how big it is and who is building it. A small shed should take two to three days and a large 12x20 shed would take between 6-8 weeks. Anything larger than that could take up to 10 weeks or more depending on how much work you can do by yourself, the region where it is being built and if there are any delays due to unforeseen circumstances. If you need additional work space, concrete slab, storage space to store garden tools, and more then time will increase. ## Is it easier to build or buy a shed? Sheds are easy to build from an easy assembly kit and It is more money-effective to buy a pre-built shed as they are cheaper than [building it yourself](/guides/sheds/how-to-install-a-garden-shed) with materials. However, if you have the skills, time and patience then building a shed can be rewarding. Doing it yourself will also give you the freedom to design and construct a shed that is tailor-made to your tastes.

How to Organise Inside a Shed

How to Organise Inside a Shed

Having a shed can be very useful but keeping everything neatly organised in it can be difficult. Not only do you have to worry about the size of the shed itself but also how to keep things tidy in their place within it. Here are some shed organisation tips for how to organise inside of shed, once you have [put it up yourself](/guides/sheds/how-to-build-a-wooden-shed), of course. Start by making a list of everything that needs storing. If there's anything you don't use all the time, try to think of somewhere else it can be stored away safely. Put everything into piles to give an idea about how much space you have and how many things are going in the shed. If you need extra storage for small things like screws or nails, why not get yourself some little plastic boxes? They can be purchased very cheaply from any DIY shop and will keep those items tidy in one place. For larger objects, such as garden furniture or rakes, it might be worth buying a couple of hooks so they can be easily found without having to sort through the shed each time you want to find one. Make some wall space to hang tools.You should have room for tool storage to store commonly used items. Organising your shed efficiently allows you to save garage space. Wooden shelves, middle shelves, and other shelving units can be used to store hand tools. Peg boards can be installed on two screws which can have hooks, magnetic strips and other tools. ## How do you declutter a shed? Think about the things in the shed that you use regularly and those that you don't. Those items which you don't use very often should be stored safely out of reach in a box or drawer somewhere else. This way you can avoid it becoming a dumping ground. Use hang hooks to hang small tools and other smaller tools. It's a good idea to label shelves and drawers with the contents that are inside them. This can help you or anyone else find an item easily without having to rummage around in drawers. One of the most frustrating jobs about owning a shed is putting everything back neatly again. Try making this job easier by thinking about how you might use certain parts of it when deciding where to store different objects. For example, garden tools might be more easily accessible if they're all stored together on one shelf rather than being spread across several. Create storage space for them. Once everything is neatly organised you can easily grab your tools and [put up some new insulation](/guides/sheds/how-to-insulate-a-shed-wall). Shed storage should have only important things like mason jars and other smaller items. An important objective of decluttering is to keep the floor area clean. ## What should you not store in a shed? Try not to secure items like heavy paint cans or gas canisters inside your shedding. Many sheds have little or no ventilation so storing these items can result in a build-up of dangerous fumes. If your shed [does not have good ventilation](/guides/sheds/how-to-install-a-window-in-a-metal-shed), then try not to store any chemical products inside it either. An accumulation of fumes in an enclosed space is dangerous and could result in serious illness. If you do need to store hazardous chemicals, try to find a more secure alternative. Speak with your local council about storing chemicals in a containment unit, or contact your landlord if you rent the property.

How to Build a Shed Roof

How to Build a Shed Roof

If you want a durable shed roof then you should go for metal sheets as they last longer and don't rust quickly. The first step in how to build a shed roof is to build the wooden frame that will support it. The frame consists of two rafters and two supporting beams that run parallel to each other. If you are using metal sheets, the next step is to butt them against each other and attach them with screws or bolts. By making sure that the edges meet properly at regular intervals, you can achieve a smooth finish. The metal sheets also need to be attached to the shed roof framing with screws. The next step in building a shed roof is to fix a support beam between the two ends of each side wall. The support beams should be at equal distance from the ground, but on different levels. This will make it possible for you to easily place the two remaining rafters into position and attach them firmly onto these support beams using nails or screws. Then all you need to do is fill in the gaps between these rafters with wooden boards. If you choose wood strips, then be sure to use [styrofoam insulation](/guides/sheds/how-to-insulate-a-shed-wall). When this is done, cover the exterior of your roof using sheets of metal or tin plates. The shed's roof can have end rafters. The end rafters should be facing down to form a triangle. Use several full sized shingles and more building materials to cover the roof. Add remaining shingles on the top of the roof for added strength. Use a wall plate to mount the shingles to the gable ends. ## What is the easiest shed roof to build? There is no such thing as the easiest shed roof to build. The most important consideration in building a shed roof should be whether it will serve your purpose. If you want a durable shed roof then you should go for metal sheets as they last longer and don't rust quickly. Be sure to check the weight limits of the structure you are building so that it is able to withstand pests, bad weather conditions and other mishaps. In addition, ensure regular maintenance by cleaning your shed regularly. ## How much slope do I need for a shed roof? If you want a secure structure that can bear heavy weights, then you will need at least a 30-degree pitch. This means that every foot of length should be covered by at least 3 inches of length in height and width respectively. If, on the other hand, you are planning to use this type of structure for storage purposes only, then it would suffice with a 20-degree pitch. The roof pitch can be determined by using the following formula: Pitch = (Length x width /12) This means that if you want to find out the pitch of a shed with dimensions of 2 x 4 feet, then it would have a slope of 20.5 degrees. In addition to the slope, consider a proper floor frame with good floor joists. You also need to calculate rafter halves and rafter peaks. ## What is an A-frame shed? An A-frame shed is a type of shed that is made from a simple framework. The walls are made from wood boards and the roof is composed of metal sheets or tin plates. Sheds like this can be built by anybody who has a [basic knowledge of carpentry](/guides/sheds/how-to-put-up-a-shed). An A-frame shed works well as a storage area, particularly for garden tools and other outdoor items. Roof trusses are important during roof framing. ## Do I need roof guttering on my shed? Roof guttering can be an invaluable asset for your shed. You should consider this especially if you are living in a place where it rains frequently. Sheds with guttering also tend to last longer and give off a better aesthetic appeal. Make sure to add fascia board on the side walls when installing gutters, since fascia boards help avoid walls getting wet. Installing a drip edge will allow proper flow of water falling from the roof. ## What tools do I need to build a shed roof? A basic list of handy tools you will need to build a shed roof is below. ### Table saw The best tool for cutting boards to length or trimming their edges at a right angle (standard saws can do this, too). ### Circular saw A circular saw is ideal for ripping (cutting at an angle) plywood, OSB and other sheet materials such as particleboard, wood, etc. ### Nail gun A nail gun is great for driving flat-head nails in tight places or through sheet materials —but only with careful aim. Nail guns typically use more expensive wafer-style nails than a regular hammer does. ## Cordless drill You will need a cordless drill for driving screws into sheathing materials so they cut their own threads when driven in deep enough. This is important for stability as well as for staking (nailing) lengths of wood or plywood together. Roofing material includes roof sheeting such as metal sheeting, concrete piers, rafter boards, roofing nails, wall plates, plywood sheathing and more. ## What types of roof can I fit on a shed? The type of roof you can fit onto your shed depends largely on its size, your budget and whether you want a new roof or an add-on one. If you are looking for a completely new roof, then it's best to go with metal sheets as they last longer and don't rust quickly. Be sure to check the weight limits of the structure you are building so that it is able to withstand bad weather conditions and other mishaps. Asphalt shingles and other waterproof roofing materials are a great idea. More [shed style roof options](/guides/sheds/how-to-build-a-slanted-shed-roof) include gambrel roof, flat roof, pitched roof, saltbox roof, slanted roof, steep slope roof and more. Gambrel roofs are one of the most beautiful roof styles that have two slopes.

How to Frame a Shed Roof

How to Frame a Shed Roof

Roof framing is always done differently depending on the style, size, and pitch of the shed. Make sure you know how your shed is going to be framed before getting started. The basic principles of framing a shed roof are the same for all sheds. You will need to create gables, rafters, and connectors. ## Shed roof framing procedure The way this is done varies from design to design depending on the style of the shed. Some styles like a gable roof require less cutting than a lean-to or a gambrel roof design would. Calculating rafter lengths can also get difficult when dealing with odd-shaped roof slopes so make sure you have a calculator handy. Roof styles e.g. flat roof, lean to roof, saltbox roof, barn roof, lean to shed, [type of garden shed](/guides/sheds/how-to-install-a-garden-shed), etc. also determine the roofing material and shed plans. Framing a roof requires some major cuts and framing skills but once you've completed them you'll be familiar with the process. The process starts the same way for all sheds - you need to create your rafters, then your gable ends, and finally the ridge board that runs along the top to form the roof line. After that, you'll be ready to lay down your first piece of plywood. On the plywood install asphalt shingles and then at the drip edge, install a fascia board. ## Building a gable roof The sloping roof on the opposite sides from a single line is a gable roof. The roofing materials for this kind of roof style are always designed according to the local climate so that they may provide higher protection than flat roofs. The local council is the best place to start for advice regarding the roof pitch and roof sheathing. The wall studs, wall plates, shed floor, exterior walls, front wall, steep slope, and many other factors must be kept in mind for gable roofs to maintain the roof load. ## What is the minimum slope for a shed roof? The minimum slope for a roof is not the same as the pitch. A shed's roof does not need to have a very steep pitch like a garage or traditional house. The reason for this is for rainwater drainage purposes and it being able to get off the roof easily through a drip edge without causing damage. A shed may have a [5-degree roof pitch](/guides/sheds/how-to-build-a-slanted-shed-roof) or even less. As long as the roof pitch is enough to encourage water flow off of the roof slope it will be fine. ## How much overhang should a shed roof have? This largely depends on personal preference. If you are trying to get the most benefit from your shed and want to be able to walk along the sides under protection aim for 2-3 feet at the minimum. An overhang will help keep rainwater off of you easily and stop water from dripping onto your things laying around in the shed. Rafters need to overlap a minimum of 3 inches and be secured firmly at the top by either a connector or rafter support nailer if they are less than 2 x 4s. ## What materials do I need to build a shed roof frame? The basic materials you need to build a shed roof frame are decking boards, plywood sheets and nails. You may also want to use something called rafter support nailers. These come in various lengths and can be nailed into the tops of your rafters for extra added support and strength. You may also want to use a rafter connector at both ends of the rafters. Plywood gusset plates are also needed to keep intact the joints. A framing square holds the ceiling joist and is then put on the side walls. You may also need ridge board to support the frame for roof construction. A level is possibly one of the most important tools as well when it comes to [framing a shed roof](/guides/sheds/how-to-build-a-shed-roof). ## Can I use 2 x 4 for shed roof? Yes, you can use 2x4 for a shed roof, however, they are not the best to use for building sheds. It is possible but go for a more sturdy option such as 2x6 so that there is adequate support and strength when using 2x4s in rafters. 2x4s are better for creating gables and secondary support. Building materials such as pressure-treated lumber are best to use for your upper rafters so that the roof will last much longer. To help make your shed roof last longer consider using a water sealant. The sealant will protect the wood from rotting and insect damage as well as help keep it looking great for years to come. For those wondering if you need building approval, Brisbane City Council [has a handy guide](https://www.brisbane.qld.gov.au/planning-and-building/do-i-need-approval/residential-projects/structures/building-a-shed), however people living elsewhere will have to refer to their appropriate government or council body.

How to Waterproof a Shed

How to Waterproof a Shed

Waterproofing protects the main structure and inner materials from exposure to water, moisture and dampness. A shed is a great place for storing various materials and other things but there are chances that it will get damaged from regular exposure to water. Waterproofing your shed will not only protect it from regular exposure but also unexpected floods and rainfall. If you have a wooden shed then it will be a great idea to apply wood treatment to keep its durability intact for years to come. Waterproofing keeps any kind of rot away from the wooden base, preventing them from termite infestations. A shed base made of wood will raise the shed above the wet ground and enable good airflow. Clear gutters to keep it waterproof. A new shed should be positioned in the right place. This helps avoid installing in lower spots in which water pools up during heavy rains. Regularly check if your roofing felt is damaged and make a replacement. Use floor bearers on your concrete slab for adequate air circulation. However, it is important that you hire professionals for waterproofing your shed rather than carrying out this job on your own as improper waterproofing can lead to bigger problems. ## How can I waterproof my existing shed? Before you start waterproofing any shed, it is important to inspect its structure and materials. Check for any cracks or holes that might lead to problems in the future. Repair all these defects before starting with your project as a patch job can solve a limited amount of problems. You also need to remove all dirt from the surfaces using a shovel or broom so that they are clean and dry before applying the sealant. Next, apply water-based primer on all surfaces including walls, doors, concrete base, treated wood and flooring except metal which needs chemical primers applied for successful painting afterwards. Apply one coat of paint followed by two coats after 24 hours of drying time in between each application. The final layer will be petroleum wax which works as a damp proof membrane ensuring better protection from water damage along with improved durability. Installing static vents of the same size will also help keep the shed dry. Waterproofing a [wooden shed](/guides/sheds/how-to-build-a-wooden-shed) is fairly simple if you follow these steps carefully. However, feel free to contact professionals or local handymen for assistance when waterproofing large structures. You might also get exclusive offers. For smaller items like garden sheds, just adding another coat of paint will help in preventing water damage in the future. With the use of heavy machinery, you can raise your shed onto concrete blocks to keep it off ground moisture. Regular maintenance of the building can also help keep it in good shape. ## How do I stop water seeping into my wooden shed? Priming and painting the exterior surfaces of a wood shed will help in reducing water damage. However, if your shed faces heavy rainfall often, you need to take more measures for a waterproof shed. If there are soft patches, cracks, or holes in the walls or roof then fill them up before applying paint or sealants. You can use industrial-grade silicone for this purpose as it gets dry within minutes after application and is highly durable at the same time. Use a weather bar on the door to make it water-resistant in case of excess water. Wood treatment can help the wood shed last longer. If any spaces around windows and doors let rainwater flow inside of the shed, you need to cover these gaps with rubber seals available online or at local hardware shops to avoid water-based stains. It will also help [protect windows](/guides/sheds/how-to-install-a-window-in-a-metal-shed) and doors from becoming weak points. These will ensure that all dampness stays out while allowing air to circulate underneath the shed along with proper light penetration during daytime hours. Solving drainage issues will ensure water flows out hence eliminating dampness. ## How do you insulate and waterproof a shed? Insulating and waterproofing a shed is fairly easy if you choose the right weather-proofing material. However, you need to ensure that this item has enough [insulation properties](/guides/sheds/how-to-insulate-a-shed-wall) as well so that it doesn't lead to temperature fluctuations inside your storage space once insulating and waterproofing of the entire perimeter is complete. Many brands are selling insulated panels online along with their installation manuals for DIY enthusiasts. These panels vary in thickness and other details so be sure to order one that suits your purpose best after measuring out the dimensions of your shed first. Once the panel arrives, apply double-sided adhesive tapes on its upper surface and attach them firmly on top of your current roof covering. This should provide added protection from heat absorption during summer conditions while preventing heat loss during winter. ## How to waterproof a metal shed Since metal sheds are mostly used outdoors, you need to waterproof them properly before they start corroding. Before applying any sealants on the roof, door frames, or walls of your metal shed, you need to remove all dirt and loose rust particles using a wire brush. The surface should also be free from dust and any oil residues which is why you must clean the panels thoroughly before starting with the project. You can use water-based silicone sprays for this purpose as they dry within minutes after application, and has fewer volatile organic compounds like solvents do and will protect your storage space for years with proper maintenance in between. Spray one coat on all surfaces including doors, windows, vents, etc., allow them to dry overnight (three hours minimum is recommended by manufacturers) then apply a second coat of silicone spray on top. ## How to waterproof a shed roof If your shed comes with gable roofing, you can use the same method as used for metal sheds. However, if it [has a flat roof](/guides/sheds/how-to-frame-a-shed-roof) with a parapet wall all along its perimeter then you need to waterproof every joint and crack before applying the sealant on the exterior surfaces. You can do this by filling up gaps using caulking guns available online or from your nearest hardware store. Sealants are required during all seasons but they work best during winter months when moisture tends to stay inside the material for longer periods. In summer, most manufacturers recommend re-applying fresh coats every three years to ensure that enough protection is provided to your storage space throughout the year. Always use appropriate roofing material to ensure what you store inside has adequate protection from water leakage. ## What type of paint should I use to waterproof my shed? There are several types of paint available for keeping your shed waterproof including acrylic, silicone and epoxy paints. However, it is recommended that you use waterproof paint which is water-based to prevent the formation of harmful chemical residues which can damage your storage space in the long run. Waterproof paint is also easy to apply and can be removed with water if required without causing permanent damage to the shed walls. The Tweed Shire Council website has a really handy guide to [garden shed installation](https://www.tweed.nsw.gov.au/development-business/building-renovating/home-renovations-do-I-need-approval/garden-sheds-gazebos), but be sure to check with your local area. ## How do I waterproof my shed roof? Waterproofing your rooftop is an important part of any storage space construction project since moisture penetration through the roof leads to damp shed base and corrosion inside the walls over time which in turn results in rust formation that weakens its overall structure. You need to choose a suitable coating for this purpose depending upon whether you have flat, sloping or gable roofs to leave your shed watertight. In case the roof felt is damaged, a waterproof shed membrane or an EPDM rubber sheeting can be a suitable replacement. ## How to seal a shed window Since windows are more prone to rusting, you need to take extra care while waterproofing them. If your shed has fibreglass windows then you can use silicone spray for this purpose. However, ensure that they don't stand in your way during application since the material is highly flexible and might cause the frames to bend out of shape if removed after spraying. A good method of doing it is by applying masking tapes on the edges of the window panes before applying the sealant on one side with a sponge or paintbrush so that they are held firmly in place. Once the silicone dries up, remove tapes carefully without disrupting their original position. If you have wooden windows, apply two coats of water-based primer first then follow it up with a single coat of waterproofing paint after the primer has dried up. Ensure that you apply a quality wood preservative on their frames and sills before applying waterproofing paint in order to prevent water penetration even when they are closed. You can also add extra insulation using outdoor fibreglass with minimum R-values of 5 per inch inside the metal shed in order to reduce heat loss during winter days when temperatures tend to remain low for longer periods. Fibreglass is an ideal insulator but does not retain moisture as other materials do so it will provide adequate protection from condensation and additional heat loss if installed correctly without coming under direct contact with moisture or sharp objects.

What is the Best Insulation for a Shed?

What is the Best Insulation for a Shed?

Generally, there are two types of materials used for insulation: foam and foil. When building a shed it is important to ensure that you have the best insulation installed so as to keep your belongings safe and secure from the elements of weather. Foam insulators work by stopping the conduction and convection of heat which in turn stops the loss of heat via radiation. Foil insulators, on the other hand, are more effective at stopping convection as it is covered with an adhesive foil. The adhesive works by stopping the transfer of heat through its reflective barrier. Both types of insulation have their own set of pros and cons which you must consider before deciding which one to use, or if you plan to use both when [building your shed](/guides/sheds/how-to-build-a-wooden-shed). Insulation comes in different shapes, sizes and noise-reduction qualities. It can also be made from a variety of materials depending on the needs of its user. With all that being said, the best insulation for a shed would be one that is easy to install with an effective noise reduction quality. Keeping these factors in mind, the following are some of the best insulation materials for a shed. ### Rockwool insulation This material is manufactured from molten rock that has been spun into fibres and then compressed to form rolls of dense insulation. Rockwool insulates by absorbing and blocking noise, heat and cold making it an ideal material for sheds with limited space. It is also fireproof, water-resistant and doesn't support mould or mildew growth. ### Fibreglass insulation The difference between the two materials is that Rockwool absorbs noise, heat and cold whereas Fibreglass is a poor insulator. However, it is easy to install and can easily be made into various shapes making it a versatile option for many building projects where you need a water-resistant material with a good sound-absorbing quality. ### Mineral wool insulation The difference between mineral wool and Rockwool or Fibreglass is that it insulates by blocking noise, heat and cold much like a sponge blocks water. It also has a higher expansion rate than other materials which makes it easier to fit in small spaces such as inside a shed. ### Cellular plastic insulation Cellular plastic insulation is made from polystyrene beads which are locked together with recycled cardboard creating an effective thermal barrier. This unique material absorbs sound, making it the ideal choice for sheds used for music practice or recording studios. ### Expanded Polystyrene (EPS) foam board insulation Expanded Polystyrene is a rigid sheet of insulation that can be used inside and outside. it is effective at blocking heat and cold as well as absorbing sound; this makes it an ideal choice for your shed's ceiling or walls where you need maximum noise reduction quality. ### Spray foam insulation This type of insulation comes in two parts, A resin base that consists mainly of polyurethane with various additives depending on the desired application. The second part is the propellant which when combined with the first component turns into foam. This material insulates by blocking conduction, convection and radiation. It also reduces sound transfer so it can be used at home or work to stop unwanted noise from reaching your ears. ## How can I insulate my shed cheaply? Insulating your shed doesn't have to be expensive. Using leftover materials or second-hand insulation can cut costs of [building a shed](/guides/sheds/cost-of-building-a-large-shed) significantly. Using a Do-It-Yourself approach allows you to choose the insulation material that works best for your project. Give yourself plenty of time to find the perfect materials and allow them to properly install your insulation. Doing this will guarantee a better result on your finished product. ## What are some benefits of insulating my shed? Insulating your shed is important for a number of reasons, the most important being the ability to use it year-round. This makes [storing and organising](/guides/sheds/how-to-organise-inside-a-shed) items easier and more efficient as well as saving you money by reducing your heating bills. It also ensures that your equipment will always be in prime condition by protecting them from extreme heat or cold which can damage sensitive materials. ## How do I install insulation in my shed? There are many ways to insulate your new or existing storage sheds depending on their size, location and how much noise reduction quality you need. If you have rigid walls inside the unit, you can easily fit insulation between the wall studs if they are spaced 16 inches or more apart. Cover the studs with insulation sheets to achieve optimal results. If your shed is made of wood, you can simply insulate between the walls by cutting pieces to size and attaching them in place using adhesive materials applied over the entire surface before installation. This will reduce noise transfer significantly without spending much money on your project. If you have a metal shed that is non-insulated then you may want to consider installing Rockwool or Fibreglass insulation which are easy to cut and install inside small areas like lofts or other tight spaces where other materials won't fit properly. For more information on the benefits of insulation, take a look at the Federal Government's [Your Home](https://www.yourhome.gov.au/passive-design/insulation) website. For sheds installed outside make sure they are not touching any surfaces such as another building's exterior wall, trees or fences. Avoid using a flammable material such as a tarp to protect against fire. You may want to consider hiring a contractor or licensed professional to install insulation since they have the tools and knowledge needed for the job which will save you time and money. ## Should I leave an air gap when insulating a shed? Air gaps are not needed when insulating your shed because the material you have chosen will absorb air regardless if it is hot or cold. This means that there should be no need to install a space between the wall panels and the insulation itself for ventilation purposes. ## What R-value insulation do I need for a shed? If you decide to go with fibreglass insulation it is recommended that you install a minimum of R-3.2 per inch thickness in your shed. For an easy installation use the pink fibreglass sheets which are easier to cut and install vs. the white or blue variety which can be more difficult to manage when cutting them down to size. Rigid foam board insulation such as polyurethane options l or EPS will require an average of R-5 per inch thickness. These products are known for doing a high-quality job at blocking noise from reaching external surfaces such as metal, wood, brick and concrete so they make great choices for sheds that need maximum noise reduction qualities like garages and workshops. ## How much insulation do you need? The amount of insulation you choose will depend on your personal preferences and the type of material you use to insulate your shed. Fibreglass is more affordable than polyurethane foam board but requires an additional sheathing to produce the same R-value as one inch of rigid foam insulation (this can increase the cost considerably) Other factors to consider are the thickness of the insulation sheet, it's colour (white reflects heat more than any other colour) or if there is a foil backing that can potentially give you added noise reduction qualities that fibreglass lacks. ## How do I install insulation under my slab? Another way to effectively insulate your shed is by installing it underneath the slab instead of using traditional methods like sheets installed between studs. This method is more expensive but can produce excellent results if done properly. The first step is to drill small holes at 2-foot intervals around the entire floor of your building which will serve as ventilation for any moisture that may potentially leak or be created inside your insulation. Next, cover the ground with a tarp and place plastic sheeting over it using duct tape to seal all seams. Depending on how your slab was poured, there might not be enough room under the shed floor to install foam board insulation so you can use fibreglass instead, although this product will require an additional layer of sheathing to achieve the same R-value as rigid foam board insulation (this layer adds considerable cost) After installing the sheathing you can now place the insulation sheeting and finish installing it by using regular carpentry tools. Be sure to leave a small space around the perimeter of your floor for air ventilation purposes, although you don't need to texturize or paint this area since it will be underneath your slab. ## Shed insulation benefits Insulating your shed has multiple benefits including preventing heat loss, controlling heating expenses and raising the value of your building. Many people also enjoy the added noise reduction qualities that rigid foam products provide which is ideal if you are planning on using your garage or workshop for woodworking or other tasks where you will need to pay attention to detail.

What is a Colorbond Shed?

What is a Colorbond Shed?

A colorbond shed is essentially a steel sheet that has been powder coated with a colour of your choice. Colorbond sheds are a versatile and long-lasting alternative to traditional corrugated iron sheds. Although they may look like a galvanised or stainless steel sheen, colorbond sheds do not rust and should last for between 10-15 years under normal usage conditions. Colorbond sheds are mostly made up of steel sheeting which comes in 4.5m x 2.4m panels. There are two choices of colorbond; galvanised and non-galvanised. Both options complement steel buildings and provide good protection against the elements. ## What is galvanised colorbond? Galvanised colorbond sheds are made from a steel sheet that has undergone a galvanising process in which it is dipped into molten zinc (Zn) and then baked. This results in the formation of a strong barrier against corrosion, protecting the sheet's steel core. Galvanised colorbond sheds are powder coated with a layer of zinc phosphate hence they are [easy to maintain](/guides/roof-cleaning/how-to-clean-a-colorbond-roof). ## How good is galvanised steel against the elements? Galvanised colorbond is excellent in harsh weather conditions hence suitable for the Australian climate. It is non-magnetic, has thermal insulation properties and will not rust. However, painting over galvanised steel will chip off easily and can cause corrosion to form on the base material underneath. Generally, once you have chosen a galvanised farm shed, it's best not to paint again as the result will be less than desirable. A new alternative has emerged over recent years which can still protect metal sheeting but without compromising on its appearance; galvalume steel sheets offer similar properties as galvanises steel at half the price without any need for painting. ## How long will a galvanised shed last? A galvanised shed is a great investment. 15 years is an average life expectancy under normal Australian conditions. For best protection, make use of regular preventative maintenance by way of an occasional wash and seal any damaged space with brush oil or rust converter paint to keep your colorbond looking new for longer. ## Can you paint galvanised colorbond? Only paint galvanised steel if it is to be painted with a powder coating only. Galvanised steel sheeting should only be painted with a brush oil or rust converter paint as these paints contain no harmful chemicals that may cause corrosion. ## What is a non-galvanised colorbond? Non-galvanised colorbond sheds are made from untreated steel. It does not have any zinc coating and so can develop corrosion over time if it is exposed to moisture or rain without proper maintenance. However, this type of panel will protect itself by creating an oxide layer on its surface which prevents further damage for many years. As a bonus, this oxidisation process makes the metal rust-resistant. ## How long should a non-galvanised shed last? Non-galvanised colorbond sheds are less durable and should last around 10 years under normal usage conditions. This type of sheeting is ideal for people that are looking to paint their colorbond shed as it can be painted with any exterior paint imported into Australia. ## What types of coatings are suitable for non-galvanised colorbond? In addition to being able to have your metal sheeted shed powder coated in any colour, you can also apply decorative coatings such as automotive paints, wood stains and water-based emulsion paints so long as you prepare the surface properly with a degreaser & rust converter. It's very important to note that oil-based, solvent or epoxy paints are not suitable for non galvanised colorbond. ## What else can I do to look after my colorbond shed? Regularly wash your shed using either warm water and dishwashing liquid or industrial-strength detergent containing degreaser properties. Do not use high-pressure cleaners as this could weaken the metal corner beads rendering your shed vulnerable to water penetration. Brush off any loose dirt and dust from the exterior of your shed with a stiff-bristled broom prior to washing it down. Allow the metal sheeting to dry properly before you paint or apply a rust converter paint. Ensure that you do not store chemicals, fertilisers or garden products in your shed as they can cause corrosion if spilled on your colorbond shed. ## Can colorbond sheds rust? Yes. Non galvanised metal sheeting will corrode over time if it is exposed to moisture without proper maintenance; this process can be lessened by regularly washing & sealing the exterior of your shed with brush oil or rust converter paint. Galvanised colorbond steel sheds should still be washed at least once a year with a brush oil or rust converter paint to stop the galvanising from wearing off. ## What is powder coating? Powder coating is a non-liquid type of protective finish that is applied in powder form to the surface of metal sheeting. A dry, free-flowing, thermoplastic resin powder and a cross-linking agent (that determines properties such as flexibility in the finished product) are mixed in an airless spray gun and applied in several layers until it forms a hard-wearing film on top of your steel sheeting. The process includes baking the powder coating at high temperatures until it attains an oven-baked finish. This means you can use it indoors or outdoors safely without fear of toxins being released into your environment (unlike solvent-based paints). Colorbond is a great solution for fencing. The [New South Wales Department of Fair Trading](https://www.fairtrading.nsw.gov.au/trades-and-businesses/licensing-and-qualifications/fencing) has a handy list of credentials required to become a fencer, however check with your local requirements. ## How much does a colorbond shed cost? The price for colorbond sheds varies tremendously depending on the size, style and manufacturer. The cheapest contractor-grade garden shed can be bought from around $1,000 whereas an imported Australian-made product (which has superior quality and features) could cost you anywhere between $2,500 to $3,500 or more. Preferences such as designer colours and site-specific engineered colorbonds could also influence the cost. Always do a search on different providers to determine the best site-specific quote and if there are any promotional offers or if the [cost of installation](/guides//shed-installation-cost) is included. ## How long does a colorbond shed take to install? This will depend on the size of the shed and the complexity of your metal sheeting shed. Most of them are lightweight and should not be a problem to carry. With the right tools, a small garden shed that has been pre-constructed in a factory should take only one or two hours to install; however, an entire kit set for large garden sheds could take anywhere between half a day and a full day depending on whether you have help from friends and family. A [large and expansive structure](/guides/sheds/cost-of-building-a-large-shed) will take more time. ## What colours can I choose for a colorbond fence? There is a wide colour range that could suit you depending on your exact requirements and even more when factoring in powder coatings. Most steel sheeting comes in the following colours; weathered grey, red corrugated, blue corrugated, green corrugated and brown corrugated. They could also come in deep ocean, cottage green, shale grey and classic cream colour. The colours for powder coating include bright orange, pink, yellow and white among many others. The colour of the doors should complement that of the entire structure to create a perfect outlook.

Bare Metal Thickness v Total Coated Thickness

Bare Metal Thickness v Total Coated Thickness

Bare metal thickness is the total thickness that the bare metal will be after the removal of any coatings. It is also known as base metal thickness (BMT) and is the standard measurement adopted by the Australian steel construction market in measuring steel thickness. Base metal thickness is therefore used to measure thickness of structural metal. This approach disregards the protective coatings because they do not add to the strength of the metal material. Total coated thickness (TCT) is the sum of the base material and all paint layers. It includes coats such as primer, the clearcoat, etc, that are on top of each other before any stripping or cleaning takes place. So, when comparing, remember base metal thickness is the measurement of the substrate before application of any coats and the TCT total coated thickness is the thickness of the substrate, including all applied coats. ## How thick is bare metal? Bare metal is normally measured in microns. A micron is 1 millionth of a meter or .00004 inches. The thickness of bare metal can vary greatly depending on the alloy used. Aluminium, for example, is an average of about 4.5-6.0 microns thick, depending on its alloy type and manufacturer. Steel (galvanised or not) is usually 48 to 52 microns, and stainless steel is 40-50 microns. Metals like chromium and nickel take more coats to paint over than aluminium. They also require a high build primer in order to get enough adhesion between the metal and the top coat. Chromium-based metals such as bright polished chromate conversion coating range from 80-100 microns thick before any cleaning take place. Chrome plates can actually be 200 microns thick without any plating bath compounds on them. The reason for this thickness difference is that these types of coatings are usually applied in multiple coats. Chromate conversion coatings, for example, are usually applied in 1-3 coats. The more coats present on the metal, the thicker it will be before any cleaning takes place. In Australia, metal thickness measurement is based on the Australian Standard, which emphasises the bare metal thickness over the TCT, and this will greatly influence the [cost of your new shed](/guides/sheds/shed-installation-cost). ## How thick is clearcoat? Clearcoat is generally about 30 microns thick or .0011 inches when measured over a black substrate (primer). If you have other colours underneath your clearcoat (such as yellow base), then this thickness will increase slightly depending on how many layers of colour there are under the clear. If you want to get an accurate figure for total combined thickness, including paint and primer/paint, it's best to measure each layer separately since they all add up to make one coating system and then add them together. ## How thick is primer? Primer is usually applied in 2 coats of 10-12 microns each and must be sanded twice before any paint or clearcoat can be applied. This means that you have a combined thickness of about 22-24 microns over bare metal. If you add a further 30 microns for the clearcoat, then your total coating system thickness will be 52-54 microns. ## What is total coated thickness? Total coated thickness is simply the sum of all the layers that make up the finished coating system. Coating thickness measurements can be taken from a paint depth gauge or a physical sample of metal/paint by using a micrometer. In this case, you would add together your paint, primer, and clearcoat measurements to get the total combined thickness over bare metal. Typically, there are coating thickness standards that you can refer to when interpreting metal coatings. Before applying additional coatings to building materials, the key things to consider include the coating manufacturer's specs and the environment where the metal will be used. If the substrate is used in harsh conditions, more coats are required. ## How is total coated thickness measured? Total coated thickness is generally measured by using a paint depth gauge (not to be confused with measuring film build, which looks similar) or by using a micrometer. To use a paint depth gauge, simply apply the "inside" tester onto your coating system and push it into the surface until it touches bare metal. Then take note of how many marks are above the panel to get the total combined thickness, including all three layers. The paint depth gauge is only effective if you are sanding to bare metal. You can also use a micrometer on the V of the "inside" tester in order to get accurate thickness readings. Make sure that you measure crosswise with your reading for more accurate results. This is recommended if your sanding through multiple layers to get to bare metal since sandpaper can sometimes take off too much material or leave sanding marks. ## What is a micrometer? A micrometer is a tool used to measure the coating thickness of metal (or other materials) by applying it crosswise with your coating systems. The measurement will be how thick each layer of film build is at that specific point across the surface. This means that you can get an accurate reading of whether or not you are sanding through multiple layers. If there are no layers underneath, then the depth probe will be 0mm across bare metal, just like when using a paint depth gauge. You can use either method for measuring total combined thickness, but one will give you more accurate results than the other since tools such as sandpaper and paint depth gauges alter your coating system slightly. When determining which method to use for your coating system, keep this in mind. ## How is primer sanded? Your primer must be sanded twice, the first time, it will be around 220 grit, and then its final sanding is usually done with a 400 grit paper. This means that the majority of the fine scratches from sanding are removed before any paint or clearcoat can be applied. The more coats of paint, the thicker it will have to be before you can even begin cutting through with your sandpaper. Keep this in mind when deciding how many coats you need. For accuracy purposes, measure or calculate total coated thickness after priming. Sand twice to eliminate all metal finish marks for better precision on measuring devices such as a paint depth gauge or micrometer. [Sheds made of colorbond](/guides/sheds/what-is-a-colorbond-shed) will not require any preparation. ## What is the thickness of a roof sheet? The thickness of the roof sheet is roughly about 50 microns. If you were to add on 30-40 microns for paint and another 20-30 micron layer of clearcoat, your combined coating system would be measured at anywhere from 80-110 microns over bare metal. Different measurements of base metal thickness determine the application of the roof sheets. Thicker roof sheets are for industrial applications, whereas thinner ones are [ideal for shed roofing](/guides/sheds/how-to-build-a-shed-roof). Consult your local metal materials supplier if you are unsure what a measurement like BMT refers to or how thin or thick the roofing material should be. ## How thick is the finish coat? A standard finish coat (a top coat) usually applies around 90-120 microns but can be as thin as 70 microns depending on how many coats are necessary to achieve desired results. The thicker it gets, the more protection against wear and tear that you will receive. To achieve a thicker topcoat, you must apply more coats of clear as the thickness gets higher. Keep in mind that the more coats added onto your coating, the more chance for peeling, so keep this in mind before going too thick on coating layers. Check with your local council to ensure if your shed needs planning permission. Tweed Shire Council has a [handy guide to follow](https://www.tweed.nsw.gov.au/development-business/building-renovating/home-renovations-do-I-need-approval/garden-sheds-gazebos).

How Much Does a Shed Cost?

How Much Does a Shed Cost?

You'll need to take a number of factors into account, including the size and type of the garden shed. Other considerations are the security features of the garden sheds (such as windows and locks) and whether you need one or more ground anchors for your specific soil conditions. A garden shed base, or [concrete platform](/guides/concreters/concrete-slab-cost-for-a-shed), is required if you want to make the structure stronger and more stable. This can be poured yourself or installed by a professional. If you're using the structure for storage sheds, then there are things to consider such as shelving and electrical work that are ideal in garden sheds. ## Estimated building costs | Size of shed | Estimated cost | | -- | -- | | Small residential type shed of 2m x 2m | $500 | true | | Medium-sized residential shed of 6m x 6m | $5,000 to $6,000 | true | | Medium/Large residential shed of 9m x 6m | $7,000 to $8,000 | true | | Large residential shed of 12m x 6m and 12m x 9m | $8,500 to $9,500 and $10,000 to $11,000 respectively | true | | Shed for farm use of 16m x 10m | $15,000- $16,000 | true | ## Is it cheaper to buy a shed kit or build from scratch? It's cheaper to buy a shed kit for the customers, especially if the number of builder materials required for your shed project is small. If you're building from scratch, it's worth asking around for cheap builder materials or if you can purchase them in bulk. However, if the materials are not cheap, then there's no saving in the shed cost over buying shed kits than [building a shed from scratch](/guides/sheds/how-to-build-a-wooden-shed). You'll also have to calculate the time you spend making the shed; it will take a whole day to assemble an 8-foot by 6-foot shed (based on 2 people working together). When you buy a shed kit, it will contain the right amount of materials for your project and everything is labelled. However, if you're building from scratch then you'll have to follow the assembly instructions all of the materials yourself and make sure that they are compatible. Building from scratch can be time-consuming when there are no easy instructions. Labour costs and installation costs in addition to council fees for the council approval are added prices for such projects. The cost can vary from place to place depending on the process, so always note an expected cost and price range. ## Should I build a shed out of timber or steel? Sheds are made of different materials, so you can build a shed out of both timber and zincalume. But keep in mind the cost. These materials are sold per square metre. If you're planning to use your shed in high-wind areas, then it's worth considering using zincalume framing, as it will be stronger than wood. In terms of the cost and amount of materials required for the shed project, there isn't much difference between the two choices. When metal is used for an outdoor structure like a shed, sheeting for the sheds should be used because it has elasticity, which helps with resisting rust and weathering. Timber is easier to work with compared to steel [or colorbond](/guides/sheds/what-is-a-colorbond-shed) when constructing a shed; timber can be cut with a regular saw or other cutting tools while steel requires professional welding equipment for custom cuts. It's also easier to find shop assistance or help from others when building with timber. Always ask a question- can I store my garden tools, is there enough workspace, are the suppliers quoting the right price, do I need additional storage space, and is the job up my ally? ## Do a need a concrete floor for a shed? A concrete slab or concrete footings is not required to build a shed, but it will be stronger and more stable if you install one in the sheds. This can be poured yourself or done by a professional. If you need extra strength for your structure at the location though, then you should also consider installing ground anchors if there's risk of the soil collapsing at the location. For anyone without experience pouring concrete, this job would require hiring a tradesman or reading instructions online on how to do so. You will also need to [level the foundation](/guides/sheds/how-to-level-ground-for-a-shed) for the shed. You'll have to take into account any additional tools required when purchasing concrete though; these usually include hoses and mixing equipment. If you're installing a concrete base, you should measure the area that needs to be covered before purchasing enough material. ## Concrete slab price list The cost of a shed concrete floor offered by a supplier of any style: | Shed size | Estimated cost | | -- | -- | | 6m x 7m | $3,360 | true | | 7m x 14m | $7,840 | true | | 12m x 13m | $12,840 | true | The price is subject to change or modify based on the purpose, design, categories, and more. There are no doors included. One thing you should note is that the delivery services are chargeable separately. You might need to get approval to build your shed from a local council. Tweed Shire Council [have a handy guide](https://www.tweed.nsw.gov.au/development-business/building-renovating/home-renovations-do-I-need-approval/garden-sheds-gazebos), but check to see the regulations that apply in your area.

Frequently Asked Questions

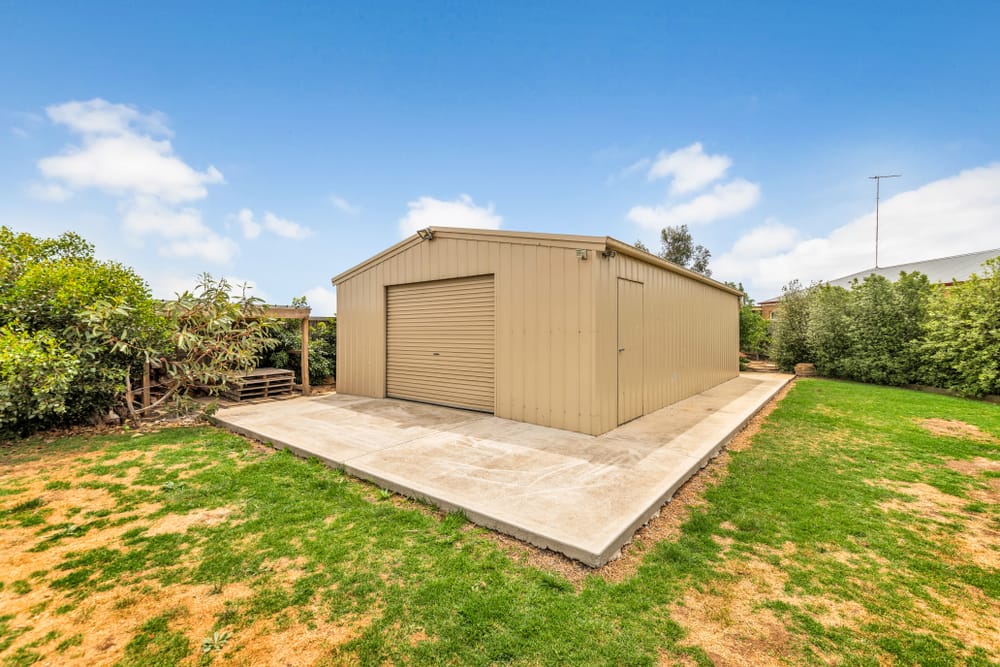
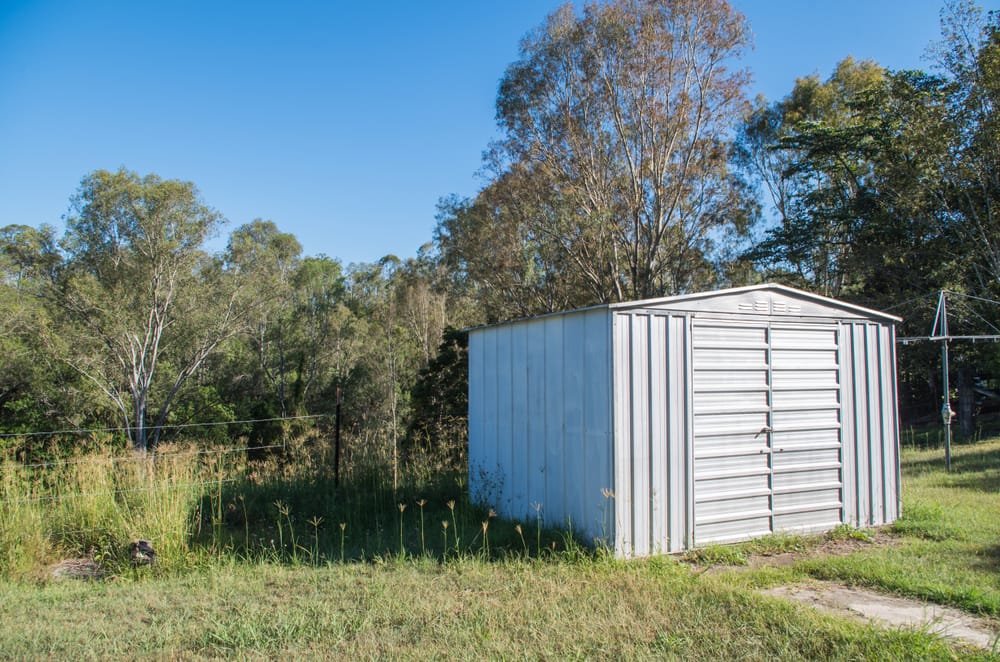
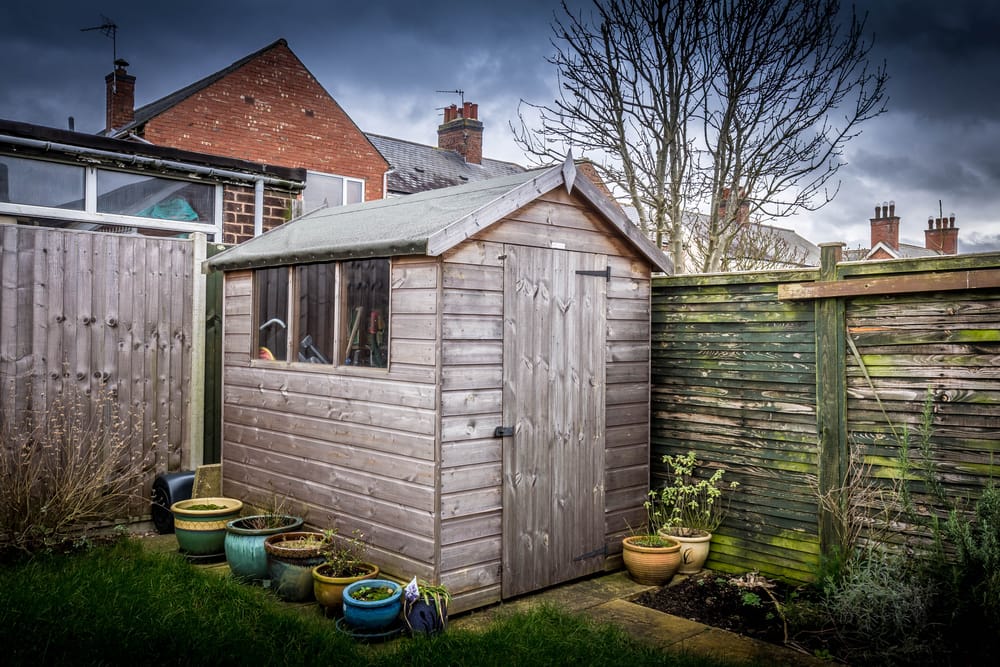
What is the best material for a garden shed?

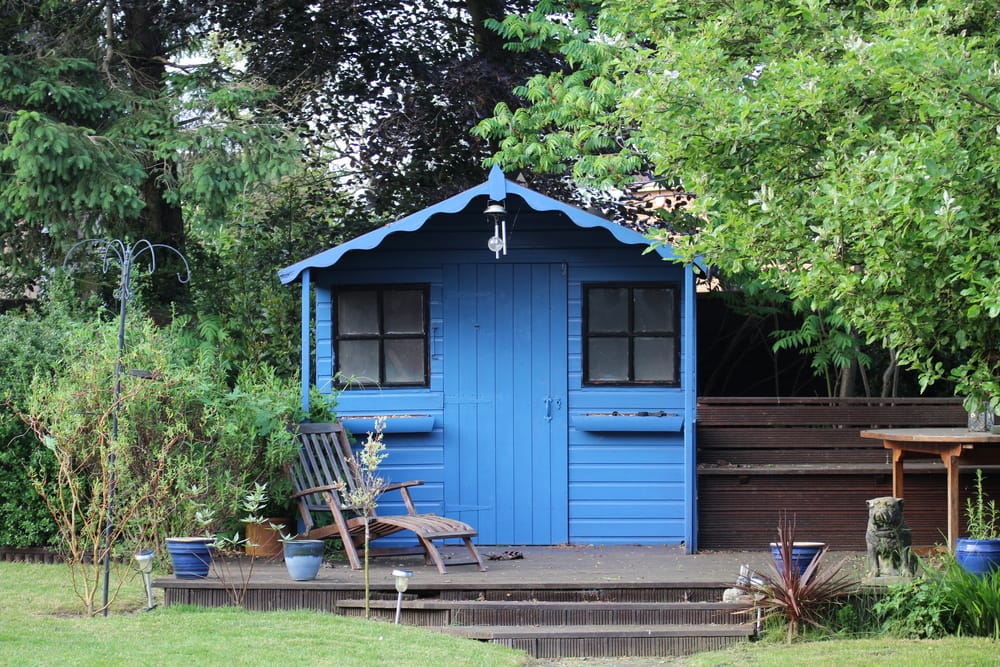
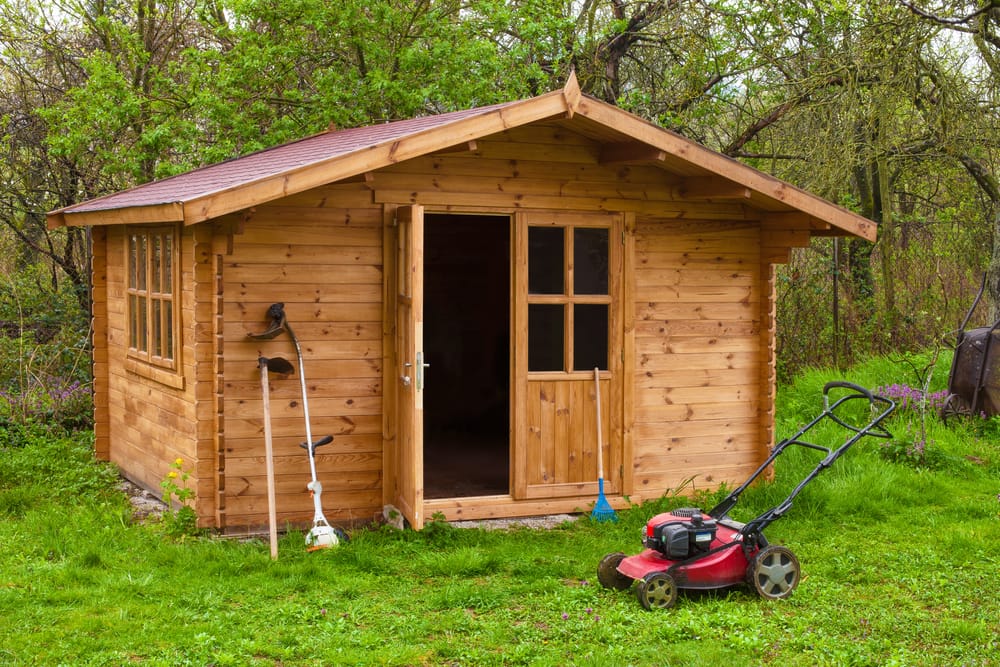
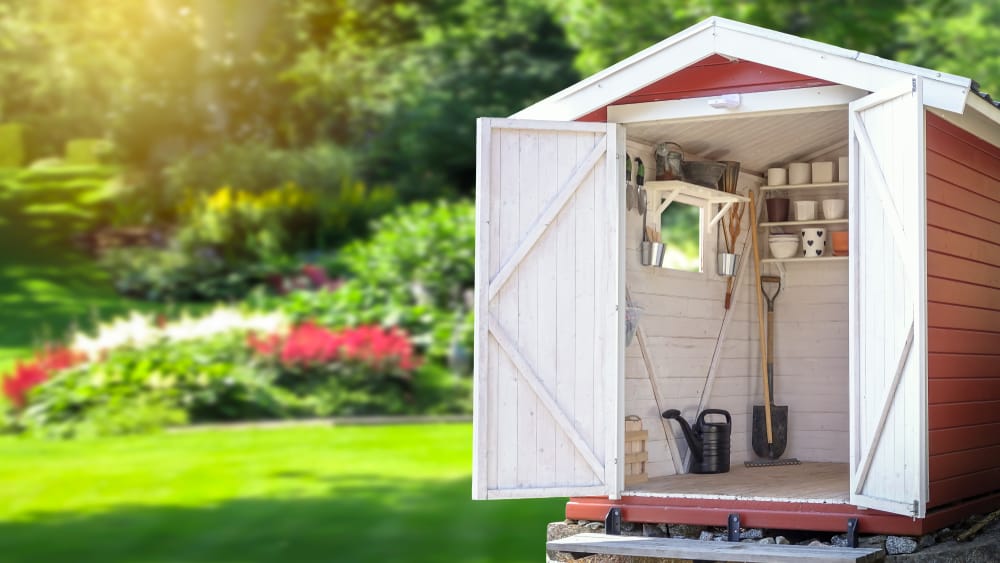
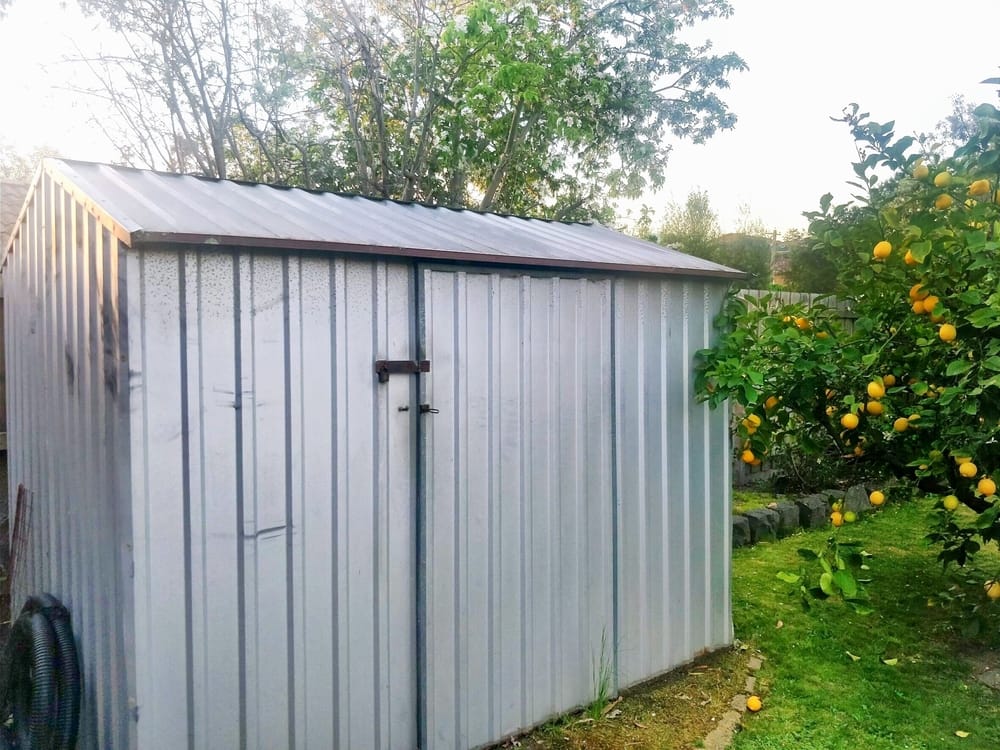
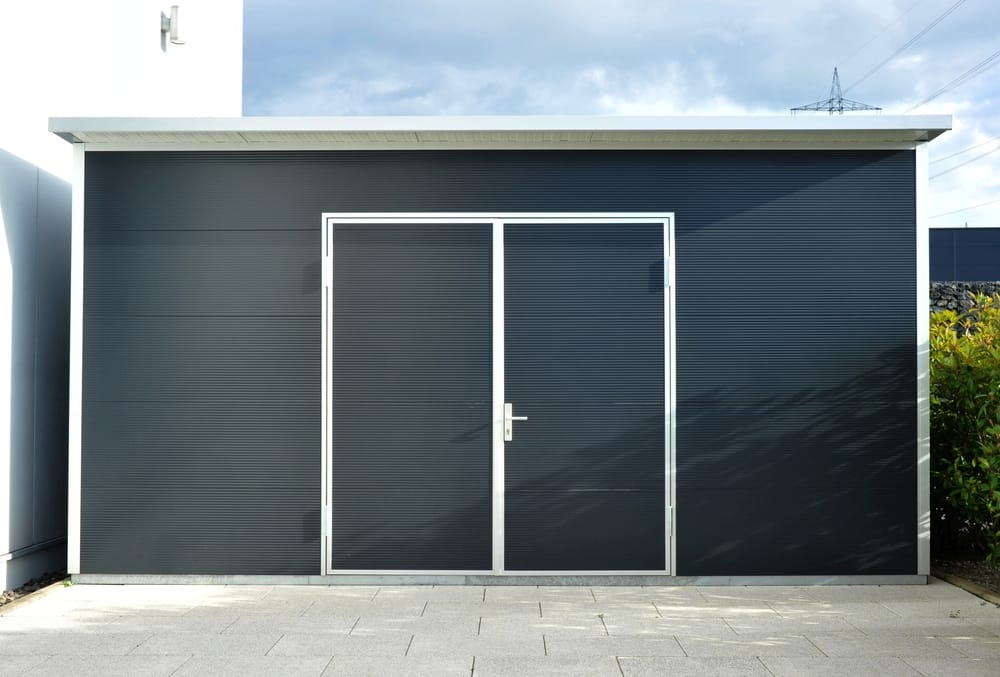
While a wooden shed may look good, the most common shed material used in Australia is steel. Whichever you choose, always use a reliable manufacturer.

Download Our App

Screenshot of the Localsearch App
Card highlighting that you can claim and future proof your business with the Localsearch App

Localsearch App

Find local businesses - anywhere, anytime.

Available on the Apple App Store iconAvailable on Google Play icon
Screenshot of the Localsearch For Business App
Screenshots of the Performance and Notifications sections of the Localsearch for Business App

Localsearch For Business App

Manage your business - anywhere, anytime.

Available on the Apple App Store iconAvailable on Google Play icon