Painters Guides & Resources

Trending Searches

Plumbers

Dentists

Hairdressers

Electricians

Roof paint cost

Roof paint cost

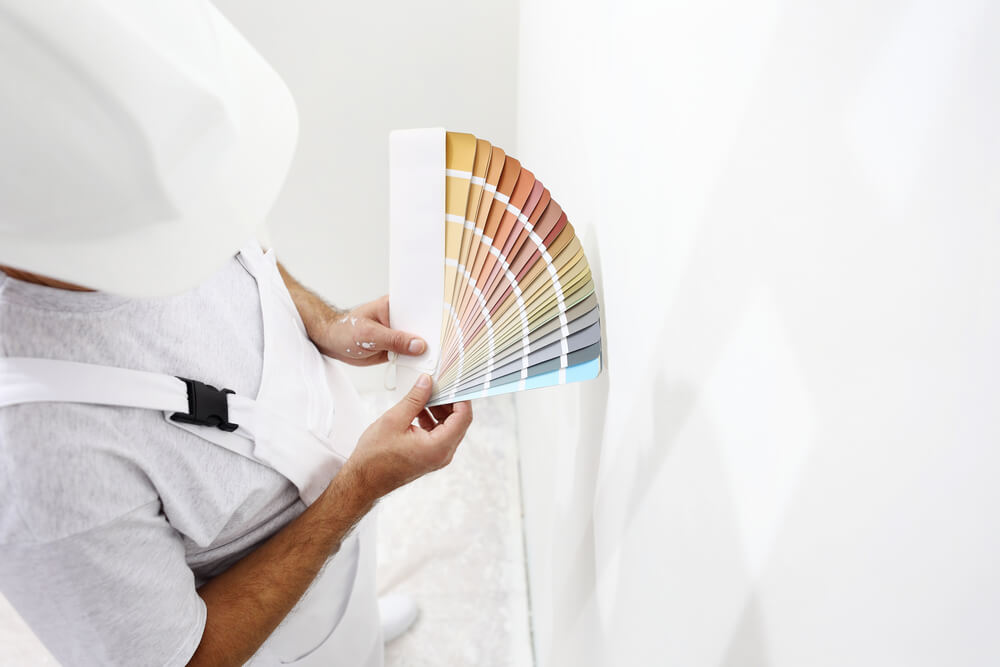
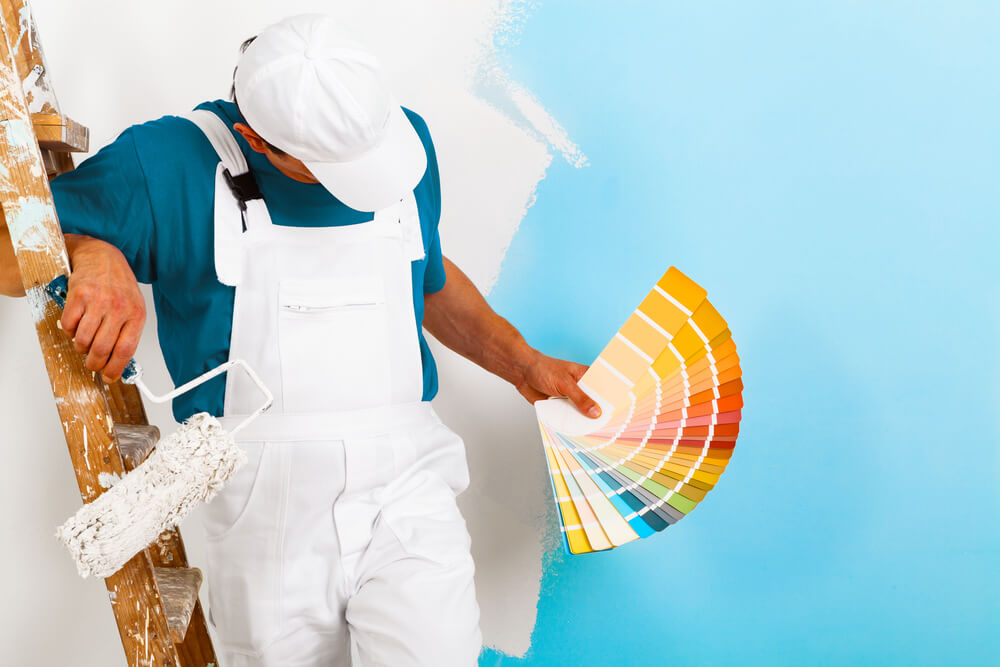
Deciding on the colour to use for your roof is something you need to take seriously. When calculating the cost of roof painting you need to consider the size of the roof (the cost of roof paint is calculated by the square metre), the quality of roof tile paint including other materials used by a professional roof painter), labour costs, angle of the roof (hiring a hoist will surely generate an additional roof painting cos ), if it is a two-storey home and other access difficulties. In Australia, Queensland has the lowest rate of around $35/hour and priced around $45/hour in New South Wales. The average cost for professional roof painting ranges from $2,000 to $10,000. ## Is it worth painting a roof? While the average cost of roof painting may sometimes be expensive, there are many benefits including extra insulation to help reduce the amount of time spent running the heater or air conditioner, boosting kerb appeal (making it newer and brighter) and improving the value of the house. Consider the dedicated equipment and safety processes used by [professional painters.](/guides/painters/cost-to-paint-exterior-of-a-house) There are different paint options including polyurethane roof coating, polymeric roof coating, bituminous coatings, water-based acrylic roof paints, and the most expensive option, eco-friendly silicone paint. ## How long does roof paint last? How long a roof paint will last depends on many factors such as the quality and workmanship of the painters and the type of roof used. Investing in quality materials and engaging professionals in your roof painting can go a long way in deciding how long the roof paint will last and [how much paint](/guides/painters/how-much-paint-do-i-need) you actually need. With a reputable company, you can get up to a 10-year workmanship and product warranty. ## What type of paint is used to paint a roof? There are different types of paint out there for roof painting but not all are appropriate for painting all types of roof. Choosing an improper paint can make your roof vulnerable to rusting and fading over time. The roof of a home does withstand wear and tear without excluding UV radiation. If you're using metal roofing, you need to go for paint that provides elasticity to a high degree because it is susceptible to contracting and stretching. Traditional household paints don't offer a high degree of elasticity and become brittle and crack with time. For painting your metal roof, the best choice you can have is water-based acrylic paint. This paint is elastomeric and can help prevent peeling and cracking. You may also want to try oil-based paints. ## What colour should I paint my roof? Deciding on the colour to use for your roof is something you need to take seriously. Keep in mind the colour of existing guttering, the garage door, fascia, driveway and the style of your home. Try to get a visual of how the colour will appear on the roof. The rule is two contrasting colours and one accent. For your roof, you may think about the Hamptons Style colour scheme or Earthly tones. You may go for colours such as Shahara, Gully, Jasper, Nutech’s Wallaby, and Evening Haze. Nutech’s NXT Cool Zone for example is one of the heat reflective options (for heat reflective roof) that can lower the heat in your homeand in your ceiling space.

Painters Guides & Resources

How to Paint a Fence

How to Paint a Fence

A fence given proper maintenance and paint not only adds to the street appeal but gives you safety and privacy as well. If you have a wooden or wall fence its best to consider routine maintenance to keep it looking good and strong. Care helps prevent damage and insect infestation. Regular fence painting should be done at least once in two years and with the right paint. This will help you prevent structural repairs and accidental damages. Start by cleaning and getting the area prepared, gather the right tools and the right paint and get started. ## How do you prepare a fence for painting? Preparation is an excellent step to obtain a good result. To start you will need the below. - A good finish paint of your choice. - Paintbrush or sprayer. - Cloth and drop sheets. - Scraper. - Sandpaper. - Spray gun. Here are top essential preparation tips you should consider. ### Set out the area Sometimes, it's possible that grasses can surround the fence or over grow across the fence giving it a bad appearance. Trim the bushes, shrubs and weeds. This is important because it gives you the ideal workspace and prevents the paint from getting messed with by its plants. ### Create a workspace This step is not just essential for you; it is necessary because it protects the ground and prevents it from being stained with paint. Use an old or drop cloth to place on the ground close to the fence. This ensures that all drips and residue will drop on your workspace. ### Make repairs on the fence Before setting out with painting, you may want to scrape out the old coat of paint, replace old or broken nails and tiles. Also, if you find cracks repair them with wood glue. Make sure the fence is in good shape. ### Select a suitable paint and brush There are many paint choices out there. You wouldn't want to use paint to wash out during the rain or look dull in the dry season. So, try to get yourself an affordable quality brush and paint that would, no matter the weather conditions, shine out as clean as new. Most times, a sprayer is often recommended instead of a brush. ## Do I need to sand the fence before painting? It depends on the fence. If it's a brand new fence, sanding is not necessary. ### For painted fence Use a handheld orbital sander. ### Wood fences This also includes old surfaces, wooden fences such as redwood and cedar. They will require very light sanding. Meanwhile, you can apply sealer every few years to maintain appearance. You can either use a vibrating sander or an orbital sander. A fence that has been painted before needs sanding to remove the loose paint. This allows the wood to soak in the new colour. Wooden fences such as redwood, cedar will require very light sanding. Meanwhile, you can apply sealer every few years to maintain its appearance. ## What paint should I use to paint a fence? Some people want their fence to blend in with the environment and space. It helps to keep this in mind when picking a colour. For a wooden fence, oil paint or latex paint is a good choice. Oil-based paint is a good coat that prevents stains and absorbs quickly into the wood. Also, it takes only 4-5 hours to dry and leaves your fence all glossy and clean. Latex paint is another natural paint. It is safer and doesn't expand quickly like the oil paint. This is because it contracts with temperature changes.

Ceiling Painting Cost Australia

Ceiling Painting Cost Australia

In most cases, painting an entire ceiling in the house is not a do-it-yourself project. It's better left to professional painters or a painting contractor that has the proper tools and techniques for a successful and easy application. Many people like the idea of painting their ceilings to give them a fresh new look. However, when they attempt this themselves, they usually end up with less than desirable results with the ceilings painted. The cost to paint usually vary depending on various factors and varies per square metre and the total cost after choice of paint, colour, technique usually differs. ## Painting ceilings: The highs and lows You can paint the ceilings of the house with an eggshell or a flat finish per square foot. Flat finishes are generally easier to clean, have less cost to paint, and resist stains more than an eggshell finish does. However, both types of paint ceilings have their advantages and disadvantages when applied to ceilings. Generally speaking, if you have high-domed ceilings, then flat ceiling paint may provide a smoother look once it has dried completely when you paint a ceiling. In other cases, people may choose to apply a coat of primer before the final paint is applied on the prep work with a fresh coat in the final price. Another problem that appears is peeling after the painting project. There are certain types of paints and primers that do not adhere well to ceilings and require more paint, which results in an uneven surface once painted on the prep work. Some oil-based paints may warp and peel [or even blister](/guides/painters/what-is-blistering-in-paint) around door trim or wood beams. Although this can be prevented by applying one or two coats of primer first on high ceilings, it's still something to beware of if you plan on painting your ceiling with flat finish paint. If you're going for a glossy look on your high ceiling, then eggshell paint would be the best choice since it dries hard and resists stains better than other types of paint and is also less costly per square foot. It also provides a smooth texture once dry and retains its colour over time. If you are wondering how much does it cost, some general painting costs as per the current hourly rate are below. - Complete three-bedroom home ceiling cost to paint $2,500 to $4,000 - Living room ceiling average price to paint $500 to $800 - A tiny kitchen ceiling cost to paint $300 to $450 ## What is the best paint for a ceiling? The paint finish you choose is largely a matter of personal preference in your house, but in order to achieve the best results, choose a high-quality acrylic latex paint in the painting project. Latex paints cover better than oil-based paints and clean up easier with soap and water in the house. Unlike oil-based paints, they can be cleaned up immediately after use with just soap and water before the paint begins to dry. Water-based finishes in a paint job for interior painting also require less priming prior to painting than their oil-based counterparts and provide better coverage in fewer coats per square foot. They repel bugs and moisture and last longer once painted. Latex has greater flexibility than any other type of paint which allows it to expand or contract naturally when surfaces expand or contract due to moisture changes in the environment in the ceiling painting and if you wonder how much paint you need or how much is needed for walls for a nice coat, the answer is not much. ## How do I prepare a ceiling for painting? Remove all light fixtures and cover before ceiling painting to get the preparation work going. Make sure the lights are turned off before you remove them before starting the painting job on your house walls. If there's a chandelier, ceiling fans, or heavy fixture in your ceiling, make sure to turn off the breaker before you remove it. Once all of your fixtures are removed, sweep and dust the ceiling to ensure that it's free from dirt and cobwebs and start surface preparation and remove water stains. If there is a lot of staining on your ceiling, then consider using a mildewcide paint additive per square metre to help prevent future stains from forming in the next painting project. Make sure to apply primer or finish paint as soon as the surface has been cleaned and dried completely every square metre. Latex paints dry quickly so make sure you have everything you need close at hand before starting this includes the safety equipment before you apply the first coat. Also, make sure that any tools or equipment needed for finishing are nearby as well before you begin painting. This will save time since they'll already be set up ready for use when they're needed most. Always apply the finishing coats after the first and second coat [have dried well](/guides/painters/how-long-between-coats-of-paint) in the room. ## How long does it take to paint a ceiling? It normally takes 2 to 3 hours to paint an average ceiling. If you apply two coats of finish paint, then this will double the time needed for painting your ceiling. ## Should I paint the cornice the same colour as the ceiling? If you plan to paint your ceiling white then [painting the cornice](/guides/painters/how-to-paint-a-cornice) white will blend it into the ceiling and make it less noticeable. However, this isn't a hard and fast rule and if you want to create contrast between the two surfaces, then consider creating a focal point in another area of your room with multiple colours. For example, if you have a feature wall behind your sofa, then why not paint the cornice a contrasting colour to draw attention away from the ceiling and lower the cost. If you do decide on painting it another colour make sure that it matches the rest of your decor. Choose neutral shades for ceilings since they'll be most noticeable in any areas where they don't match other surfaces. This will make them stand out and cause a distraction rather than blending into the room as you hoped and will increase the cost of the property when painted. For new construction or the house, the cost to paint will go up as this is a new house that has to be painted from scratch. ## What is a high gloss ceiling paint? A high-gloss finish has a radiant, shiny appearance that reflects light back at its source and does not have a high paint cost. This can help to brighten up darker rooms since light sources will be reflected off the surface of the ceiling and enhance their glow. The smoothness of the finish also enhances the reflective quality of light which helps to maximise illumination and make rooms appear more spacious and airy and don't have a high cost to paint. Because high-gloss finishes are so shiny, they're not recommended for use in kitchens or any textured ceiling where cooking oil and steam can cause dirty build-up on surfaces that aren't easy to clean. They're more suited to dry areas like living rooms and bedrooms, but some manufacturers now offer special low-odour gloss paints designed specifically for use in kitchens. ## What is a matte ceiling? A matte finish has a dull or flat appearance without any shine or glossiness that makes it great for a cathedral ceiling and exterior painting. This makes it perfect for creating contrast with lighter coloured ceilings as darker colour such as deep reds, blues and greens stand out more effectively when painted onto a matte surface and this is true for skirting boards as well. Its textured, non-reflective finish also lends itself to creating the illusion of extra height in smaller rooms without windows since light sources will reflect off its surface and aid in maximising illumination. If you're after a sophisticated look for your ceilings then think about painting them using 1 or 2 different shades of grey to create an impressive contemporary feature that's guaranteed to impress your guests. ## What is the best ceiling paint type? The best type of paint to use on ceilings is water-based acrylic or latex finishes in one room. Oil-based paints are too thick and glossy for application onto ceilings since they'll take longer to dry. If you attempt to apply them in crown moulding, then they'll run down the walls and leave unsightly streaks that are difficult to remove. Latex paints have a few variables like they are easy to apply, dry quickly, can be rolled or sprayed on, are available in a wide range of colours, have low odour levels during application making them suitable for use indoors where ventilation isn't ideal, such as in small rooms. And you don't even need a professional painter to do it. While they may be more expensive than other types of paint, such as [high gloss or low gloss](/guides/painters/high-gloss-paint-vs-low-gloss-paint), the fact that you only need to apply one coat is a huge saving on time and will save money in the long term. If you are dealing with an older ceiling or old paint, be careful as it may contain lead. Follow this handy guide from the [Australian Government](https://www.awe.gov.au/environment/protection/publications/lead-alert-six-step-guide-painting-your-home) if you have concerns.

High Gloss Paint vs Low Gloss Paint

High Gloss Paint vs Low Gloss Paint

Gloss paints are known for its durability and the ability to repel stains, smudges and rain from unprotected surfaces. Apart from the obvious visual difference between these two types of glossy paint, there are actually quite a few major differences that you should be aware of. ### Ease of use The next time you go to buy paint for your home or office project, remember to check whether the paint is made specifically for one type of wall finish or another. Many paints come in versions with higher gloss levels than others. In most cases, including interior walls, dining rooms, front doors, living rooms, family rooms, laundry rooms; an eggshell gloss would be the desired choice as it is easy to clean, offers protection from UV rays and has a less reflective finish when dry. ### Cleaning Cleaning a high-gloss surface is a bit more work because it is not stain resistant. Instead of simply dusting this type of wall, you'll need to wipe it regularly with a damp cloth. High-gloss surfaces are more prone to spots and smudges, so be sure to use glass cleaner for removing any greasy fingerprints or stains. Flat paint produces a stain-resistant surface, so use flat paint on your next paint project for a more durable finish and where frequent cleaning is not done. Hi-glass surfaces can often look like they are [painted with enamel](/guides/painters/what-is-enamel-paint), which may or may not be appealing. ### Durability Painting over a painted wall is no issue when using low-gloss paint as most surfaces have been prepped beforehand in order to apply either coat onto the existing paint. Enamel paint with good stain resistance, gloss paints that can conceal surface imperfections. Matt wall paint with a low sheen finish must be applied with primer before being painted or else the paint will quickly peel off or develop cracks. ### Cost Good gloss level paints are usually more expensive than low-gloss alternatives, mainly because they are higher in gloss levels and may need to be mixed with other paints in order to achieve the desired results so that colour appears. Low-gloss paints do not need this added step. However, if you prefer a high-gloss sheen for your walls over a matt finish or matt paint, it's important to remember that this type of paint does come at a cost premium. ## High gloss vs low gloss vs semi gloss paint While higher gloss paints may have certain advantages over matt finish options, matte finishes are much more popular [inside modern homes](/guides/painters/how-much-does-it-cost-to-paint-a-house-interior-professionally) because it lends a very clean appearance to the decor. In addition, many construction professionals tend to prefer a matt finish as they can be applied quickly and easily over the existing surface without requiring any special primer coatings first. ## Is high gloss paint harder to apply? The answer to this is yes, but it's not as bad as you might think. Luckily, there's no need for you to limit your paint choices on the basis of gloss levels. Instead, focus on how thick the paint will be and if it will need any help in terms of primer coats or other additives before applying. For example, consider using an eggshell coating that needs just one layer of finishing coat for best results. If you're unsure whether high-gloss paint is necessary, try testing matte alternatives first to see which type of finish would look better on your walls. ## Is high gloss paint more durable? In most cases, yes. gloss paints are known for durability and the ability to repel stains, smudges and rain from unprotected surfaces. In fact, a high gloss finish is often created using a base coat that has been specially designed with UV protection in order to shield paints against damage caused by sunlight's harmful rays. ## Is high gloss paint easy to clean? Typically, no but it doesn't have to be too troublesome either. The trick to keeping your high gloss paints clean is regularly dusting and removing water spots. Using a lint-free towel for general dusting, wipe the walls at least once every week to remove any unsightly smudges that could mar or damage the surface over time. ## Is high gloss paint good for doors and trim? Absolutely! There's no reason why you can't treat all of your interior surfaces with high gloss paints, provided they're fully prepared beforehand. In fact, using gloss on doors and trim is a good idea as it helps to make the doors and fixtures appear more reflective and shiny. While this could be done with matte paint, it would make the areas appear duller in comparison and having a slightly glossy appearance would be better. ## Is high gloss paint good for kitchen cabinets? It depends on how much work you are prepared to do pre-paint preparation. For instance, using a spray primer is generally not possible when applying gloss to cabinets as the paint will slide off too easily. This means that an additional coat of varnish should be used before painting otherwise your primer coat may fail after just a few weeks or months. ## Which paint finish should I use? The answer to this question isn't cut and dry. If you're looking for a high-shine finish, then gloss paints are your go-to choice. However, if you want the best colour retention possible without spending too much money, then matte or eggshell paints are often better choices in terms of longevity. Some semi-gloss paints also exist, which reflect back most light while still maintaining sheen. ## Is high gloss paint washable? Yes, but it shouldn't be treated like watercolour on canvas. To retain the original sheen and shine of your gloss finish, use only damp cloths for cleaning purposes and avoid using strong soap or detergents that could strip away some of the final paint pigment. Also remember that while high gloss paints will repel most stains once properly applied, they aren't designed to be completely stain proof, so don't expect them to do the job of something like latex paint in this situation. ## Can high gloss paints turn yellow? Yes they can. If exposed to too much sunlight for long periods of time, your high gloss coatings could start fading and discolouring over time. This is especially true if you live near the equator or generally reside in warmer climates that receive very little rainfall overall. Also, try to avoid using any kind of oil-based cleaners on an excessively glossy surface as they could damage already thin coats with ease when applied over large expanses of flat areas. ## How do I remove high gloss paint? If you ever need to remove your existing, highly reflective appearance coating for whatever reason, the key is to do it slowly and carefully. Using a paint scraper or sandpaper for scraping purposes could be dangerous given that your existing topcoat may already be thin or brittle from exposure to sunlight. Instead, try using a chemical stripper designed for this purpose in order to get rid of old paints without causing any uneven surfaces to form when removing the paint finishes. ## What is a sheen level and what is low sheen paint? Most paints are available in varying sheen levels, which correspond to the amount of shine that they produce when dry and how much light is reflected. Matte (or flat) paints is a type of low sheen paint for instance give off very little shine once applied making them an ideal choice for kitchens and bathrooms where you don't want to reflect light or glare produced by glossy surfaces. Low sheen paint also includes eggshell paints which come with a low-to-medium level of sheen that can be perfect if you're looking for a mid-point between matte and gloss. Satin finishes meanwhile offer a subtle pearlescent touch that is somewhere between eggshell and gloss in terms of clarity and impression. A full gloss finish will have the most sheen as compared to flat finishes while having good cleaning properties. ## Which paint finish should I use for my home exterior? It entirely depends on your personal preference, but it's important to remember that matte, eggshell and satin paints are low sheen, and don't protect against ultraviolet (UV) rays like gloss or semi gloss surfaces can,meaning you may [need to re-coat often](/guides/painters/cost-to-paint-exterior-of-a-house). This means that these types of finishes may start to peel over time to highlight surface imperfections if they're regularly exposed to harsh sunlight on a regular basis and should not be used on hard-wearing areas. However, stains will be less likely to form given the non-shiny nature of these sorts of surfaces in the first place. Wet areas may be coated with gloss paints but not low sheen paints. ## Which paint finish should I use for my interior surfaces? Interior surfaces such as walls and ceilings can be painted using any number of different finishes. As a general rule, matte paints are less favourable for bathrooms and kitchens given that they may not repel water droplets or stains very well when used in these spaces rather than paint sheen. Eggshells meanwhile come with a moderate level of shine while satin finishes offer a pearlescent touch, making them ideal choices for living rooms or bedrooms where you don't want an overwhelming amount of more light reflected back at you while you're watching TV or reading a book. Are you luck enough to live in a heritage home? Brisbane City Council has a handy guide to painting while [adhering to strict regulations](https://www.brisbane.qld.gov.au/planning-and-building/do-i-need-approval/restoring-and-researching-heritage-properties/fact-sheets/the-painting-process). Check to see if it applies in your state.

How to Paint the Bathroom Tiles in a Shower

How to Paint the Bathroom Tiles in a Shower

Some areas of the bathroom will require more attention when applying the second coat. Your current shower tiles could be old and dated hence make the bathroom look tired and unappealing. Painting bathroom tiles require the right materials and correct instructions to get the best results. Since the painting process is a DIY job - begin with proper cleaning using a powerful cleaning agent and sandpaper to get rid of the tile layer and dust before the painting process. Once you ensure the entire surface is cleaned properly, use the correct primer to ensure the paint adheres to the ceramic tiles. Some cases will require a specific type of paint from your local store. Pay attention to the ceramic tiles and use epoxy as well as oil-based paint where necessary. While working on the tiles, remember that tiles and the grout will end up with one colour. You will need to redo the process periodically. ## What type of paint can you use on shower tiles? Bathroom tiles come in several materials like ceramic, natural stone, quarry, porcelain and glass - notoriously [tricky to paint](/guides/painters/how-to-paint-glass). You need to beware of specific paint types to use to ensure your paint job lasts longer. You will likely lose some of the interesting preset styles and characteristics of your tiles if you ignore crucial constraints when choosing the correct paint. Preparation is crucial. Ensure you clean the tiles thoroughly to get rid of the soap scum, dirt, and mildew that could have stuck on the surface. A strong cleaning agent could make the process easier and then wipe any residue to allow the surface to dry. Be sure to use sandpaper for this process to remove the gross from the surface of the tiles. Wipe the dust and allow the surface to dry, and ready for painting. The paint you should go for can either be latex paint or epoxy paint.

What is a Cornice?

What is a Cornice?

A cornice sits on the facade of a building above the roofline or crown moulding, which on with flat roofs is at the base of the outer wall. Generally, the cornice differs from the rest of the building by being made with a more decorative material such as wood or plaster, and/or having a different design. The projecting structure which forms the top part of a wall, whether simply supported or roof-like, can also be termed a cornice. Cornices are not just found on buildings, however. They are used as decorative features on many different types of structures such as bridges and jetties, perhaps most famously on the Parthenon in Greece. Cornices often serve a structural purpose. They may provide a space at their foot for a masonry wall to run or a beam to project which increases stability from an architectural perspective. ## What is a ceiling cornice? A ceiling cornice is a decorative moulding that crowns the top of a room, usually in a rectangular pattern. Ceiling cornices are most often found above window and door openings in a building's exterior wall where they conceal the lower portion of the wall construction from below, which generally would be unsuitable for view. In interior design, ceiling cornices may be constructed from any number of materials including plaster or wood. Plaster cornices are often used when weight or deflection needs to be kept at a minimum such as over fireplaces or light switches which have to support up to their own weight plus that of people passing through the room. For ceilings with heavy accumulations of dust and dirt, they can sometimes be made from metal coated in a thin layer of rubber, such as that used for making tool handles non-slip. Ceiling cornices may run continuously around all four sides of the room or just on two opposite sides. Often they only extend across half the width of the room and are referred to as 'quarter', 'three quarter' or 'short' cornices. they are commonly painted to [match the skirting boards](/guides/painters/how-to-paint-skirting-board). ## What are cornices used for? Cornices are used to make rooms appear taller or larger, to conceal unpleasant construction details such as the plumbing and air-conditioning ducts, and mask the junction between walls of different heights. They can act as loggias (in other words - covered outdoor patios) for exterior relationships. Cornices can also decorate a structure including giving it an aesthetically pleasing appearance to help in the design process. Cornices are often decorated with elaborate mouldings which may include capping, corbels, brackets, modillions and other decorative elements that extend beyond what is needed structurally. These could be purely ornamental or serve a functional purpose e.g.: by supporting overhanging eaves. Decorative features on cornices may be made from moulded plaster, wood, metal, or other decorative elements. ## What are modern cornices made of? Modern cornices are often made from wood, extruded polystyrene, or any number of non-traditional materials such as moulding plastics. ## What is a cornice board? A box cornice board is the horizontal trim located at the top of a wall and designed to cover joints between wall panels and to provide protection against water infiltration and throwing rainwater free. Its purpose is also to add architectural detail, in which case it may be called an ornamental cornice or decorative cornice. The "board" part refers to its resemblance in size and shape to a traditional timber board (the type used for boarding up windows when there's a hurricane coming). A system constructed with plywood sheets nailed together over dimensional lumber provides adequate strength, while sheeting made from extruded polystyrene has a low profile and is often used for metal buildings. Other modern materials include vinyl, aluminium, fibre cement board, skirting boards, and various composites of these In some styles of architecture such as Victorian or Art Deco, the projecting cornice may consist of an overhanging boxed structure with moulded decoration or decorative moulding at the outer edge. In traditional domestic architecture, this was frequently constructed from timber. Modern cornices often consist of a lightweight framework with a finished surface on top that gives a smooth appearance to what would otherwise be exposed plywood edges around window openings or other voids in the construction. The material covering the framework is called finish material or "scrim" which is most often vinyl but may be any number of materials, for example. ## What is a cornice return? A cornice return is the return of an architectural element at the end of its horizontal run. Cornices are often functional, especially when they are serving as part of a roof structure such as an architrave cornice. Imagine if the exterior wall of your house was simply butted up to the rafters with no trim or crown moulding to cover it or make it look more finished. It would indeed be "functional", but it wouldn't look very good nor would you get much enjoyment out of living in that building. For this reason, almost all buildings have some sort of ornamental treatment on their exterior walls with exterior cornices - even something basic like window and door casings can help break up what would otherwise be a plain, hard wall. The most common ornamental treatment is the use of crown moulding. The function of such a decorative element is to cover rafter tails, which would otherwise be exposed and stick out like a sore thumb on the building. This becomes all the more important when we're dealing with roof lines that aren't flat but rather gables or mansards for example. A cornice return then serves as a way to hide all those structural elements that need to remain hidden from view. It creates design interest and adds an air of sophistication to your home. They are [easy to paint](/guides/painters/how-to-paint-a-cornice). In addition, if you have high ceilings, you can also add a crown moulding or a cornice to cover the gap where the ceiling meets the wall. Doing so will make your room feel taller and more elegant. Of course this isn't possible with every room in your house but if you have a high/cathedral ceiling, it's certainly something to consider. ## What types of cornices are there? Modern cornices are often made from wood, extruded polystyrene, or any number of non-traditional materials such as moulding plastics. In the case of more ornate cornices that are made from wood, they can be constructed from a number of different materials, namely hardwood or softwood. Besides those, some people eschew the use of traditional mouldings and go with steel, aluminium or even copper instead. What's great about modern cornices is their simplicity. You don't have to worry about having a carpenter come in and do moulding work for your home. You can buy "off-the-shelf" or "prefabricated" cornice systems that mount onto your wall quite easily with nothing but a few basic hand tools. In terms of how many pieces there are to such a system, it depends on the manufacturer but typically there are no more than 4 or 5 pieces to deal with. It's definitely something you can do yourself. If you're not the type of person who feels comfortable taking on a project like this, don't worry, most manufacturers will gladly provide installation services for their products. Whether you go with an ornate traditional cornice or a modern cornice, one thing that they all have in common is that they are installed on top of your interior wall surface between the interior wall and ceiling. For traditional types of cornices, this means adding crown moulding onto your interior walls at locations where your siding meets the rafters/trusses of your roof structure. Cornices are typically added at window openings for window treatments as well but it really depends on what you see in the style of your home. Other cornice types include, interior cornices, bracketed cornice, cavetto cornice, external cornices, simple cornice, open cornice and close cornice. ## Is a cornice necessary? While the function of a cornice is almost always to add interest and sophistication, it's by no means an absolute requirement. In most cases you will see a cornice on homes that have stucco or vinyl siding. This might be because most houses with these types of exterior covering usually feature a gable/mansard style roof which means there are tails where the rafters meet the exterior walls and interior walls. For that reason alone, many people choose to add some sort of ornamental detail here. However not all homes with gable or mansard roofs have cornices. Sometimes they're simply built in to the wall structure itself using trim boards. If your home features a flat roof without any slope to redirect water away from the building (such as a shed roof) then there's no real reason to have a cornice. If your home has vinyl or stucco siding, that means it also likely has corner boards. Cornices are typically constructed in the same way as these other types of exterior trim - they're not simply flat slabs of material but rather have some kind of shape or curve to them. As such, these can be made from materials other than wood which is where extruded polystyrene and moulding plastics come in very handy. ## Do all homes have cornices? The simple answer is no. Just because some homes have cornices doesn't mean that all homes need them. If you're building a home with brick or masonry exterior walls, there's no compelling reason to have one unless your taste just so happens to lean in that direction. Are your cornices in disrepair? The Master Builders Association on Western Australia has a handy guide to dealing with [cracking cornices and plaster cracks](https://www.mbawa.com/cracking-cornices-and-plaster-cracks/). ## Do all homes have cornices with exterior siding? Traditionally speaking, homes that feature stucco or vinyl exteriors usually have cornices. However, that doesn't mean that it's impossible to build a home without one - especially if your house features brick walls instead of these materials. For this reason, many modern homes either with brick or masonry surfaces don't include them at all. There are some cases where you may see them on newer homes but they tend to focus on the decorative aspect such as roman architecture, building or furniture element, ancient greek design elements that are necessarily decorative rather than primarily functional commercial buildings in nature since there is no tail section above the exterior walls to support one. This could be for classical architecture or an architectural feature. Surprisingly enough, even some wood-framed houses don't have traditional cornice or interior cornice moulding of any kind whether it's more modern looking or very ornate.

What is Caulking in Painting?

What is Caulking in Painting?

Caulking fills in any space between walls or building materials to avoid wrinkling or bubbling after being painted. The most common type of caulking comes in an aerosol can, which you spray onto the area where your tape meets the wall under the 2-inch overlap. Once you have sprayed this line of caulk, run your finger along with it so that it dries smooth. You may have to apply several thin coats rather than one thick coat. The key with caulking is not to be too heavy-handed. You do not want the caulk to ooze out past the tape, but you also do not want it so thin or watery that it doesn't cover or dry properly. Caulking is also available in tubs and tubes. To apply, you use a caulking gun with a movable plunger, a push rod, and an applicator tip. Some painters prefer these disposable cartridges because they can mix paint to get just the right colour for their caulk line. When using the tube, apply with a plastic putty knife or putty spreader instead of your finger. Some painters choose not to use caulking. There are two key reasons: first, there are less expensive ways to make taping go faster, such as using the mini-roller application. Secondly, caulking does not prevent paint from bleeding under the tape. ## What is the purpose of caulking? The purpose of caulking is to get rid of the space between the wall and tape. This way, it's better for the paint not to bleed through since there is no space for it to go through. Caulking is used for sealing cracks, filling spaces, nail holes, or gaps between joints in stationary building components. Applying caulking in larger gaps is different from doing the same for small joints or cracks. Large gaps are anything bigger than one-quarter inch. You can use polyurethane spray foam that expands upon application. As an alternative to polyurethane, you can place backer rods to seal joints prior to applying the caulk. The idea here is similar to the concept of adding oakum or cotton to the seam of ships using a caulking mallet and irons to make the ship's hull watertight. Backer rods reinforce the insulation and significantly reduce the amount of caulk used. Caulk dries faster than paint, making painting faster if you are caulking. Using rollers or sprayers makes cleaning easier because you can take off an entire section at once rather than one strip at a time. It makes taping go faster because after the caulk dries up (usually in about 15 minutes), painters only have to press on one strip instead of two strips where they overlap with each other. ## Which type of caulking should I use? There are many types of caulking out there. The best caulk to use really depends on what you are caulking. If the surface is smooth, then an aerosol caulk would be good enough for most jobs. For surfaces that are textured or uneven, it's best to use tub and tube caulk because it adheres better to these types of surfaces since they have more grip. After applying caulk to prevent leaks in damp areas, you can reinforce the seal by adding caulk strips on top. ## What do I need to apply caulk? Caulk can be applied in many situations. Cracks on walls may need to be sealed to keep the weather and insects out. Sealing cracks or joints that cause energy loss improves energy efficiency helping you to cut home energy costs. The same applies to small holes that may be causing water, dust, or air leakage into the house. Many painters use it for a [professional finish](/guides/painters/how-much-to-paint-a-house). Caulk is sold in tubs or tubes. To squeeze out the caulk from these rigid plastic tubes, you will need a caulking gun. You can improvise ways of pushing the sealant out of the squeeze tubes, but a caulk gun makes applying caulk smoother and easier. Use tape to seal off areas that you do not want the caulking compound to attach to. When replacing old caulk, scrape it off using a putty knife or screwdriver. For stubborn caulk, use appropriate solvents to ease removal. Once you have applied the caulk, use a caulk tool or a spoon to spread the caulk. ## What is the difference between sealant and caulk? Sealant is strong and durable, while caulk is flexible. Seals are usually used where there are holes or cracks to prevent air or water from getting in. It is applied [after painting tiles](/guides/painters/how-to-paint-tiles). Their strength makes them useful for long-term use (for example, pipe sealing), but they don't work well when flexibility is required (for example, faucets). These types of applications would require something like caulk rather than sealant. ## What is caulk made of? Caulk can be made of latex, silicone, or acrylic. Acrylic Latex caulk is the most common type of caulk. It is flexible and water-resistant. Acrylic tile sealant is stiffer than latex but can still stretch with the movement of surfaces like your walls and ceilings. It's best for dry conditions. Vinyl latex caulk works best in damp places. It is not as long-lasting as acrylic latex. A better alternative to vinyl latex is butyl rubber caulk. It is a sealant suited for water conditions like plumbing fixtures, downspouts, water gutters, roofing, and roof vents. Silicone sealant is more expensive than both latex and acrylic because it's extremely durable; it won't shrink or crack over time. Silicone caulk is a good choice for long-term sealing needs, such as those found in bathroom shower stalls or window panes that see a lot of temperature changes during the year. ## What should I look out for when buying caulk? There are quite a few things to consider to help you choose the right caulk: colour, amount, packaging type, price, and the area you are caulking. The colour of your caulk can affect how well it matches with your paint. Generally speaking, lighter colours work better than darker colours for this purpose because they provide a clean contrast to the different tones of paint on your walls. This allows painters to make taping easier by looking at which part of their tape line needs to be more visible versus hiding under excess paint on the wall surface. Even if you are not taping around your edges or corners, it is still important for painters to look out for where they're caulking. Sometimes, caulk lines show themselves more clearly when painted over rather than hidden underneath excess paint on an adjacent wall section that hasn't been caulked. Its a great trick when [painting skirting boards](/guides/painters/how-to-paint-skirting-board). If you have a lot of caulking that needs to be done, then consider going for a larger-sized caulk tube or cartridge so that it saves time and effort rather than having to keep on changing the applicator size. If you're not planning on doing a lot of caulking, go for smaller sizes so they don't waste after just one use. Packaging types can include tubes or cartridges. Tubes are generally more affordable but do not provide as much control as cartridges because they squirt out more air with each press of the nozzle. The benefit of using tubes is that sometimes their opening can allow painters to simply cut them open along the entire side and apply small amounts at a time (when you can't cut the whole bottom off). Cartridges are the opposite; they usually come with a small opening at one end that allows you to control how much goes out. In addition, cartridges usually come with caps, so you don't have to worry about anything accidentally squirting out. ## What is the difference between caulk and grout? Caulk is used on more porous surfaces, while grout is more suitable for nonporous materials. Grout prevents water from seeping into or outside of something, while caulk helps seal penetrations through less dense materials like drywall. Grout is also available in premixed bags, the same as most tile grouts (sand and cement mixture). These are usually found at home improvement stores; they come in various colours for decorating purposes. Just mix the appropriate amounts of powder to water per directions on the box with a power drill using a mixing paddle. The texture after mixing will be like that of yogurt (not runny), which is perfect for applying into seams and joints around corners. Let it sit for an hour. ## Is caulk a glue? No, caulk is not a glue. Glue is usually made of water and does get hard when it dries (unless you add something like glycerin or corn syrup to make it softer). This property makes it difficult to remove once hardened; therefore, we recommend scraping off excess dried glue before washing surfaces with soap and water. Caulk creates a seal by filling in the gaps along the edges where two surfaces meet. It's like weather stripping for windows and doors: The seal keeps any moisture that enters your home from getting into places it shouldn't prevent mildew growth. Some caulks dry hard while others remain flexible so they can move along with the materials they are sealing without cracking because this movement, which often occurs in older houses, can create hairline fractures along the edges of these materials. ## What kind of rooms need caulking? You can use caulk in any room where you want to seal gaps or cracks that might let extra air or cold draft into your house, and common wet areas including kitchens and bathrooms because they are usually damp most of the time, which makes them susceptible to mould development if there are leaks. Bathrooms also get a lot of condensation when you shower. This develops around the caulked area between the tile walls and tub that should be sealed properly with latex or silicone caulk depending on what other surfaces are nearby (latex for porcelain surfaces, silicone for metal). Caulk can also serve as a great water repellent. Professional painters in New South Wales need to be licensed, which you can [find more about here](https://www.fairtrading.nsw.gov.au/trades-and-businesses/licensing-and-qualifications/painting).

Painters Informational Articles

How to Prep a Room for Painting

How to Prep a Room for Painting

Before applying a coat of wet paint to a wall or repainting a piece of furniture, you need to prepare the surface you're working on. This helps ensure that the finished product looks good and lasts for years. The first step is to tape off any areas you don't want the paint to touch, such as mouldings. Use painter's tape for this task; it has an adhesive that won't damage surfaces when removed. If your room doesn't have trim, line the perimeter of your room with masking paper before painting that area. Next, prime walls or ceilings in preparation for painting them white. It makes any colour you apply after that look brighter and richer by comparison. To prime, use an oil-based primer, which most paint manufacturers sell. Oil-based primers have a longer drying time, so they help give you more time to smooth out any imperfections in the wall before painting it white. However, don't use oil-based primer on wood because it can raise the grain of the wood and cause problems when applying a coat of paint. Note, if you are using water-based paint, apply a water-based primer. Similarly, apply oil-based primer to a surface prior to applying oil-based paint. Always leave the primer to completely dry before starting to paint walls. ## Can I paint over wallpaper? If you're painting over wallpaper, spend whatever time is necessary to remove all of it first; otherwise, your new coat will peel off with the old paper wrecking the entire painting job. To remove wallpaper, soak a sponge or brush in warm water and add some mild dishwashing liquid (or another mild detergent). Cover this sponge with plastic wrap and cover the area where you're working with a drop cloth, using weights to hold it down. Then moisten the wall and wait a few minutes for it to soften up. Chisel away any parts of the wallpaper that won't come off with the moistening. If you still can't remove all of the paper, use a spray bottle filled with water and spray the surface until it softens enough so you can scrape it off. Using this technique to remove wallpaper won't cause damage to paint or plaster behind the paper, two substances that would be adversely affected by water if applied directly. However, your walls may need repairs before they're ready for painting; fill holes and cracks using spackle paste. To prepare plaster for painting, apply an anti-fungal agent. This will prevent it from turning yellow. On walls that may get damp, seal the surface with masonry paint formulated for masonry surfaces; on all other walls, use an oil-based primer before painting them white. [Preparation is key](/guides/painters/how-to-prep-walls-for-painting) to long lasting paint. ## Do you need to wash the walls before painting? You'll also want to clean dirty walls before painting. Wash dirt and grease off kitchen walls with a cloth dampened in warm soapy water, then rinse the surface with clear water to remove any soap residue. If your walls have been painted before but are looking worn, you may want to lightly sand them with fine-grit sandpaper just before applying primer. This will help it stick better. However, if you're going to use an oil-based primer, sanding isn't necessary. After this preparation, your walls should be ready to receive a new coat of paint. The rule of thumb is to apply the next coat of paint only after the current [coat of paint dries](/guides/painters/how-long-between-coats-of-paint). ## How do I prepare walls for painting? It is critical to prep walls thoroughly before painting. You will need to move furniture or remove pictures or fittings on interior walls before anything else. For wall fittings and light switches that cannot be removed, tightly wrap them with a plastic bag and fasten them with masking tape. It is easier to unscrew outlet covers and switch plates to apply paint freely. Always wear safety equipment. For areas high up the wall, have a step ladder ready. Have the right tools such as masking tape, putty knife, stir stick, paint roller brush or related brushes, and sanding block or sandpaper. Scrap off loose paint with a putty knife. Smoothen the surface by sanding down uneven surfaces. Start with medium-grit sandpaper. Finish with finer grade type to ensure you attain a smooth surface. Apply gap filler to fill cracks and nail holes. A joint compound should be used to fill larger holes. Use a damp cloth to wipe any excess filler from the surface. Apply painter's tape to wood trim areas and tape off one paint colour section from the other. For unlevelled surfaces, apply spackle compound, then sand it down to level up such areas. Before you start painting, spread drop cloths on the floor. Paint splatters and drops will fall on the drop cloths instead of the bare floor. You do not need to cover the entire room floor. Just cover along the length of the wall where the paint drops will fall. Once you have finished painting, clean the brushes with water and soap to preserve them for the next paint job. ## Can I just paint over old paint? Painting over old or cracked paint can cause problems since the new coat doesn't bond to whatever is underneath. While this won't affect your walls much in the short term, it could cause peeling or flaking when you apply a second coat of paint or when you try to change colours later. If you're painting over the same colour, you might get away with applying a coat of primer first. However, if you're changing colours or just applying fresh paint, consider stripping existing paint off instead. To get a clean surface, apply a liquid chemical stripper to the surface using a sponge brush. Let stand for about 15 minutes before rinsing it off completely with water. If the paint comes off easily, then go ahead and apply your primer or new paint. If not, repeat until it does. ## Do I need to prepare differently for different types of paint? Even if you are [painting multiple rooms](/guides/painters/how-much-paint-do-i-need), the only time you should consider this is if you're applying an oil or water-based primer to a surface that will receive a lacquer finish. In these cases, lightly rough up the intended wall surface with very fine sandpaper. This will give the primer something to hold onto and prevent it from rubbing off when you apply topcoats. Before painting your walls white, then follow these guidelines: If they aren't dirty and haven't been painted before, paint them with an oil-based primer; if they've been painted before and are in good condition (no holes or cracks), paint them with an oil-based primer; if they've been painted before and need repairs (holes or crevices), strip existing paint off before applying primer; clean any dirt or grease off with a damp sponge or cloth dampened in lukewarm water, rinse with clear water and let dry completely; finally, apply your primer. ## What is primer made of? Primer is made of a thin mix of two parts paint and one part thinner. It's important that you buy the right type; most wall primers are latex paint with water as their thinner, but some may be acrylic (a mix of polymer and water) or oil (just like regular paint but uses mineral spirits in place of water). Oil-based primer needs to have a bit more volatile substance, mineral spirits, than regular paint so it can dry entirely through evaporation over time. That's why it isn't recommended for areas where moisture tends to gather. If this will be a problem, get an oil-free primer instead. There are other types of primer available for specific purposes. One is "kraft" primer, an oil-based product that has the consistency of peanut butter and is used as a sealer before painting plaster or masonry walls. Another type, known as "impregnator" primer, is also recommended for unprimed plaster and masonry surfaces; it's designed to penetrate these porous materials and prevent bleed-through of dye and pigment from paint coats applied above it. ## Is there another way to prepare walls? Scrubbing your walls with a detergent may seem like a good idea if you're trying to get them really clean, but this can affect paint's adhesion. Instead, go over them lightly with fine steel wool (grade #0000) dipped in mineral spirits and immediately wipe it and the steel wool off with a cloth dampened in mineral spirits. This will remove any remaining dirt or grease without stripping away primer. If renovating an older home, make sure you take caution as lead was a feature in many older paints. For more information, take a look at the [Department of Environment website](https://www.awe.gov.au/environment/protection/chemicals-management/lead/lead-in-house-paint).

How to Prepare Concrete for Painting

How to Prepare Concrete for Painting

Concrete is porous and paint doesn't adhere well. To ensure good adhesion, the concrete surface must be sealed. This is a relatively simple and inexpensive task that can be done at home or on our own with the help of some products that are available in stores. When preparing concrete it's also very important to clean the concrete floor with rubber gloves from any grease and dust particles before applying any sealer. For proper preparation of the concrete floor for painting you need the following materials. ## Things you need to prepare concrete for painting - Wire brush - Sandpaper (medium grain) - Water hose - Bucket and rubber gloves - Rags and sponge - Screwdriver and putty knife - Paint roller and pan or brushes and rollers. You can choose between oil base paint or water-based paint, but always chose paints made specifically for outside use. - Water sealer or concrete paint - Rubber gloves - Stiff bristle broom ### Prepare concrete for painting The first step to prepare concrete for painting is wire brushing or using a pressure washer to wash off any dust, dirt, or debris that are present on the concrete dry surface. Make sure you have cleaned it up properly before moving to the next step. If some parts are covered with existing paint, old paint, grease, or oil stains, then use a fresh water hose, power washer, or a heavy-duty concrete degreaser or high-pressure cleaner provided by most homeowners to clean them out properly and leave it to paint dry for a day before continuing with the rest of the steps with safety goggles, masking tape and adequate time. ### Use medium-grain sandpaper Use medium-grain sandpaper (120 grit) for the wall and edges, wet it thoroughly with clean water and debris, and go over all the cleaned areas with this sandpaper until you completely remove any gloss from these areas. After this, make sure to wash the concrete floor for any sand residue with water as in plastic watering. ### Repeat For the best result it's recommended to do this step twice while you prepare your concrete for painting, so for the first time pass over it using medium grain sandpaper (120 grit), wait until all the residues and trapped moisture are removed then wet it thoroughly with water again and go over the previously cleaned areas once more, but this time use fine-grain sandpaper (180 grit). Make sure there isn't any gloss on these areas after you're done. ### Use a knife If necessary, use a putty knife or scraper to remove any oil residue that might be present on some of these areas. After removing them make sure you clean the concrete floor with a pressure wash before continuing with the rest of the steps. ### Leave to dry Use a damp rag or sponge to wipe off any remaining dust from the concrete. The surface must be completely dry and free of any grease or sand residue. ### Apply sealer You can successfully paint concrete surface/floor by applying the first coat of water-based sealer over the entire prepared concrete floor area, letting it dry completely for 24 hours before beginning with the next step. Make sure you choose a sealer that's made specifically for outside use because these products contain ultraviolet filter agents that protect them from deterioration caused by exposure to direct sunlight and moisture. ### Prime the surface If your sealer is specifically formulated or oil-based then wait until it dries out completely and apply a second coat of acrylic latex primer over the painted surface using a brush, roller, or spray gun. This should be applied very thin and all residue should be removed as you go. ### Paint your concrete After the primer is completely dry, paint concrete by applying your final coat of paint using a brush or roller. If you choose to use a spray gun then apply a few coats of paint instead of just one heavy coat. Avoid going over areas that have been previously painted because it will affect the adhesion and quality of the paint's finish and etching solution. Also, avoid [using glossy paints](/guides/painters/high-gloss-paint-vs-low-gloss-paint) on these areas because they tend to peel off easily when exposed to sunlight and humidity so be careful with what kind of paint you use for this step as it could create a boring shade. ## Do you need to prepare the concrete surface before painting? Yes, you do need to prepare concrete for painting before you apply the first coat. In addition to that, it's highly recommended to clean the area properly for any stains or grease with clean water before your prepare concrete, from any dirt and dust particles with a heavy-duty concrete degreaser before applying any sealer. These surface contaminants can affect the adhesion of paint so they should be cleaned thoroughly. Also, make sure there are no oil residues on the surface after you clean it because these types of paint peel off more easily when they're applied over concrete that has oily residue. ## How do you get paint to stick to concrete? There are 2 ways to make paint stick properly to concrete. One of them is to prepare concrete for painting by applying a coat of water-based sealer over the entire surface before painting it with any kind of paint. This type of sealer has an acrylic base that provides easy adhesion for various kinds of paints, but they're only suitable for interior use because they contain solvents that can damage some types of objects if not used carefully. Also, this type of sealer is not resistant to sun exposure and moisture so they should be reapplied every 6-12 months on exterior concrete surfaces and bare concrete surfaces depending on how often you use the area where they've been applied. It's a little different to [repainting the walls in your home](/guides/painters/how-long-between-coats-of-paint). ## Do I need to acid wash the concrete floor before painting? No, you don't need to acid etch your concrete floor before a paint job. Deep-cleaning processes such as using muriatic acid are necessary for older and more porous types of surfaces because they remove any dirt or residue that might remain on them. However, this method is not suitable for seal coating or when it comes to areas where the surface has been previously painted because acid washing removes all its previous coats of paint which weakens its adherence attributes If you have painted over an oily surface or have oil stains then make sure to sand it down with sandpaper to clean away any oil residue. It's also recommended to use a primer coating over these areas for better adhesion purposes because primers provide a strong base for paints. ## When do I need to apply a primer coat to concrete paint? Primer coats should be used whenever any type of paint is required on nonporous surfaces, especially if their texture is rough or porous then you won't get good adhesion without applying a primer coat, or at least you'll get poor results that are prone to flaking and peeling off after some time. Without a primer you won't be able to accurately estimate [how much paint you will need](/guides/painters/how-much-paint-do-i-need) for a good finish. ## What kind of paint do you use on concrete floors? Below is a list of the best paints for concrete floors. ### Water-based paint These types of paints are suitable for interior surfaces because they have low toxicity levels so they don't affect indoor air quality when used inside homes, offices, and schools. They also give you more time to clean up spills compared to other types of concrete paint so it's easier to work with them on most surfaces. ### Latex paint Latex-based paints are more suitable for smooth and nonporous exterior surfaces and bare concrete surfaces because they don't accumulate dust particles that easily. They're also inexpensive, easy to use, and durable which makes them perfect for both interior and exterior surfaces which is why they're one of the most popular types of paint used today. Painting such surfaces is a skill in itself, which you can get more information on at [training.gov.au](https://training.gov.au/Training/Details/CPCCPD3035).

Cost to Paint Exterior of a House

Cost to Paint Exterior of a House

Painting the exterior of your house requires more attention to keep the total costs within your budget. People paint their homes for different purposes. For example, improving look and street appeal or maintaining to ensure your property is protected from the elements. Generally, painters charge per square metre, and the cost ranges from between $15 to $45 for brick walls and $12 to $60 for wooden surfaces. The total cost of painting the entire exterior largely depends on the style and size of your home but can be anywhere between $500 and $25,000. The cost to paint the exterior of smaller Victorian homes can be around $12,000 to $18,000 and a Queenslander style building may cost between $10,000 to $25,000. If your walls have a brick veneer, you will be paying between $4,000 to $7,000. If it is a brick home, you may rarely need to paint outside. But it can be beneficial to apply a coat of render to give it a fresh look every few years. However, if it is a weatherboard house, saving it from weather is necessary. ## Is it expensive to paint outside of the house? Painting the outside of a home is not something people do every year. It is often considered expensive home improvement work. Several aspects like the region where your property is situated, surrounding environment and climate decide if you need to apply a new layer of the paint. Apart from this, the previous job quality, cladding and stucco and seasonal effects play a role in the life of the paint, especially if you are living in a coastal area. In this case, you may want to paint a house at least every seven years. On the other hand, if you live in an area where weather conditions stay mild most of the time, your [exterior paint](/guides/painters/how-much-to-paint-a-house) would last up to 15 or 20 years. Thus your home may need a new coat of paint in 7 years or may even last up to two decades. With such a long life span, the cost to paint a house exterior can not be as expensive as it seems. Moreover, you will be paying for what you get done, and if your home's exterior is in good condition, the expense will be relatively low. ## How do you price exterior painting? Exterior painting is a significant part of home improvement. Estimate the cost of painting by determining the area to be painted by calculating the total square metres of your home. Get an experienced painter to inspect your walls as they can tell you which areas need more attention depending on the factors like the location, condition of the previous layer of the paint and topography. Ask for the paint type and per litre price. Paint comes in different qualities and compositions for various surfaces. You may need more than two coats. Painters generally give a quote on a per metre basis. You can calculate the total expense by multiplying the charge per metre by the total number of square metres of your home’s outside surfaces. Also, ask how many people will be working on this job and if they would need any extra materials or arrangements. ## Does painting outside of a house add value? When you take up a significant home improvement and painting project it can be a costly, but it will boost the value and longevity of your property. Painting your home’s outside surfaces will not only add beauty to the appearance but also add value to your property. ## How much does it cost to paint a weatherboard house? If you have a weatherboard house, you need to perform maintenance every few years, especially painting inside and outside. As per the average quotes by painters in 2020, it takes; - $7000 - $12,000 for a small single-storey tenement in good condition. - $10,000 - $20,000 for a double-storey building in good state. Painting is vital to keeping the walls look lively for many years. Waiting for a long time may make timber rotten, resulting in a budget blowout. If your property is in a region with harsh weather conditions, you may end up paying high repairing and replacement charges to a carpenter. ## How much does it cost to paint the exterior of a three-bedroom house? If your property has been maintained well and is in good condition, you will save on preparation work, time, [amount of paint](/guides/painters/how-much-paint-do-i-need) and painting cost. Also, you have to take timely decision to avoid any additional cost harsh weather and delay may cause. The costs may be between $5,500 to $8,000 if you have a two-storey house with three bedrooms. If it is a weatherboard home of two-storey, the expense will be relatively higher. If it is in a good situation, you may get the exterior painting task done at about $10,000. However, if the weather has taken a toll on the outer surfaces and the timber or wood is rotten, you may need repairs and pressure cleaning as part of the preparation before your painters can paint them. In this situation, your total costs maybe $20,000 or more. Ask a painter to inspect your house to get an accurate quote and make prep work easy. ## How much does it cost to paint exterior of house per square metre? Applying beautiful colours on the exterior of your building gives you both satisfaction for its look and feel and additional safety to the walls. House painting may be costly, but you would still want to do it every few years given its benefits. Further, if you are looking to improve your home from inside and outside with many elements, including colours, it will be helpful to know the cost and aspects that affect it. Once you have sorted at the street appeal of your home, why not [paint the interior?](/guides/painters/how-much-does-it-cost-to-paint-a-house-interior-professionally) To start with, you will need to get an estimate based on an inspection by a painter. They generally provide total labour costs based on per square metre charge that is; - $15 to $45 per square metre area to paint an exterior of a brick house. - $12 to $60 per square metre for the exterior painting of a house that has wooden surfaces. Next comes the material like paint, primer, paint rollers, roller covers, Stir sticks, painters tape, small paintbrushes, and paint trays. An expert painter can give you an almost accurate estimate of the paint and other things required. Once you have these details, you can get a per square metre price by dividing the total cost (for labour and material) by the number of square metres.

How to Paint Laminate

How to Paint Laminate

As with all your DIY projects, proper planning and knowledge is crucial. If your furniture, cabinet doors or cupboards require some sprucing up, adding a fresh coat of paint may be just the thing you need. It is important to know if your furniture is solid wood, veneer, or laminate as this will affect the painting process. Laminate furniture is one that has a thin layer of plastic covering a substrate of particle board or plywood. It is not real wood though many have different wood grain patterns printed on the surface to mimic the wood look. This is slightly different from wood veneer furniture where the layer on top is not plastic but a thin layer of real wood. Laminate furniture is they easy to clean and resistant to staining. To have your paint stick to laminate, cleaning, sanding and priming is required before adding the first coat of paint. ## How do you get paint to stick to laminate? Unlike solid wood that can absorb the paint into its pores, laminate is non-porous and smooth with a gloss finish that prevents the paint from adhering easily. It is prepared [similar to glass.](/guides/painters/how-to-paint-glass) If proper prep work is not done, you may find the paint bubbling, scratching or stripping. However, with the right preparation painting laminate cabinets can be done with much success. Here are a few tips on how to paint laminate cabinets successfully. ### Sanding This is an excellent way to prepare your laminate kitchen cabinets and cupboard doors for painting. This helps to roughen the slick surface of your countertops and will ensure that your paint job lasts. ### Priming Adding thin coats of an appropriate primer will provide the adhesive layer you need to have your paint stick. You need to choose a primer specifically made for laminate. An oil-based primer that has bonded features will be the best option for priming. Work with undamaged surfaces - For the best results, work with laminate surfaces that are not cracked, peeling or are damaged as this can influence the appearance of your final product. If you have extra laminate and a patch, you could use wood glue to re-attach the extra at the point of the patch and then fill any gap with the wood filler and smooth it over before you start painting. Best results are on a smooth surface as this attempt at repair may not work great in every situation. ## What paint will stick to laminate? Due to the glossy nature of laminate, proper preparation of the furniture that you want to paint is required for success. Chalk paint will stick to the laminate surface, even when added directly and works great as a primer. If you were to use it as both the primer and for painting, many coats would be required. The best option for painting laminate furniture is acrylic paint or oil-based paint. Satin or semi-gloss enamel paint is another type of paint that will yield good results and provide you with that satin finish. Even water-based latex paint can be used once the surface has been properly prepared. Do bear in mind that when painting, [a second coat](/guides/painters/how-much-paint-do-i-need) may be required or multiple coats depending on what is used. For painting, paint brushes, paint tray, foam rollers or paint sprayer, drop cloth or cardboard will be necessary. The foam roller or sprayer will help to prevent brush strokes, thus giving your DIY project a clean factory finish. ## Can you paint laminate furniture without sanding it? Laminate furniture can be successfully painted without sanding. However, to have the paint sticking to the furniture without the bubbles, peeling and scratches, you will need to use a primer. This is best applied using a foam roller. For your cabinet door or glass doors with laminate frames, a soft paint brush should be used to get the primer into the creases and crevices. There are many different types of primers available but it is important to choose a primer that was made for smooth surfaces. The best type of primer in this situation would be a bonding primer as this will tightly grip the laminate and promote adhesion of the paint you want to add. With this type of primer, sanding will not be necessary. Chalk paint will stick to anything and so can also be used as a primer for your DIY. Inspect your work in between coats regardless of the primer used and gently sand any raised brush marks before the top coat is added for a smooth finish. ## How do I sand laminate furniture before painting? When sanding your base cabinets, protect yourself by wearing safety glasses. Begin with a clean surface by using a damp cloth to help you. This should be a soft, lint-free microfibre cloth that has been dampened in warm water. Use a solution of water and vinegar or a TSP solution or sugar soap if there is any grease or stains on the surface. During packaging and manufacturing, oil is sometimes used and so some amount of oil may be present. Next, allow the surface to dry completely being sure to remove any residue of chemical cleaner you may have used. Use 150-220 grit sandpaper or an electric sander to lightly sand the furniture in a circular motion. This process requires light sanding as the thin piece of laminate can be torn off if you were to over sand or be too aggressive in the process. If this were to happen, the engineered wood or MDF layer beneath the laminate top would be exposed and you would see the difference when you are finish painting. So use a light sand process to just remove the glossy finish of the surface. When you have totally sanded the surface it will appear dull, but this is what you want to form the perfect foundation for a durable finish.

What is gouache paint?

What is gouache paint?

Gouache paint, pronounced 'gwash' descends from watercolours but has a twist to it. Gouache paint (pronounced gwash) also exists and has been around for centuries! Interestingly, gouache paint descends from watercolours but has a twist to it. Unlike watercolour pigment, gouache paint is much thicker, opaquer, and is better for deeper hues. Plus, it has a very clean finish that works well with paintings and photographs as well. This opaque paint, which dates back to the 9th century, is now making a comeback. While it has taken a backseat for a while, contemporary, traditional artists have used it to intensify hues, preferring it over acrylic paint and watercolour. Gouache paint borrows from acrylic paints and watercolour paints, taking the best from both worlds and resulting in a luminous hue. As the gouache dries, it gives off a matte finish that does not reflect light, unlike other paints. ## What is the difference between watercolour and gouache? You can use gouache as you would watercolour and artists have used it on watercolour papers and other areas they can use watercoluor. Additionally, you can use your watercolour brushes with gouache without ruining them, which does not hold when you bring acrylic paint into the mix. Gouache is water soluble like the typical watercolours and you can clean up nicely once you’re done. And if you need to correct something in your painting, you can wet the gouache and get back to work. As far as similarities go, they are many. What are the differences? It comes down to the structure. Gouache is an opaque water-based paint that dries faster and darker than watercolour paint. It relies on gum arabic as its binding agent, as is the case with watercolour. Acrylic paint, on the other hand, relies on polymer. Gouache pigment particles are more tightly packed in the medium and are also much bigger. It makes it much harder for light to pass through, making the paint more opaque than your standard watercolour. Some manufacturers also add some white chalk additives to make the gouache paints even more opaque. Artists who want more accuracy in their work go for gouache and those who are after luminosity go for watercolour artwork. If you want to use gouache for transparent work, all you need is to add some more water to the paint and voila, it’s less opaque! ## What is gouache paint used for? Using gouache is quite easy to master, and a good material to [start painting with](/guides/art-therapy/what-to-paint). You can use it as it is or add more water to create a more transparent outcome. Typically, it works for: ### Staining This technique enables you to cover a section of the white paper with paint to act as a base for your art piece. All you need is to mix the paint with some water to get a thin consistency. When working with works of nature such as fields, such staining is essential. ### Layering When you want to create a rich undertone, use the gouache with little water to make it a bit wet. Say, for example, you want to add a tree to a picture, this technique works in your favour. ### Wetting To add abstract items, you can dampen the paper first before painting it with gouache. As it dries, the background will become more apparent and you can enhance the object with your brush. ### Dry brushing An easy way to add more dimension to your work is to use semi-wet gouache and brush most of it off in a separate paper. When you have some paint left on the brush, briskly brush this over the artwork, creating texture in the background. ### Shadowing You will require mixing gouache with varying water levels to achieve several shades of the colour with varying transparency levels. As you slowly work these onto the paper using a dry brush, you will achieve deep shadows. You can also use the paint for the blooming technique, achieving a gradient, and mixed media effects with other paints. Gouache is very versatile and works almost like watercolour, with the main disparity being the after effects. Thus, you can use it on any surface you would with a watercolour palette. Even the techniques do not change much, and as you layer the paint, the matte look will be more evident. When you paint gouache mixed with water, you will notice that the painting has a more transparent result, even with white pigment. ## The history of gouache Gouache is not the first water-based medium, as such media have been around for centuries. However, it is not until the 18th century that this paint got its name. In ancient Egypt people would combine honey and other mediums to create gouache. The same holds in Persia, where early paintings show that gouache was in use. Art by Albrecht Durer from the 15th century and Francois Boucher in the 18th century depict as much. The use of gouache with mixed media such as oils and inks is also shown, pointing to this medium’s flexibility. Even Matisse used gouache when he painted the ‘Blue Nudes’ series. Following its recognition in the 18th century, the paint became more commercially available thanks to its versatile choice of binder. It was used to create comic books, animations, and other artwork that relied on precision. Its fast-drying nature and non-luminous look made it a favourite. Additionally, it was easy to correct mistakes made on paintings which proved important for illustrators and designers. Even now, with cheaper options coming into the market, this paint still holds its own and is expected to grow even more popular as people search for versatile options. You, too, can join this quest for a translucent colour that enhances creative paintings. ## Is gouache good for beginners? Getting started with gouache is quite easy and fun. As a beginner, it might be best to first work with student-grade options before moving on to the professional paints. But if you want to get a sense of quality gouache paint, go with the artist-grade options. Please note that this will be the pricier option. You will also need to get some paintbrushes, a paper or illustration board, a palette, some rags, pencils, and holding cups. Start by applying some gouache to the paper to see if you may need to add more water. Allow the paint to dry to see the results when dry before making your decision. Where water is necessary, work with about two drops to give you a creamy rather than watery texture. If everything seems okay, you can start mixing your gouache colours on the tray to see what you like the most. And with gouache, you can relax because you are free to change the outcome if you do not like it. Each time you err, you can rework it and people will think you painted your work without any hitches. That’s the beauty of gouache! From dry brushing to texturing to shadowing, there's a lot you can use gouache to do. Get creative and join the many beginners who have embraced this medium to create translucent paintings.

How to Paint Glass

How to Paint Glass

If you are looking for an easy medium to work with, or painting glass with children, use glass paint markers and pens. Painting on glass is an ideal cafty project whether you want to have fun with your kids, create a new décor in your home, or just love the art and creative outlet. You need a little guidance to learn how to paint glass and a little practice to master this skill. The approach to painting glass differs from painting on any other material. ## What kind of paint will stay on glass? You have several options for glass painting, and most are with an acrylic base. ### Acrylic enamel This is the best of water-based acrylic paints and oil-based enamel paint. Acrylic enamel paints form a hard coating that helps your paint stay in place. ### Acrylic glass paint This type is pure acrylic-based and differs from your standard acrylics. Standard acrylics do not adhere easily to the smooth surface of the glass. Acrylics, which are specially designed for glass and tiles, have chemical additives. These chemical additives allow the acrylic base to adhere to a non-porous surface. ### Solvent-based paint Oil-based paints bond to the glass better than water-based paints, as this type of paint contains high levels of organic compounds. But these paints are much more toxic and harder to clean. If you are looking for an easy medium to work with, also if you are painting glass with children, consider glass paint markers and pens. These markers and pens are available in different colours and sizes. Use oil-based markers for greater durability. Solvent-based paints are great but not recommend if you are painting with children or have limited ventilation. ## What is the best paint for glass painting? The best types of paint for paint on glass are those that are specially formulated for the use of glass. Enamels and acrylic are the most common types of paints and also [handy on tiles.](/guides/painters/how-to-paint-tiles) If you need acrylic paint, the expert series in Amsterdam has great choice. They are high-quality paints and they stick well on glass surfaces. Acrylic paints are water-based and enamel is oil-based. Acrylic paint keeps colour - Enamel turns yellow. Enamel paint has a shine and acrylic paint is a matte colour. Acrylic paint lasts relatively shorter than enamel. The best choice of paint for glass painting is acrylic enamel paint. This is a combination of the advantages of both acrylic paint and enamel paint. It is easier to work with, produces lighter colours and lasts longer. ## Waterproofing paint on glass It is necessary to treat the surface and provide a waterproof layer because acrylic paint can be washed away if the paint is still wet. ### Here's how to waterproof paint on glass - Choose a sealant of your choice, spray-on or brush-on. - Choose a well-ventilated workplace, but it is best to do the process outdoors because many seals have toxic fumes. - Spray your sealant on the painted glass if you are using a spray can. Do this at a distance of 12 inches from your surface. Cover the whole area, balanced, without holding a certain area. - After doing this, leave the layer to dry for 15 minutes (the drying time is written on the manual and depends on the type of seal). - Repeat the spraying twice more. You should have three flat layers of sealant. - Allow your product to dry completely for 24 hours. ## How do you prepare glass for painting? First, grab the below materials - Clean drinking glass or glass vase, on which you will paint. - Alcohol or white vinegar (for wiping). - Mild soap, warm water and paper towels. - Brush basin and soft natural bristle brushes. - Latex gloves. First, you need to remove dirt, grease, and dust from the entire glass surface, so the first thing you need to do is wash the glass thoroughly in warm soapy water. After washing, rinse and leave to dry completely. You should not leave soap on the work surface. To be sure, wipe the glass jar with a damp paper towel by rubbing alcohol or white vinegar. After that, leave it aside in the air again for 15 minutes, to dry. Now, your glass is ready for paint.

How much paint to paint a bedroom?

How much paint to paint a bedroom?

Before deciding on which paint to choose for your bedroom, you should consider paint gloss level, also known as sheen. A highly porous plane will absorb additional paint and impact on how much paint you need. To find total area, find the perimeter by adding the length of each wall then multiply the perimeter by height. For instance, an average guest room can have a wall diameter of 16 metres and 3 metres height. The number of doors and windows is one each. Allocate 2 square metres for the door and 1.5 square metre for the window. Total paintable area will be: 16 x 3 = 48 2 + 1.5= 3.5 Therefore, total area = 48 - 3.5 44.5 square metres. Generally, 1L paint covers 6.5 square metres. The required paint quantity will be, 44.5/6.5 = 6.846 litres. For this case, buy 7 litres to cater for retouching if there will be any. If you need to apply two coats, then you need to buy 14 litres. ## What area does 5 litres of paint cover? Different manufacturers pack and sell paint in different quantities - from as low as 500ml to as high as 20L. One of the most common sizes is the 5L. The size painted will depend on porosity and the [number of coats needed.](/guides/painters/how-much-paint-do-i-need) If the surface is highly porous it will require more paint. More number of coats means more paint. In turn, the 5 litres will only cover a small space. The type and the brand will also affect the spread of the 5 litres. Different type and brands have different spreads. Some will cover a large surface while others will cover a small surface. Also, the nature of the painting will dictate the area covered. If it's the first time painting, then it will require more paint hence the 5 litres will only cover a small space. However, if the wall is being repainted, then less paint is needed and more surface will be covered. On this account, the surface covered by 5 litres can be found by: If 1L covers 6.5sqm then 5 litres will be 5 x 6.5 = 32.5 square metres. ## How much paint is needed for a 12ft x 12ft room? To find out the quantity of paint you need for a 12 by 12 ft room, you need to find out the total paintable area. The ceiling standard height is nine feet. To find the total wall size, take the perimeter times the height. Perimeter is found by adding the length of the walls. In this case perimeter will be 12+12+12+12=48ft. Total surface area will be 48 x 9=432 square feet. Generally, one gallon has an estimated coverage of 400 square feet. What about 432 square feet? In this case, we divide 432 by 400. So 432/400 =1.08 gallons. If two coats are required, then you will have to buy 2.16 gallons. ## What paint should I use in a bedroom? Before deciding on which paint to choose for your bedroom, you should consider paint gloss level also known as sheen. A more shiny wall is as a result of high gloss which means how much light is reflected in the paint. Paints with high gloss will generally reflect lots of light as compared to paints with less gloss. There are different types of sheens that are almost suitable for all rooms. Flat sheen paints are more suitable for bedrooms since such rooms experience less traffic. Flat sheens are perfect for hiding wall imperfections and suitable for diffusing light. It is most suitable in new buildings and ceilings. Flat sheens indirectly reflect light which tends to hide any wall imperfections. ## What area does 4 litres of paint cover? If you are planning on [painting interior walls](/guides/painters/cost-to-paint-interior-of-house) or the ceiling you will need an emulsion paint. One litre of emulsion paint will cover 12 square per metre. Therefore, the size covered by 4L will be 4 x 12 = 48 squares per metre. The coverage of the 4L will be highly decided by the wall condition. With trim paint mainly used for doors, windows and surface undercoat, you will be able to cover 16 square metres per litre.

How to paint skirting board

How to paint skirting board

Skirting boards will enhance the look of any room and add extra grace to the interior as well. Painting skirting boards seems like a simple job but in reality it’s time-consuming and tiring. Prepare yourself for a lot of crouching and crawling. The process of painting skirting boards starts with the selection of your favourite colour. A two-inch (5cm) brush is ideal for most skirting boards so you’ll be okay if you go with that. You need to clean the boards before painting so that all the dirt comes off. You can clean the boards with soap and water at a mild temperature. Now just need to cover up the edges of the floor with masking tape. This will help you get clean paint lines and a professional look. ## Do you paint walls or skirting boards first? It’s a tricky affair, one often [left to the professionals](/guides/painters/how-much-does-it-cost-to-paint-a-house-interior-professionally), but there is a certain order that you can adopt to yield good paint finishing and results. Usually, the best way is to start the paint from the ceiling, then come down the walls and skirting boards in the end. The most recommended method is to start painting the top things first and then come down along the walls and windows with skirting boards in the end. It will prove to be a more comfortable and effective method for the majority of people. Always try to follow the natural and easy process to paint your skirting boards. By painting your skirting boards in the end you can avoid the paint dripping from walls or ceiling. ## How do you paint skirting boards without getting paint on the wall? There is a major concern for people to avoid getting paint over their walls while painting their skirting boards. Proper finishing of paint on skirting boards is required to get an elegant and flawless look. Besides a careful approach, you can use masking tape to ensure the protection of walls against any stains of paint. If you have painted the walls first, wait for them to dry completely. Now you can apply the 'low-tack' masking/painter's tape across the cut line to secure your walls from paint strokes. Remember to use a 'low tack' masking tape for this purpose. Use of any other tape will completely the paint, and you will need to repeat the process again. Low tack masking tape can easily be applied and removed to get safe and better paint results. Thoroughly apply the masking tape across all the walls above the skirting board. Now, you are ready to paint your skirting boards with full protection. The tape will help you professionally paint your skirting boards and get the dreamy finish of your choice. ## How do you paint over gloss skirting boards? De-gloss the paint with sanding paper and clean the boards with a solution. Let it dry and after that apply a primer on the boards and after it dries, start painting the boards. Or you can wipe down the boards with a sugar soap and water solution and let them dry thoroughly. After that, apply one coat of a super grip primer. After letting it dry, just start painting the boards normally with the paint of your choice. Both of these ways will make sure that the paint doesn’t look unprofessional. ## How to paint skirting boards with the carpet down Carpeted rooms require extra care and effort when painting skirting boards. The dirt and lint from the carpet and easily interfere with your dream finish and the paint can easily drop on the carpets and ruin them. Vacuuming the floor will help to eliminate most of the dirt and lint can become a major problem. However, there’s an easy fix to that - you can either pull up the carpet from the edges before you start painting so that the carpet doesn’t interfere with your strokes. If your carpet is glued to the floor, then you can use masking tape to cover the edges of a carpet. Just make sure to vacuum the carpets before you apply the tape. If it's not possible for you. Don’t worry, there is another option for you to fix it. You can place a cardboard piece between the skirting boards and the carpet and move that piece along with the paint. Make sure to have several pieces of cardboard ready because the pieces can get dirty from the paint drips, and can eventually ruin your carpet. These simple fixes will make sure that your carpet stays in mint condition and your paint looks professional.

How to paint a cornice

How to paint a cornice

Ceilings are often overlooked for their importance in setting up the look of interior spaces. Cornices are a decorative addition to a space that separates the ceiling from the wall and goes around the entire room. They are widely used for a smooth transition and are a sure way of adding character to the entire setting. An elegantly styled cornice with the right tone can do wonders to the whole design without you doing much. Similarly, cornices are great for adding aesthetics to a wall. If your cornice material is absorbent like polystyrene, then you will need to do several coats on it. For other materials like paper coated plaster, there won't be a need for many coats but you will need a primer for a good finish. Nowadays polymer cornices usually come with a primer added on which only needs to be finished off with a nice top coat of paint. Get one of these if you're not into extra work. ## What kind of paint do you use on cornice? The final look always comes with the right choice of paint and your diy expertise. While there isn't much we can say about your brush stroke prowess, the choice of paint and matching it to the cornice really matters. For cornices, always go for a non-reflective paint type which will absorb the design and make it less intense. Flat or matt acrylic paints work best with not just cornices but also walls and roofs in general. Glossy enamel paints have the opposite effect, they enhance and intensify the details and are good for intricate details that need highlighting. Another benefit of using matt acrylic paints is that they remove imperfections and glare, giving off a smooth look when contrasting with the ceiling paint. While enamel is sure to give a superior finish, it is not a very [budget-friendly paint.](/guides/painters/cost-to-paint-interior-of-house) Also, the lighter enamels can become duller as they age. On the other hand, acrylic paints are not only durable, easy to maintain but also quite budget friendly. They are an eco-friendly option and do not have as much odour. They can be applied easily even if you're a beginner and do not fade or dull out. Unlike enamel paints they give off a plastic plaster look much like a shine. ## Can you paint cornices with a roller? If you are wondering how to paint a cornice, rollers are a straight no-no. A roll is intended for walls or areas that are smooth. Since they do not have an indented structure they are not meant for the areas that are irregular or have crevices. So, using a roller for painting a cornice will not work because the roller will mess up the wall, the ceiling and the cornice. It will not go into the crevices of the design simply because it is not designed for such areas. Using a small brush will always work better. With a brush that is not too big you will achieve the desired look with the right strokes. Tackle little bits of the area as you move towards the rest of the cornice. When you dip the brush into the paint can make sure it is only a third of the way in. This will [save on paint](/guides/painters/how-much-paint-do-i-need) and ensures just the right amount of paint sticks to the brush, giving the best results. ## Do I paint the cornice the same colour as the ceiling? This can make or break the aura of the whole layout. Traditionally white was a common choice. You can always enhance the height of a wall by keeping both the colours of it and that of the cornice the same. This has an amazing heightening effect. If you're interested in enhancing the height even further, involve the skirting as well. Even if you're not looking to create this effect, leaving out the cornice without matching it to the wall will never give off an elegant or modern look. Cornices that are left out always look a little undone no matter how elegantly they are styled. ## How do you prepare cornice for painting? There are certain tips that you can follow to prepare your cornice for painting. Sticking through each step and technique will ensure that you get the best results. Make preparations beforehand and gather all your materials like tape and paint. Protect your floor and any furniture in the room with plastic sheets so not a drop falls on them. Begin by inspecting your cornices for any damages or possible cracks. If you see some, fill them out, because the look will never look good otherwise. Next, use a soft cloth to dust off any dirt from them. This is to make sure that the primer and the paint sit well. Use masking tape and line over and under the coving to have an even finish. It will keep off all the paint from messing up the ceiling. After that put in the primer using a small brush that easily fits all the crevices and edges. Use a tray to brush off the excess. Make sure to wait for it to dry for at least 2 hours. Note that not all crevices require a primer, especially with contemporary materials. Finally, repeat the strokes on the surface. This time with paint with a similar kind of brush ensuring all indents are filled. Let that dry for 2 hours and inspect if there is a need for another coat.

How to paint aluminium

How to paint aluminium

Painting Aluminium and metal surfaces, in general, require a slightly different approach compared to wood and timber. Painting aluminium and metal surfaces requires a slightly different approach compared to painting on wood and timber. Aluminium requires elaborate surface preparation. Aluminium does not rust like steel and iron. Rather it naturally oxides forming an invisible thin film of aluminium oxide. So that paint can adhere to the surface, this oxidation layer must come off. To paint aluminium there are surface preparation steps to be followed thoroughly. Surface preparation commences with cleaning the surface of dust, dirt, oil, debris, grease and anything else that bids itself on open surfaces. Sanding of the surface gives it a texture where primer and paint can adhere to. After sanding is complete, apply an etching primer before undertaking the paint job. Surface preparation is the most critical step when painting aluminium. Well prepared surfaces ensure optimal adhesion of paint to the metal surface. Good adhesion prevents premature chipping and unwanted peeling of paint. With minimal peeling, the aluminium walls, furnishings or furniture will have longer life spans saving you a replacement and repainting money. When surface preparation thorough, you can attain a smoother finish. ## What kind of paint do you use on aluminium? Aluminium is a metal that is difficult to paint. However, advances in paint technology have made painting aluminium easier, with good paint job results too. Nowadays, it is not uncommon to find products labelled Aluminium paint. Practice however dictates that you still have to clean sand and apply primer before painting Aluminium. The application of primers is a critical step before painting. The active ingredient in an etching primer will directly affect the paint applied on the aluminium surface. Experts recommend that when an oil based primer is used, an oil based paint be used too. Similarly, where latex primers are used, latex paints be used to paint. Take note of the fact that latex-based products have ammonia as an ingredient that can react with aluminium. The paint applied also depends on the condition where the aluminium item or furnishing is used. If the item is for outdoor use, matt paints are ideal because they are less reflective. Sanding scratches, sandpaper lines and dents are less visible. This paint also withstands the excesses of hot conditions. Gloss paints are expressive and reveal the fine visible details. They are therefore suited for indoors and cooler weather conditions. If you are not a DIY person, seek professional services. ## Can you paint straight onto aluminium? Surface preparation is the most important part of painting aluminium. By its nature aluminium requires more preparation than other metals. This detailed preparation does not allow you to paint directly onto the aluminium though. After cleaning and sanding thoroughly, the surface needs priming. With aluminium, do not make the mistake of using regular metal paint primer. Use the self etching primer. The self etching primer is available at the auto accessories shop or a home improvement store near you. Search online for a store near you or order online. Read the etching primer manufacturer’s manual or instructions comprehensively. Before spraying the primer, as a rule of the thumb, shake the can vigorously for at least 45-60 seconds. Apply the primer by holding the primer can 8 inches (20cm) away from the surface. Evenly apply a light coating. Whether you choose side-to-side or up and down spray motion, ensure that the primer coat is uniform. Allow 5-minute intervals between coats or as indicated on the product for curing and drying. Apply 3-4 layers of light coating adhering to waiting times. If necessary, sand the surfaces in between primer applications using fine-grit sandpaper. Only after priming can you directly paint onto the aluminium. ## How do you prepare aluminium for painting? Preparing aluminium surfaces for painting requires cleaning, sanding and priming. Firstly, protect yourself using personal protection equipment. It is recommended to have or purchase gloves, goggles and dust masks. 1 Cleaning. Aluminium surfaces will come in many types, shapes and forms. These can be exterior walls, doors and window sections, and aluminium furnishings or furniture. If the surface allows, apply water to wash away dirt, dust, debris, grease, soot and oil. For oily and greasy surfaces, add degreaser chemicals to the water. To clean and wipe the surfaces, use rags or cloths. Rinse surfaces well. Wait to air dry completely. 2 Sanding. Sanding involves smoothening the surface using rubbing materials like sandpaper, steel wire or brushes. Start with coarse grit sandpaper of the 80-100 grade. Follow on with medium coarse grit paper of the 200-300 range. To attain a smooth finish, use super fine-grit sandpaper like the 400 grade. Use clean dry rags to dust off the surface thoroughly. 3 Apply primer. After sanding, apply primer as discussed in the previous section. After priming, the surface is ready for painting. ## How do I spray paint aluminium? Painting aluminium can be done by use of a brush, rollers or spray painting techniques. Using a brush is cheap, easy to use but is time-consuming. A roller is faster than brushes. Use rollers that are the same size or smaller than surfaces to be painted. Spray painting is fast, especially for large aluminium surfaces. Cover areas that you do not want to paint before spray painting. Use masking tape or an ideal material. Set aside a place where you will do the spraying. It should be away from direct sunlight and wind. Check online for tips to create a DIY spray painting space. Paint and primer chemicals expel fumes that can be harmful. Wear protective gear and work in well-aerated places. Spray painting colours are available for any project you can think of. Just like the application of primer, spray paint will require several coats. Spray, wait for curing and drying. Apply as many coats as desired but always follow product guidelines. Applying a coat of enamel protects the paint job from fading, chipping and getting scratches. Apply 2 coats of enamel sealer. Allow recommended time for drying and curing. Just like paint and primer, follow the instructions given by the manufacturer of your enamel sealer. You can call, contact or engage a professional paint job service provider if you need one.

How to paint tiles

How to paint tiles

It's best to an epoxy paint in bathrooms and kitchens as it is highly resistant to day to day cleaning chemicals. For effective use on bathroom walls, floors and kitchen tiles, choose a two-part epoxy rather than an epoxy-ester base. ## How do you paint over tiles? For the best outcome the tile must be absolutely clean and dry before anything is applied on it. Make sure each tile surface is a little rough with the help of grit sandpaper then make sure that the surface is well cleaned with a microfibre cloth. You can even rough the surface with pumice. For effective adhesion with the top coat of the paint a primer is important. Clean up spills and spatters as you go. The moment you are done with applying the prime coat, let the coating dry overnight before applying the top coat. The tile paint will harden enough in a few days. ## Is painting tiles easy? Yes, painting your own tiles is an easy and affordable way to renovate. Although it does require some really good time and effort on your schedule, you'll give your setting a wonderfully unique look as well as save money while you're at it. You may even want to [paint the same colour on glass](/guides/painters/how-to-paint-glass) around the house. When all processes are properly done, ceramic painted tiles look great in almost any room. ## Can I paint shower tiles? Yes, anyone can paint shower tiles. When you are applying a paint on a tile, the grout and the tile will form one complete colour with no patches around it. A painted ceramic tile in the bathroom will need to be redone every now and then until the surfaces worn out. ### How can I paint shower tiles? It’s a normal scenario to see soap scum all over the bathroom that normally shows up when someone is taking a shower and this should be removed before you start to [paint your shower tiles.](/guides/painters/how-to-paint-the-bathroom-tiles-in-a-shower) Once you are done with cleaning the tiles in the shower, remove all kind of stains using grit sandpaper. Using the paint tape of your choice, try to tape it through the bathtub of your bathroom and make sure to tape over grout if you want. Remember to tape up across the wall in between the tile and grout sequentially and finally, tape off all windows. Once you are done with the coating, Let the paint dry for about an hour and repeat according to paint instructions. Removing the painter’s tape from any of the decorative areas is the last step to follow.

How Long Between Coats of Paint?

How Long Between Coats of Paint?

There are three factors involved in getting your timing right - paint type, temperature, and thickness. It is crucial to know the type of paint as varieties come with specific instructions and user guides. Some paints dry faster than others, some take time. Oil-based paints and water-based paints are the two broad divisions. | Type of paint | Estimated drying time | | -- | -- | | Primer | 30min - 1 hour 1-2hours before the next coat. | true | | Gloss | 1-1½ hours 2 hours before the next coat | true | | Semi-gloss | 1 hour 2 hours before the next coat | true | | Matte | 30mins - 1 hour 1-2 hours before the next coat | true | | Eggshell | 1 hour 2 hours before the next coat | true | ## What factors extend paint drying time? Temperature: Whether it is an interior or exterior painting, the temperature will impact the dry time. It is recommended to stick to the temperature guideline on the paint for optimal results. Please note that you can speed up the drying time either by getting a fan or heater. Your choice depends on your situation. Thickness: The thickness of the paint layers also influences the dry time. Sometimes, while ensuring that the initial colour on the wall is covered perfectly, a coat may end up becoming thick and as a result, takes a longer time than usual to dry. When painting, at least [two coats of paint](/guides/painters/how-much-paint-do-i-need) is recommended for better results. Reasons are; a coat on a wall is just like a sketch on paper i.e uncompleted, not full, or solid. Oftentimes, to get the colour you want, you have to apply 2 - 3 coats of pains. There are two reasons to stick to this recommendation. Durability: paints with 2 or more coats last longer than a single coat painting. Generally speaking, a new home with 2 or more coat painting lasts +10 years while a coat painting barely lasts 4 years before it starts fading or looking rough. Maintenance: The most time-consuming and tedious period is when applying the first coat. It is faster when painting the subsequent layers. This is because the first layer already fixes the cracks and holes while the successive layers are for fine-tuning the surface. ## How many coats of paint do I need? Applying just one coat of paint on a surface can be all you need when you are simply retouching an existing colour i.e. paint retouching. ### Two coats Available colour is a determining factor. For instance, a darker colour over an existing lighter colour should take no more than two coats before it looks smooth and perfect. Some darker colours take more than two coats, therefore, it is important to do the necessary research before painting to prevent unpredictable outcomes. ### Three coats or more Sometimes when painting a light colour over an existing dark colour, it takes more than two coats to get the job done perfectly. ### Dry time This is the time after the first coat. It is important to take your time and let the first coat dry completely before applying the second coat. To be sure the layer is dry, you can gently touch the surface with your finger. ### Re-coat time The re-coat time is very crucial because it is the period that dictates when to apply the next coat. To avoid unnecessary additional costs, stress and time, it is important you take your time at this stage. Do not coat too soon. It is best to wait. ### Cure time This is the final phase. Generally, it takes time before the paint fully dries. When it does, it can be washed or cleaned without any fear of fading. ## How to paint your wall First, you need to clear the space you want to paint. If it's your living room. Clear your electronic appliances and your furniture to make room for the task ahead. Clean the wall before you apply any paint. This will ensure a smooth painting surface. To make sure your painting is as neat as possible, mask your trim so that you can use your brush later on parts that your roller can not reach. This is called cutting-in. Decide on where to start and maintain a gradual movement to avoid random brushing or rolling. Dip your brush into the paint and start painting. Roll and brush the surface of your wall. Pro tip: maintain a consistent pattern when painting. Also, maintain a wet edge so that your roller can blend perfectly with the brushed corners. You can try out the W motion theory — paint in a W motion to ensure even and consistent painting. After the wall is finished, time to start on [painting the cornice.](/guides/painters/how-to-paint-a-cornice) After a consistent painting, try to lay off those portions before you continue. Laying-off is a term in painting that simply means putting some finishing touches on the initial paints just to ensure perfection on the wall surface.

Cost to Paint Interior of House

Cost to Paint Interior of House

Activities such as sponging the wall, decorative painting, and more will further increase the cost per square metre. Painters in Australia charge from between $10 to $3 per square metre, including a single undercoat and the two finish coats. The total cost of painting a house’s interior can range from $900 to $3,000, which can further change based on the total paintable area. Homeowners are charged somewhere near $10 per square metre if the job includes light preparation and or trim work in addition to single colour paint. On the other hand, using multiple colours and painting high ceilings demands massive labour, bringing the cost near $30 per square metre. Below is the summarised estimated cost of different paint jobs: | Type of work | Estimated cost | | -- | -- | | Professionally painting a bedroom and ceiling | $1,000 | true | | Painting three bedrooms | $5,000 | true | | Windows, door and trims along with all the interiors in a three-bedroom house | $7,000 | true | | Complete interior painting in a five-bedroom house | $9,000 | true | | Painting a 10x12 foot room, requiring a primer can and 4 litres of paint. | $750 up | true | | Small bathrooms | $150 to $350 | true | ## How much does it cost to paint the inside of a 3 bedroom house? Painting the interior of a three-bedroom home, including all the windows and doors will cost $7,000 or more. Assuming that the [three-bedroom house](/guides/painters/how-much-to-paint-a-house) has two bathrooms, a kitchen, and a laundry, the cost to paint is $4,500 to $6,000 on average. In addition to walls, the Interior painting job includes painting the following: - Ceilings. - Doors and doorframes. - Window frames, including ledges. - Skirting boards. More preparation means rising costs and the ceiling height can affect the painting cost. More doors and windows mean less area to be covered, causing a decline in the cost. Painter(s) need to ensure that the decorative items (if any) don’t get ruined while painting, which increases the cost. ## How much does house interior painting cost per square metre? Professional painters charge somewhere between $20- $30 per square metre, including ceiling. The lower end, i.e., $20, is applicable if using a single colour, whereas tough jobs can settle this cost to $30. Different colours on the ceiling trim, [the cornice](/guides/painters/how-to-paint-a-cornice) and other difficult spots are considered tougher jobs. Some companies might agree to work for as low as $10 if given multiple rooms to paint, and the paint job is effortless with a single colour. An average homeowner should spend around $18 to $30 per square metre. A low ceiling is usually painted with a glossy paint to make it appear higher. A room with a low ceiling, single window, and one door can be painted for $14 to $16. The surface area type to be painted also determines the cost of painting per square meter. Activities such as sponging the wall, decorative painting, and more will further increase the cost per square metre. Painting a light shade over a dark shade will require multiple paint layers, which will take the price per square meter to the higher end, i.e., $30. Higher ceilings need painters to erect scaffolding, which again adds to the overall cost. ## How much does it cost to hire someone to paint the interior of a 2500 square foot house? The breakdown of the cost to paint the interior of a 2500 square feet house is as follows: ### Paint cost Depending on the brand, paint per gallon can cost between $15 to $80 or even more. Assuming that a [gallon of paint](/guides/painters/how-much-paint-do-i-need) is $25 and a 2500 square feet building will need 15 gallons of it, the paint cost will be $375. ### Labour charges Several factors all together determine the labour charges, making it complex to calculate. Still, here is an assumption. A painter charges $20/hour, and it will take three painters for painting the complete building in two days. Therefore, the labour charge will be at most $1,600. ### Summing up the costs Paint + materials + labour charges =U$375 + $140 + $1,600 = $2,115 ## What colour should I paint the inside of my house? Selecting the paint colour depends on the situation. For instance: If painting the house before selling it, consider white or off-white shades, as it will enable the buyer to repaint the house as desired at the lowest price Opt for lighter shades if the room is small to make it appear big. Combine various primary colours to achieve a secondary colour. Use different shades such as a lighter or darker shade to settle on the final colour. Shades play an essential role in achieving a perfect paint colour. Shades of blue are interpreted as perfect in the bedroom and or bathroom as they give a calm feeling. White, on the other hand, helps cool down the eyes and mind. Neutral shades of colours including almond walls, browns, and more give an elegant look.

How Much Paint Do I Need?

How Much Paint Do I Need?

Quality paint ensures high coverage rate, durability and lasts longer while looking good. When taking a painting project, there are few paint requirements you need to put into consideration. - Surface area (this should exclude windows, ceiling and doors). - Paint spreading rate (check paint label strip for this). - Number of coats required. ## Surface area When painting the interior or exterior of a room, a basic rule of thumb will be to first of all calculate the surface area of each wall and add them together. Firstly, with the aid of paint calculator, calculate the length of the wall and then the width and multiply them both. Say the each wall is 5 metres in width and 3.5 metres high, leave out 0.5 metre for each wall (this makes up the window and door) which translates to each wall being 4.5 metres of paintable surface. Now (4 walls × 4.5) × 3.5= 63 square metres. ## Paint spreading rate You can find every information on the paint spreading rate on the product label. This is pivotal when trying to figure out how much paint you need for your painting project. For example a paint has a spreading rate of 11 square metres per litre, in order to answer the 'how much do I need?' question you have to divide the total surface area by the spreading rates and multiply by the number of coats to be painted. So 63 square metres ÷11=5.7 × 2 coats = 11.5 litres of paint is required for the room or you could use a paint calculator to do the math. ## Number of coats Number of coats will vary depending on quality of paint, colour chosen, and porosity of substrate. A general rule will be to check if the interior walls have been previously painted or a dry wall. A dry wall will require a primer and two coats of paint. And if repainting a wall, one coat of paint is required if it's a quality paint or two coats to be on the safe side. Same applies to the exterior. ## How much paint is needed for a 12ft x 12ft room? A master bedroom is typically 12×12 ft is 10 feet in height. For repainting you will require 4 litres of good quality paint and for a fresh wall that hasn't been previously painted you will require one coat of primer two coats of paints making 7 litres of paint needed to paint a 12×12 ft room plus ceiling. ## What type of paint should I buy? Paints come in different ranges and applications, a high gloss paint finish differs in terms of sheen level compared to satin paints. ### Water based paints These paints are more frequent in a painting project due to their ease of use. Often water based paints dry quickly, are easy to cleanup with water, have a stable hue and are best for exterior painting projects. It works well on almost any surface and doesn't fade or yellow with exposure to sunlight. ### Oil based paints In cases where water based paints are not used the oil based paints are an alternative. It offers high durability, and great finish. Oil paints cannot be washed with water. ## Paint finishes High gloss, semi gloss, eggshell, satin, and matte paint finishes are all terms associated with paint sheen level. Firstly, you should understand that the higher the sheen, the higher the durability. ### High gloss High gloss are more light reflective and the shiniest of the paint finishes. ### Semi gloss This is great for rooms susceptible to moisture, grease and drips. Your bathroom and trims are best for this paint finish. ### Satin Durable and ideal for bedrooms and hallways. ### Eggshell Like the name implies, it has no shine and great for covering up wall imperfections. Great for dining rooms. ### Matte The least of the sheen levels, with medium low durability. Great for places with less disturbance to the walls. ## What area does 5 litres of paint cover? To estimate the number of square metres 5 litres of paint will paint you will need to first all calculate the total surface area of the room, divide it by the paint spreading rate and then multiply by the number of coats you wish to paint Let's say a room is 4 metres in width and 3.5 metres high (4 walls × 4)=16 × 3.5 = 56 square metres of paintable surface. Now the paint spreading rate is 11 square meters and you are required to paint two coats of paint after the primer. By using the paint calculator you can easily find out how much paint you need, or you you could follow the equation below, 56÷11= 5.1 × number of coats being 2 = 10.2 litres of paint to paint two coats on a 56 square metres of paintable surface. So, 5 litres of paint will cover approximately 28 square meters of paintable surface in two coats for your next project. ## Paint coverage tips and tricks Before initiating a paint project it is important to first of all use a sanding paper with good abrasives to sand walls and rid then of dry wall plaques and rough edges, giving your paint job a smooth and fine finish look. ### Seal furniture with plastic bags Instead of moving furniture out of the room which usually takes time, seal them with plastic bags and tape them to the bottom to avoid paint spills and splatters. This saves you time and no harm is done on the furnitures. ### Invest in quality materials It is quite easy to buy the cheapest paints and paint brushes for your next painting project but is it really worth it? Quality paint ensures high coverage rate and durability. A cheap paintbrush makes your job look unprofessional - a quality 2 1/2-in.- wide sash brush with a wide angle is a great investment for an all round paint brush.

How much to paint a house?

How much to paint a house?

An experienced painter usually considers all the factors for the project while others might focus on presenting the cheapest option. Whether you want to improve the appearance or increase the value of your house, painting is the best approach but it can be pricey. There's much to consider when calculating the price house painting cost. The volume of preparation work ------------------------------ Should you remove the old paint? Do the walls need cleaning? These factors can influence house painting costs. Quality and type of paint ------------------------- The cost of the paint can be very different depending on its quality and type. Number of storeys ----------------- If your house has more than one storey then painters will need additional equipment, leading to extra cost. Other factors include accessibility, difficulty of the entire job and the surface where your house is built. All these factors can drastically change the cost of painting. Generally, you will be charged according to the square metre of the surface that needs to be painted. Professional [painters usually charge](/guides/painters/how-much-does-it-cost-to-paint-a-house-interior-professionally) between $4,000 and $20,000 per job. Exterior house painting can cost $15-$45 per square metre. Professional painter is paid up to $35-$45 per square metre for interior house painting. ## How much does it cost to paint a four-bedroom house? The cost of painting a room ranges between $250-$400 depending on the materials, experience of painter and complexity of the job. When calculating the costs to paint a four-bedroom house, you have to consider costs of interior and exterior painting. Painters usually charge $10,000-$20,000 for a four-bedroom home. As for [the interior](/guides/painters/cost-to-paint-interior-of-house), prices range according to different rooms. Painting job for a bedroom can range between $300 and $750. The price includes necessary materials including equipment and paint. The painting cost of an average bathroom can be around $150-$350. Painting large rooms can cost between $1,000 and $2,000. Kitchen paint jobs of cost around $1,000 due to scarcity of surface area. Four-bedroom home painting project can cost between $12,850 and $26,700 for interior and exterior painting. ## How much should it cost to paint the interior of a 2000 square foot house? Professional painters can charge up to $45 per square metre but the average price of interior painter starts from $10. Interior painting includes one undercoat and two finishing coats. This applies walls as well as the ceiling. For house interior you should pay approximately $10-$30. In the case of a 2,000 square foot house the price can range between $1,850 and $5,550. 2,000 square foot is the same as 185 square meters, so you are expected to pay from $10 to $30 per square meter for interior painting job. Of course, using high quality paint can increase the cost considerably. When calculating the price of paint job be aware that several things can change the price. Cost factors include: - Number of rooms painted - Quality of paint - Number of window frames - Height of the ceiling - Colour scheme - The timeframe of the project - Condition of the walls and ceiling - undefined When choosing between interior painters take into account their professional experience and ask for a detailed pricing. Experienced painter usually considers all the factors for the project, while inexperienced painters might focus on presenting the cheapest option. ## How much does it cost to paint a three-bedroom house? The final painting cost of a three-bedroom house depends on the surface area and existing rooms. To paint an interior of a typical three-bedroom house with 2 bathrooms and a laundry room you will be expected to pay between $4,500-$6,000. This price includes a single basecoat and 2 finishing coats. Final price of painting the whole house can range from $9,000 to $14,000, including exterior paint. Exterior painting can cost around $5,5000-$8,000 for a 2 storey three-bedroom home. ## What's the best way to paint a house? Painting a house is a big deal, it can change the character of your home and even increase the value of it. Carefully choose the colour --------------------------- Choose multiple colours or keep it simple with one shade, you can pick neutral colours or go bold with sharp tones. Pick carefully and do not hesitate to ask an advice from your painter. The quality of the paint is another factor you should carefully consider. Prepare your house ------------------ The prep work is the key to successful project. The preparation includes removing paperwall, cleaning the walls and removing any nails or hooks. Often the prep work is done by the painting crew. If the painting house is not your DIY project, we recommend you to leave the surface preparation to the professionals. Preparing the room also includes taking of the curtains, removing paintings or mirrors from the walls - empty the space as much as you can. To protect bigger furniture pieces, cover them with plastic sheets. Professionals will use the masking tape to make sure the lines are straight and the final result is clean. Time to Paint ------------- You should carefully choose the time for painting - keep in mind that painting the interior during very hot or cold days is not a good decision. The same goes for the exterior. [House exterior](/guides/painters/cost-to-paint-exterior-of-a-house) should be painted in a temperature between 10°C -35°C. Avoid painting interior during rainy days as well. Humidity outside affects the interior as well, the paint does not dry properly and it can negatively influence the final results. ### Carefully choose the colour Choose multiple colours or keep it simple with one shade, you can pick neutral colours or go bold with sharp tones. Pick carefully and do not hesitate to ask an advice from your painter. The quality of the paint is another factor you should carefully consider. ### Prepare your house The prep work is the key to successful project. The preparation includes removing paperwall, cleaning the walls and removing any nails or hooks. Often the prep work is done by the painting crew. If the painting house is not your DIY project, we recommend you to leave the surface preparation to the professionals. Preparing the room also includes taking of the curtains, removing paintings or mirrors from the walls - empty the space as much as you can. To protect bigger furniture pieces, cover them with plastic sheets. Professionals will use the masking tape to make sure the lines are straight and the final result is clean. ### Time to Paint You should carefully choose the time for painting - keep in mind that painting the interior during very hot or cold days is not a good decision. The same goes for the exterior. [House exterior](/guides/painters/cost-to-paint-exterior-of-a-house) should be painted in a temperature between 10°C -35°C. Avoid painting interior during rainy days as well. Humidity outside affects the interior as well, the paint does not dry properly and it can negatively influence the final results.

Frequently Asked Questions

What is paint actually made of?

Paint is a group of emulsions made up of pigments suspended in liquid. Paints used today are made out of a variety of compounds.

Is it required to use primer on pre-primed hardboard?

As a general rule, a coat of exterior alkyl primer is used before two coats of acrylic latex paint produces a superior result that lasts longer.

Which type of paint should I use on wood?

You will have to determine which the type of wood you’re dealing with by sanding some exposed wood until it has an almost new appearance.

How long does it take to get a certain project completed?

This will depend on the nature of the work you require. In most cases, the work will be done in 1 or 2 days. Some projects may require more time.

How many painters will be sent to work in my home?

The number of workers assigned to a job will vary depending on the scope and size of the job they’re doing.

Oil or latex paint?

Latex paints are more environmentally friendly than oil-based paints. Oil based paints emit paint fumes that can be bothersome on painting jobs.

How do I maintain my interior painting job?

Removing dirt before it accumulates not only improves appearance, it reduces chances of it getting permanently embedded in the paint film.

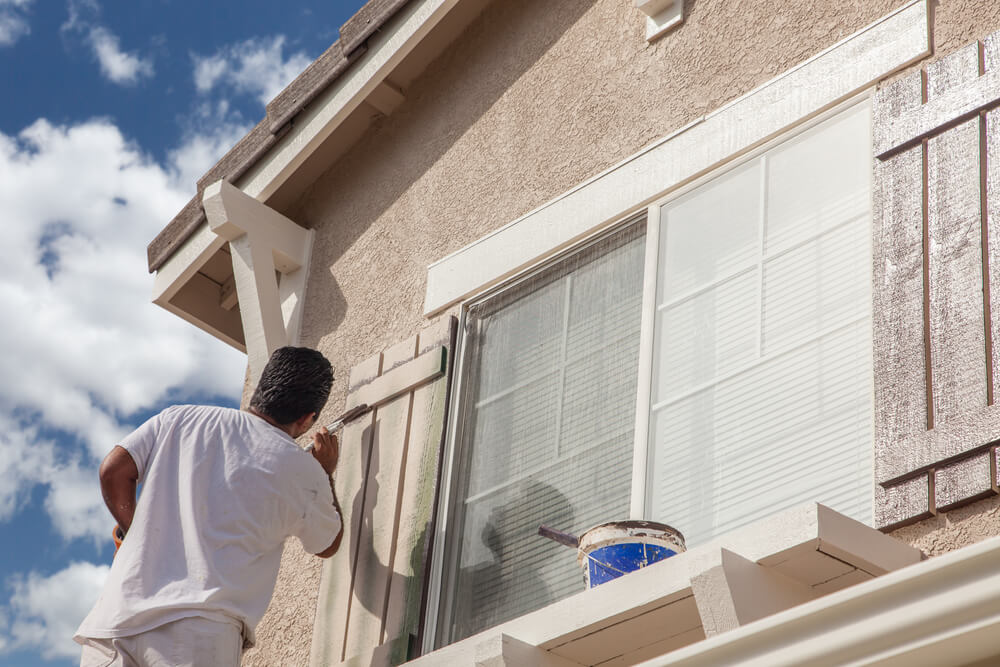
How do I maintain my exterior painting job?

Regularly check the exterior of your home for dry rot, water penetration, cracks, and chalking. Once a year it should be pressure washed.

How long will it take for the paint to dry?

Usually a couple of hours is plenty of time. Oil paint though should dry overnight. Flat paint may dry faster than semi-gloss.

Download Our App

Screenshot of the Localsearch App
Card highlighting that you can claim and future proof your business with the Localsearch App

Localsearch App

Find local businesses - anywhere, anytime.

Available on the Apple App Store iconAvailable on Google Play icon
Screenshot of the Localsearch For Business App
Screenshots of the Performance and Notifications sections of the Localsearch for Business App

Localsearch For Business App

Manage your business - anywhere, anytime.

Available on the Apple App Store iconAvailable on Google Play icon