Doors Guides & Resources

Trending Searches

Plumbers

Dentists

Hairdressers

Electricians

How To Install A Doggie Door

How To Install A Doggie Door

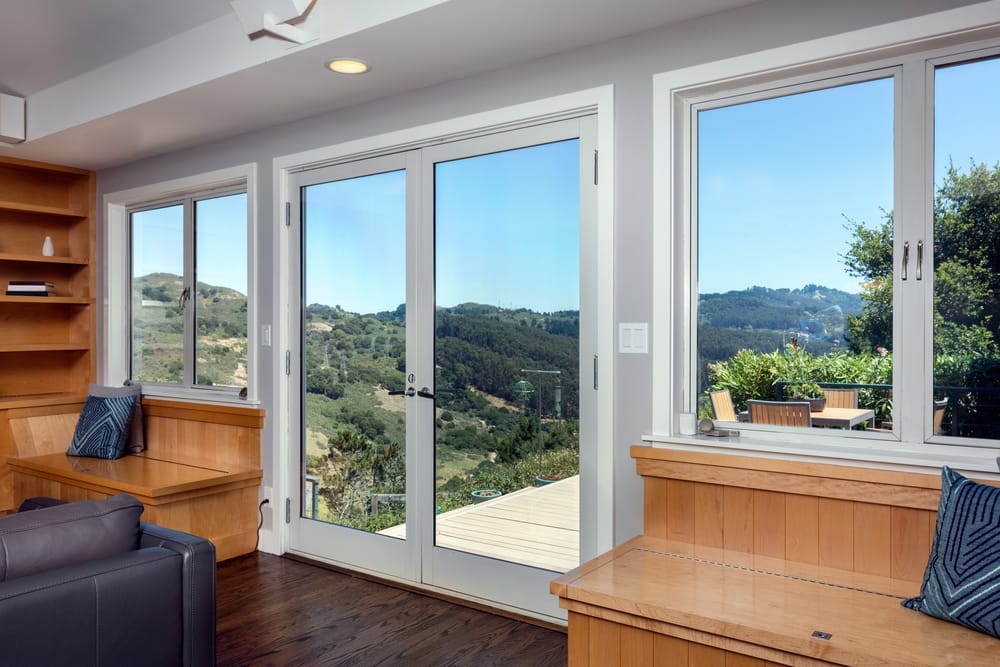
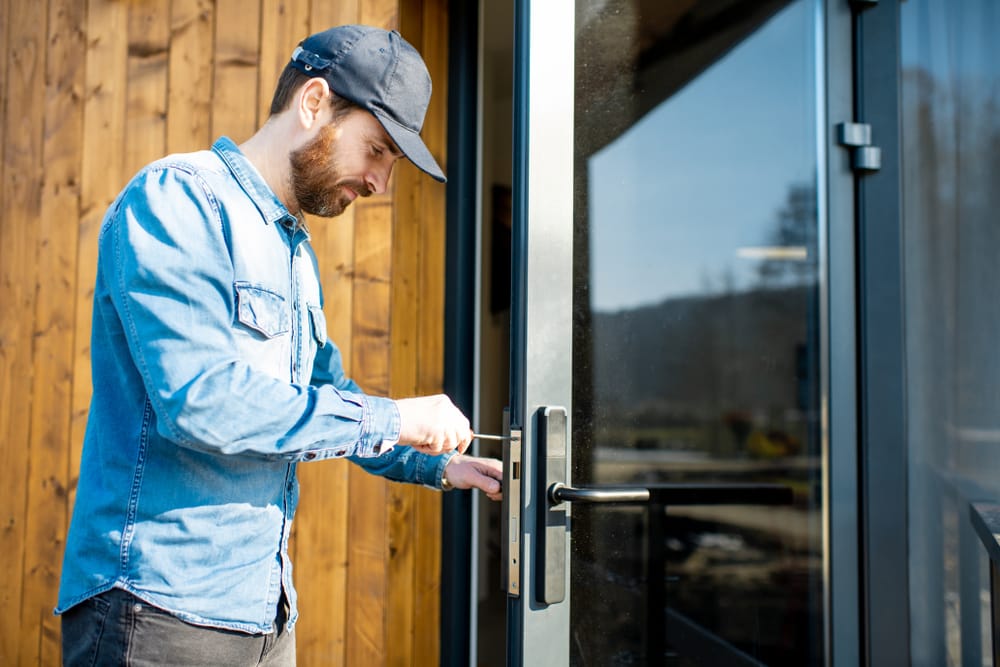
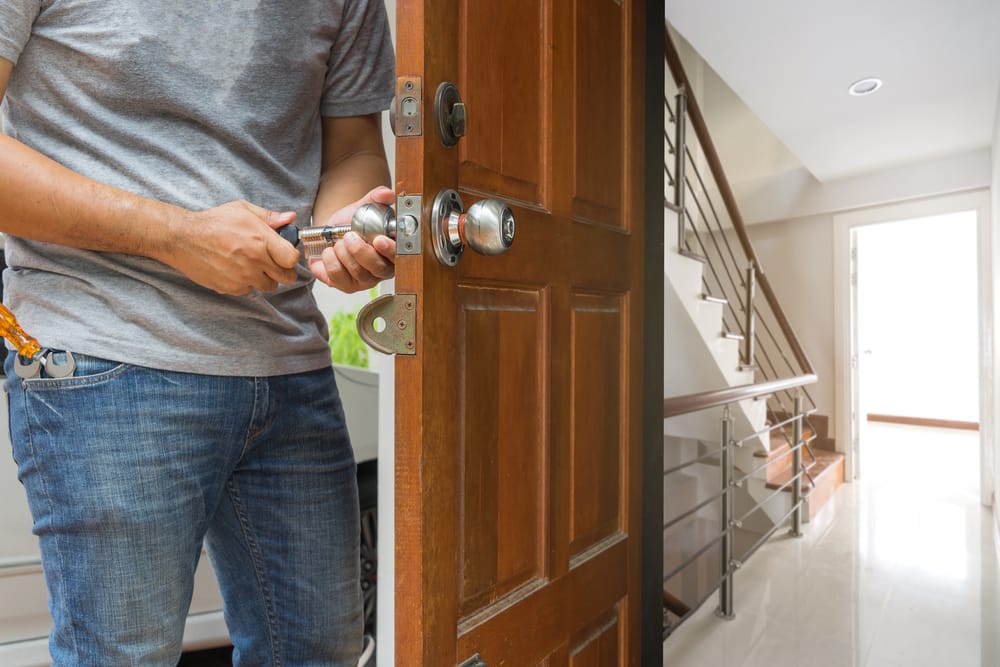
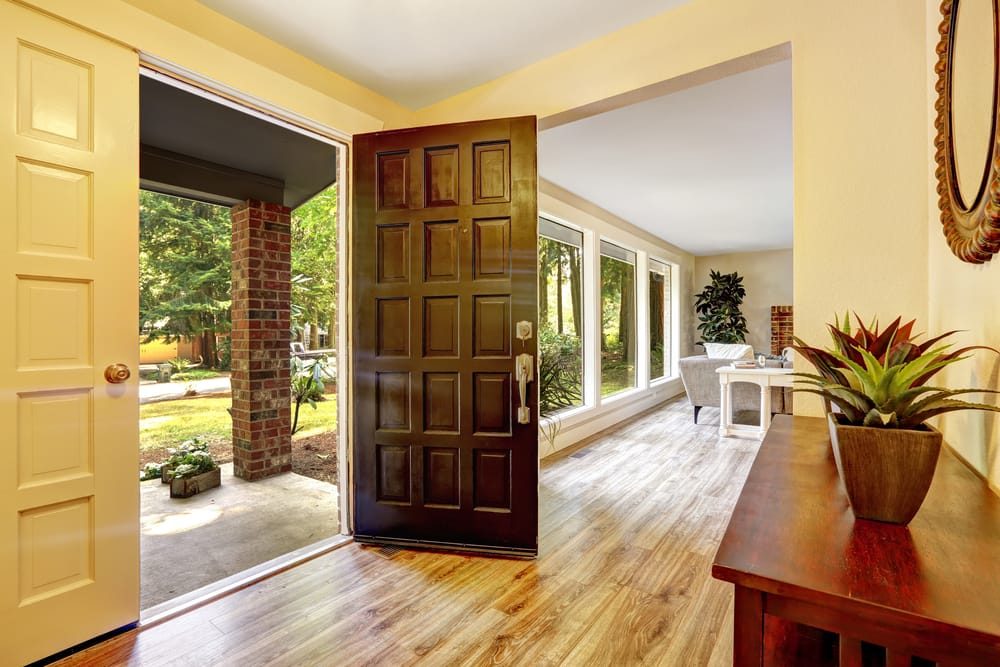
In order for a doggie door to work properly, it has to be balanced so the flap only moves when something pushes against it. Many pet owners who want to install a doggie door use standard-sized pet doors and create their own cutouts. While this is not an issue now, there are some things you should consider before you attempt this and accidentally limit your pet's freedom. First of all, if your pet is still growing it may be difficult for him/her to use the pet door at first because it will be too small. This means you will have to modify your pet door more than once. If your pet door opening is too large, the wind can get under the edge of the panel causing it to move around at times when you don't want it to. A smaller opening could cause scratches against the floor. It's not very difficult for most people to install a doggie door themselves using common household tools. But to ensure your pet's comfort, it might be better if you hire someone with plumbing experience with the tools required to deliver complete installation services. This way you can install the perfect pet door. And a job done well will make your pet's life easier. ## How do you secure a dog door from an intruder? The best way to secure a doggie door from intruders is to install heavy-duty hardware on the interior side of the exterior door to seal it shut so it can't be removed easily. If an intruder does manage to remove this hardware using his tools, there should still be enough screws in the door frame to hold it in place and seal it. You can also [insert a security lock](/guides/doors/how-to-install-a-lock-on-a-door) which works like deadbolts on a standard door only they go vertically instead of horizontally. Lastly, don't drill holes through your exterior door to install a lock because they will detract the appearance of your house and attract unwanted attention to your pet door. This can make you a target for burglars looking for easy access points to your home. ## Can I install a dog door in a glass door? Many people who want to install a dog door are not sure if they can use a glass door. The short answer is yes, you can put a doggie door in glass doors - even [sliding glass doors](/guides/doors/how-to-remove-a-sliding-glass-door) to an extent. The only precaution you should take when doing this is check the finish on your door to make sure it won't be damaged by contact with the pet door frame. Cutting glass is much more difficult than cutting a normal door because glass is much thinner and tends to break when you try cutting it. If you want to cut a hole in your glass door yourself, take extra precautions like putting down newspaper or cardboard to catch any shards of glass that fall off while making the opening. Make sure that you have the tools required to complete this job successfully. Also, measure the glass panel and cut an opening slightly smaller than usual to ensure it fits securely. It's a good idea to check your glass door at least once per year for stability even if there is no sign of damage. This is because repeated contact from scratching pets can cause extra stress on the edge and side of the door as well as the exterior wall which will shorten its lifespan. It's also a good idea to add weather stripping around the pet door so air doesn't come through between the dog door and the glass when both the exterior door and pet door are closed. ## How do you install a cat flap in a door? A cat door is a little different from a dog door. It has a smaller flap occupying less space and is usually not as heavy. You should also consider the size of your pet when you choose a cat door because small cats will have a harder time using larger doors. To install a cat flap for your feline friend, start by taking the cat door off its hinges. Then, cut an opening in the lower part of your door big enough for the cat flap to fit. You should also make sure that you take into account how big your cat is because if you cut your hole too small there's no way he/she will have enough room to use it. There are two types of flaps: magnetic and spring filled. ### Magnetic flap The magnetic flap works by moving a magnet inside the pet door which triggers a switch with position on the exterior side of your door. When your cat goes through, he/she breaks one of the magnets which activates a light on the exterior side of the door to let you know. It also works by having a metal strip inside the flap. So when your pet leaves, he/she separates two magnets which triggers an exterior light. ### Spring loaded a spring loaded or gravity flap because it uses springs instead of magnets to hold it in place. This type is very similar to any regular door except they have been modified with extra reinforcement around them. So, they won't break from wear and tear over time. This type is also much easier to open and close by cats and dogs both. You can use a spring loaded door without magnets if you don't want the exterior light to come on but it will still be activated when your pet goes through. One of the best things about these types of doors is that they require less maintenance than traditional dog and cat flaps. ## Can you put a dog door in a sliding glass door? If you want to add a pet door on your sliding door, there are several things to consider for this project: where you want to put the pet door within the frame of your sliding doors; if you want something installed or freestanding; and how big of an opening your pet needs. There are several styles of pet doors available for purchase whether they use suction cups or double-sided tape to be affixed to the glass panel. You can also scour through and find the perfect pet door template that will allow enough free space for your pet's movement. If you use a pet door with suction cups or double-sided tape, affix it to the exterior side of the door and not the interior. The flaps on the pet doors should be fairly small and appropriate for your dog's size, especially for small dogs. Measuring tape is one of the tools required when installing a pet door. Measure the full width of your glass door using a measuring tape, including the width of the window track if there is one and note it down. Then, take half an inch off of this measurement to ensure that the pet flaps aren't too big for your pet. After you measure your glass door and have the data before you, pick out a dog door that fits this size. Then, apply double-sided tape to the pet door and carefully stick it on your glass door. Freestanding pet doors can be easily moved from one sliding door to another and are very efficient, especially if you have multiple pets that require different flap sizes. If you want a freestanding pet door that can be easily moved but isn't just a flap with magnets on the ends, there are some manufactured units available. These units have the same measurements as sliding doors and can be affixed by using hook and loop fasteners to place them in the same position every time. ## What are doggie doors made from? Doggie doors are usually made from a variety of materials. The cheapest dog doors are often plastic or aluminium, and while they work to keep the weather out, they aren't ideal for insulation. Another common type is the wood-panelled doggie door which looks nice, but these can get pricey. Some nicer mid-range options include [aluminium and fibreglass](/guides/doors/fiberglass-vs-steel-door), which are both sturdy materials that hold up well to weather. If you're looking for a long term doggie door, or want one that will last through the winter months, your best option is a custom steel pet door. While they can also be pricey depending on the company, these doors will last a lifetime with proper maintenance and won't warp in the rain. ## Do I need an electric dog door? Electric pet doors use an electromagnetic field to detect when your pet is coming through the pet door and operates only when it senses this. This means it's much more efficient than manual doors because it doesn't continuously open whenever there's wind blowing outside or if someone accidentally slams it shut. Electric pet doors are available as hard-wired or battery powered. A battery-powered pet door is a much cheaper option. However, it will require regular battery changes or recharging. More importantly, a battery-operated pet door does not last as long and is less durable than hard-wired electric models. So, if cost is not a problem, it's more suitable to install a hard-wired door. An electric pet door is the best option if you want your pet door to operate both automatically and efficiently. ## How does an electric dog door know when my dog is near? This depends solely on the type of electric door you install. There are two types of electric dog doors. The first is an electronic pet door that uses a small radio transmitter housed inside the dog's collar to activate the door. When your dog approaches within several feet of it, the door will open so he can enter or exit. This type of pet door has a radio frequency range of up to 40 feet which allows your pet to get close enough to activate it before being stopped by the threshold without limiting your dog's freedom. The second type is a pet door with a pressure-sensitive mat. When your dog steps on it, it sends an electronic signal to the pet door's mechanism and opens. This type of electric pet door offers settings that allow you to set the size of your dog from one pound up to 150 pounds or 400 pounds if there is no weight limit. The processing time is less giving your dog free access to and from the house or yard. ## What are flappers made of? Flap material for pet doors can be plastic, aluminium, vinyl, fabric, or rubberised canvas. Rubberised canvas is more weather-resistant and long-lasting than other materials available for doggie doors. The best quality flaps are made out of rubberised fabric because they are one piece construction with no seams that could allow water to get in around the sides. Note that they are a bit more expensive than a plastic one, but they will last longer and be much more durable. ## What are the best pet doors for large dogs? Large dogs require an even larger dog door to get through. These doors have been specifically designed for breeds over 100 pounds. Some types of large dog doors include extended or extra-large flaps made from heavy-duty materials such as rubberised fabric which weatherproofs the door. Some of these types of flaps can be hinged at the top corner on the interior side of the exterior door to allow for easier installation and removal. Other large breed pet doors are made from metal which is more weatherproof than plastic but can be quite heavy. Electrical dog doors are also available for very large breeds with the maximum weight set to 400 pounds. Ensuring easy access outside for your pet is just one of the basics of dog ownership, according to [Brisbane City Council](https://www.brisbane.qld.gov.au/community-and-safety/pets-and-livestock/keeping-a-pet-in-brisbane/keeping-a-dog), which has guidelines in place for local residents to keep a dog.

Doors Guides & Resources

How to Make a Door

How to Make a Door

Doors are easy and simple to make if you have the suitable skill set and hand tools - if you have an existing door opening or need to replace a door. There are many types of doors with different features, including storm doors and exterior wooden or steel doors. If you have an existing door opening, measure it to get the same size door in the right type for your needs. Doors are measured by width x height. The most popular internal door size in Australia is a 2040mm high, 820mm wide, 35mm thick panel, or flush door. ## How to replace a door There are a number of steps to follow in replacing an existing door in a door frame. First, measure the height and width of the opening from outside to outside. Make sure you include the door stop moulding if any. Note how thick your door needs to be - this is a standard 35mm thickness for a flush panel interior door. In most cases, you will need to remove any excess door trim from around the existing door. A fine thickness finish can be achieved using hand planes, a chisel, or sandpaper. If needed, purchase a replacement for this moulding from a local hardware store. Search your location listing for one near you. Then cut a strip of solid wood to fill in where you removed the old moulding. Using a drill and screws, attach the wood piece to both sides of the opening. Using a tape measure, position your new door directly between the top and bottom hinge on one side of the opening. Ensure that it's straight and level. Use shims as necessary if required. This ensures that your door will be balanced and opened easily later on. Once securely positioned between those hinges, check for the level of the door. You can also use a framing square to check alignment - or have someone hold it in position while you do so. Though not critical, the new door should fit tightly into that opening (not wobbly at all when moved) and be perfectly centred with about an inch space between it and the opposite edge of the opening. Mark the [position of the hinges](/guides/doors/how-to-install-door-hinges) on the woodwork with small bits of masking tape, making sure they're parallel. Then drill pilot holes through these markings - make sure your drill bit is smaller than hinge screws; otherwise, the door jamb may crack or split. Now fasten them securely using matching screws. If the existing door frame has a warp (not square), you might need to adjust your hinges a bit so that they're not at an angle. Of course, this won't be necessary if the opening where you want to put your door already has a perfectly square door frame in it! Attach a temporary piece of moulding alongside the edge(s) of the opening until you can check that your door is exactly as high as it needs to be - including any space needed for carpet underlay or other flooring material. Place the hinges on your door about 6 inches from the top. If you are using interior panel doors, use screws to affix them- ensure they're tightly fitted to each screw before adding another. If your door is heavier than usual, it may be more difficult to close if the hinges are lower down on the door. It's best to have hinges higher up on strong exterior doors, but this isn't necessary for an interior door. ## Is it cheaper to make your own door? If you're a professional carpenter, then yes. For others, due to a lack of skills and appropriate tools, it's best to purchase a readymade door that has been mass-produced and readily available at hardware stores nationwide instead of making their own doors. Instead of making doors, get some help from an expert if you need to replace or make a new door - or any other home renovation project. A professional with the right skills will definitely do a good job, and it will be cheaper in the long run. ## How much does a new door cost? It depends on the material used. Aluminium doors are cheaper than wooden ones, while [fibreglass or steel doors](/guides/doors/fiberglass-vs-steel-door) are pricier. Fibreglass or glass doors are more expensive too. You should be able to get a decent-quality interior door below $100 if you're looking for something that's not top-of-the-line but is still sturdy enough to serve a purpose. ## How do I build an exterior door? You can buy a premade doorframe (without the door) and custom-fit an exterior door with it. You can also purchase a premade door that comes with both the frame and the door at the same time, which you simply need to install. Simply walk into a door's shop with your measurements. Exterior doors should be made of solid wood or another material like steel - these are more durable against heat and cold and last longer than particleboard and other composite materials. They should also be stain-resistant or weatherproofed with paint or varnish for better visual appearance, as well as fitted with a strong lock for increased security. Assemble your exterior door on a sturdy surface such as concrete, plywood, workshop table, or ideally sawhorses, so you're working above ground level. The woodworking that goes into making a door is widely documented. Cut rails to the desired width, length, and thickness. The rails are three, the top rail, the middle rail, and the bottom rail. Do the same with the hinge stiles and the lock stiles. Dig out the mortise groove. Cut the panels and mullions. Join the parts, once glued together. Hold the glued unit together with a clamp and leave the clamp on for about 24 hours, or depending on the recommendations of the adhesive used. Make sure you have a helper on hand as well. Check that the doorframe is completely square before installing it with screws. You may need to trim any excess, protruding parts with a saw. To achieve precision with the final thickness, use hand planes or a sharp chisel. Fit your exterior door with hinges on both sides of the jamb - again, using several screws for strength. Make sure to check for plumb alignment, both vertical and horizontal, before you screw in each screw securely. Before finishing, mount a sturdy deadbolt, a latch, or other locks as needed. Make sure there are no gaps between the frame and jamb - they should be flush together tightly all around the perimeter of the opening. A door should be hung snugly in place but should not swing shut on its own accord; if it does, you will probably need to check that the hinges are properly attached and tighten them if necessary. You can also create a brace with two pieces of scrap wood (laid crosswise) underneath the door if it tends to move about too much. ## What wood do you use to make a door? You should use pressure-treated wood if you can because it has special chemicals that increase its durability and resistance to wear and tear. Other types of exterior-grade lumber include cedar, cypress, redwood, pine, spruce, fir, hard maple/rock maple, poplar/yellow poplar, red oak, white oak. Check for rot or infestation by wood-boring insects. If you see signs of it, replace the damaged parts promptly to prevent damage to your doorframe and jamb. Alternatively, consider buying a premade exterior door frame in a kit from a hardware shop but remember that you will still need to add an exterior door with it before installing it into your wall opening. ## How do you build a board and batten door? Board and batten doors are not difficult to make. The boards are spaced out evenly so that you can see the frame or raw wall material in between them. To build one, start with a slab of plywood as the backing structure - this will give your door strength later on when it's time to set it in place. You should only have a minimum number of seams where plywood sheets come together because gaps will weaken the overall framework and reduce its durability against wear and tear - avoid cutting sheets down into smaller sizes since this could compromise stability. Screw two side rails across from each other along their length, making sure they're screwed securely onto the plywood backing at both ends as well as near the middle for added stability. Install a vertical piece of lumber about 1/3 of the way from one end, leaving a space between it and one of the side rails to create an indentation for the front panel to rest in later on. Do this again on the other side as well - note that you'll have two separate board and batten door panels here because you need an opening for your hinges to fit through as well as enough room for your bolts/latches to secure them tightly shut. Once those are installed, screw horizontal slats across from both sides just like before except near the back where there's a gap for a hinge plate or door handle installation. If desired, you can fill that with a filler block, but it won't be visible once painted. Install hinges on the back of your slab, fasten them securely to one end panel with bolts/latches, and then open your door into its proper position facing frontwards. The battens are installed vertically between each slat - these are usually made from thinner strips of plywood or two-by-fours for extra durability. You should always sand down the entire surface before painting, including the vertical pieces - sanding is much easier when you have all panels facing upwards rather than downwards. An electric sander will make short work out of it, but you can also sweep away dust with a paintbrush and hand-sand if necessary. ## How do you make a simple plywood door? If you want to make a door quickly and cheaply using plywood, all you really need is three pieces of hardboard (a type of press-plastic) or plywood for the face frame, one piece for the back and four sections of lumber cut to the desired length. Cutting the parts to size can be quickly done with a circular saw. You'll also need several screws because these doors usually don't stay in place without them, causing them to warp. Creating the frame is easy: just lay out your boards on edge with equal spaces in between each one so that they form an evenly spaced grid - then join them securely together with screws in the spots where they overlap. Cut out a latch hole (with access afterwards to check if it's properly closed) using a jigsaw tool before installing your hinges because these are usually too small to cut accurately afterwards. Slide your plywood panel into the frame carefully, making sure it's flush against all four edges before screwing it securely in place - then do this for both sides of the door because you'll need them to be tightly shut for this type of design. The back panel goes on next, screwing it to the frame on all four sides; these types of doors usually don't need a centre rail support structure. Finally, add your vertical battens using glue and nails or screws. Make sure the top one is slightly higher than the bottom by about three inches so that rain doesn't get in when you use it outdoors. Your door is [now already hung](/guides/doors/how-to-hang-a-door). ## How is wood pressure treated? Wood pressure treatment is the process of using chemicals to change the properties of wood in order to make it more resistant to moisture or insect damage. The most common type of wood pressure treatment is wood preservative; this type typically contains copper, chromium, arsenic and sometimes even mercury. The process starts by chipping or grinding the logs into very small pieces that are then soaked in water for an extended period of time. Afterwards, they're heated at extremely high temperatures so that all organic material - including any bacteria or fungi - will be destroyed. Finally, they're poured over with a chemical solution of various compounds like chlorine salt and sulfuric acid. They are entirely dried until ready for use. Different types of wood need different amounts of heat and time to process properly; the type of heat (steam or dry heat) used will change the chemical makeup of the wood preservative. Additionally, other chemicals may be added to seal cracks in the wood, give it a better colour or add preservatives that will help prevent mould growth or insect infestation. ## How is treated lumber different from regular woods? Wood pressure treatment can make a huge difference in how your wood looks and how long it'll last because rot and pests won't damage your furniture as quickly if they can't get through the outer surface. However, there's also different types of treated wood, such as CCA-treated lumber, which uses chromate copper arsenate rather than arsenic. For example - not all wood has to be pressure-treated to be environmentally friendly and rot-resistant. The Victorian State Government's has some useful information on [CCA-treated timbers](https://www.betterhealth.vic.gov.au/health/healthyliving/copper-chrome-arsenic-cca-treated-timber). You'll want to take a close look at the label information before choosing any furniture made with wood and make sure it's treated - don't assume anything; many types of manmade or manufactured woods may also be highly durable and suitable for use as furniture, flooring or even building material without needing treatment.

How To Install A Lock On A Door

How To Install A Lock On A Door

A door lock is one of the most important parts of a home's security system. Installing a new door lock is possible with some basic tools that are found in almost any household, but, it may take some time depending on what type of lock you plan to install. If you do not have an existing door lock, you will need to decide how many screw holes to drill. You should also decide where to place them and if you will need any additional parts. For example, strike plate or screw and all the tools you need. You will also want to consider what type of material your door is made out of and choose a new lock that matches it. Measure the areas where the new lock will go before drilling anything into your door. Most deadbolt locks require at least two screws. You will place them between the edge of the door and its attachment such as a strike plate or side jamb. If your door does not have this space because it is too close to the wall, you may need to attach additional wood pieces to either side of the door. ## Is it easy to put a door lock? It generally takes about 20 minutes to install a new door lock. Installing most lock brands is easy if you have the right tools and pay attention to what you are doing. ## What tools are needed to install door locks? The following tools can be used to install a new door lock. They include a deadbolt lock, doorknob-sets and other common types of door locks. If you select an unusual type of lock, you may need additional tools or items. It depends on what you purchase. You may also require different screw sizes based on the material your door is made out of. Tools needed for installing a door lock: - Drill with bit for metal doors. - Drill bit for wood doors. - Hammer. - Screwdriver. - Pencil. - Level. - Tape measure. - Pry bar. - Screwdriver. - Strike plate. - Screws. ## What is the most important thing to do before installing a lock on a door? Before starting any type of door lock installation, you need to ensure that your locks are compatible. Different companies make different types of locks. It is unlikely they will all match up properly if they aren't made by the same manufacturer. You also need to know what type of screw [came with your door](/guides/doors/how-to-install-folding-doors). Some are large or smaller than standard screw sizes. If you don't have this information, ask the previous owner. Also, you can try buying replacement screws at your local hardware store. It is best to avoid having problems during the door locks installation process. These two things will help ensure everything goes smoothly without requiring extra parts or time to complete the job. ## What is the best way to install a deadbolt lock on a door? Deadbolt locks are built with two parts. They are the bolt and the cylinder or core. The cylinder plug can be either part of your door's existing hardware. Also, it can be installed as a separate piece. It is usually done for security reasons. An old lock may not have been built as strongly as today's models. Cylinders also allow you to key new locks without replacing them entirely. You should consult a professional if you wish to replace this type of lock yourself. You could end up damaging it if you do it incorrectly. ## Is it cheaper to re-key or replace locks? It is generally cheaper to simply replace an existing lock in your home when they are damaged or broken. Just give a [locksmith a call](/guides/emergency-locksmiths/what-does-a-locksmith-do) if you are in too deep. Using new keys may sound like a good idea but, it can be more time-consuming and expensive than simply replacing the hardware. ## What are some of the benefits of re-keying? Re-keying kits can help you save money on your next big move or renovation project. If you want to sell your home in the future, all you have to do is change one old lock. It is better than buying new ones for every door in your house. Sometimes people also choose not to install a new lock when they first buy their homes. They wish to do so after moving in. Replacing your existing keys and lock is far simpler than installing an entire lock. ## How difficult is it to re-key a lock? It is often very easy to key a door lock yourself. Some locks only require you to turn the lock cylinder one way before turning it back. Then, insert a new key into the lock. It is also possible that your lock will not need to be turned at all during re-keying. It may have been done previously when your home was first built. ## How do you change a door lock on a bedroom door? Replacing a bedroom door lock is a simple process that can be done in just a few minutes. ### Choose the type of lock and lock cylinder you want to install The first thing you have to do is choose your new lock. There are three most common types of locks. The ones for bedroom doors, which include interior doorknob and levers. Also, there are exterior door knobs and levers, and privacy (or dummy) locks. Interior door knobs and lever sets require little skill to install because they usually don't need any screws or drilling. These types of door locks also come with their own installation instructions. An outside doorknob and levers, however, may require some extra tools such as a screwdriver depending on what type of current hardware you're removing from the door. ### Open the door and determine what kind of doorknobs you have You should first open your bedroom door and take a look at the hardware type. You may need to remove screws located [underneath doorknobs](/guides/doors/how-to-remove-a-door-knob) using a screwdriver. You should also check the latch plate if you have an older lock installed. Unscrewing this part will give you access to the lock cylinder. You can swap out existing pins with new ones as well as change your keys (if necessary). If yours is a deadbolt lock, you will only need to detach or remove the screws holding it in place. ### Remove old lock and latch plate After determining the type of existing lock you have, you can remove it. If the lock is a knob and not a deadbolt style, you will need to remove the screws holding it in place. The lock may be an old deadbolt and has no visible screws attached. You may be able to use your fingers or a screwdriver to pull out the strike plate. That way, you can remove the entire bolt from the door's frame. If this doesn't work, consult your owner's manual for more information on how these types of locks should be installed and removed. ### Install new lock After removing your old latch, put in your new one by sticking it through existing holes in the door. Place them in the same position where the previous one was installed. Make sure the entire lock is facing inwards when you do this. Then tighten all screws to secure the new hardware into place and you should be all set. ## Is it easy to change a lock on a front door? Replacing a front door lock is a little different from replacing a bedroom lock. For one thing, you may need to remove your existing deadbolt. It could be an older type of hardware that you can't change out with ease. Locks for the front door are more complicated than those for the bedrooms. They have more parts and there's always the chance of the door locking while you're working on them. So, make sure to take ample precautions against this common situation. It won't be possible to change some locks on the front door without removing the deadbolt first. The process varies depending on what type of door lock you have. Most exterior door locks are installed using screws. But, you can drill holes and remove them with the proper tools. For example, a screwdriver and wrench. Also, you may be unable to change your door locks without removing your current setup. It is vital to note that there's no thumb latch next to the doorknob. Hence, taking off this piece of hardware will allow you access to how it all fits together. ## How much does it cost to install a door lock? In most cases, the price of a lock replacement will depend on the hardware you want to use. It can be as cheap as $20 for a simple bedroom set but exterior door locks tend to cost more. They have multiple parts and may require drilling or screws to be installed. But, you need a new deadbolt if the current one is outdated and needs to be replaced. It won't add any additional charges to your project. Tech-savvy homeowners may even choose to install a new keypad or a smart lock themselves rather than hire an expert for help. Most professional locksmiths also offer affordable rates that range from $50-$100 per hour. It depends on how much work needs to be done. ## Can you put a lock on a door without drilling? It may be possible for you to install new locks on your doors without drilling. But, if you live in an apartment or condo complex, the landlord may not allow you to make changes. Always check with your homeowner's association before attempting to change your door's locks. Thus, you don't risk getting into any trouble. Although locks that can be installed without screws or drill holes are becoming more popular, these types of accessories aren't quite mainstream yet and they tend to cost more than your typical models. If you're looking for something that won't require any drilling though, it's possible you could get away with using double-sided tape, magnets, or even 3M strips to hold your hardware in place until you're ready to use the screws later on. ## How much does it cost to change a lock on a door? The price of your door's lockset will vary depending on the type you have. There are so many different types of exterior hardware and replacing them can be pretty cheap. For example, your front entryway may be using an older model that has no thumb latch plate next to the doorknob and you're looking for something more secure like a digital code padlock. Installation costs may start around $25 to $30. ## Can you re-key your own locks? It's possible for you to re-key your own locks in your existing house. But most homeowners are advised against this type of DIY project. Your skill level may not be sufficient enough to get the job done properly. Many people don't know how to switch out the new pins inside locks or align them in a way that keeps them secure. They risk doing more harm than good when trying to fix up their door on their own with no prior experience. It is why it's typically best for you to hire a professional locksmith. They have the know-how and skills to switch out old pins and install new hardware. If you are tenant in Queensland, the [Residential Tenancies Authority](https://www.rta.qld.gov.au/starting-a-tenancy/locks-and-security) has a host of information on door locks. ## What is a smart lock? Smart locks are a locking mechanism with some type of internet connection. It activates in an automatic way without the use of house keys. There are plenty of different types available including Bluetooth, app-secured, and even fingerprint activated locks. You can install them on your doors today to upgrade your home security. You can also find electronic locks that let you enter passcodes. Also, you can connect to them using your mobile device. They are convenient whenever you come home late at night.

How to Change Door Locks

How to Change Door Locks

Each type of lock may have its own set of tools that are required to change the lock cylinder. There are two common types of door locks, tumbler door locks and pin style door locks. It is important to understand how each type works before moving forward with changing them out. Generally speaking, both types of locks can be changed using one or several special tools called "door lock cylinders" which enable you to easily remove the broken key from the central locking assembly and replace it with a new key. You may be able to change the lock cylinder yourself, however, a good job would probably require a professional locksmith/mechanic to do this for you. Tumbler door locks, these are much easier to change than pin style door locks. Tumbler locks can usually use just one tool called a "door handle puller." This tool has multiple sized pins that attach themselves in the grooves on each door's inner and outer handles. Once they are properly placed, you can simply twist them until they stop moving, and the handle will be removed from the door, and you can access the lock cylinder. This sort of lock is designed so that you can remove and replace just about any part on it without having to do anything else. ## Is it easy to change a lock on a front door? It is easy to change a door lock on a front door as long as you have the right tools and follow the instructions and installation process exactly. Doing this by yourself will save money, and it can be done in less than an hour if you know what you are doing. When changing your locks, make sure that you use high-quality steel or solid brass deadbolts that clearly state they meet resistance requirements of grade three (the highest level) which means they will resist prying and clawing. A good door lock is often supported by a solid [front door and frame](/guides/doors/cost-to-replace-front-door-and-frame). ## Follow these steps to change a lock on a door Locate your original key and put it somewhere safe outside of the home. You want to make sure that there is no chance someone can get their hands on it while you are replacing the lock because this will defeat the purpose of changing them in the first place. Remove your old lock cylinder by inserting a screwdriver into the small hole on the face of the door knob while depressing the locking mechanism with another screwdriver wrapped in cloth. Take care not to scratch anything when doing this. Wrap some Teflon tape (available for purchase at any hardware store) around your new pin and insert it into your door handle. Insert it fully and then back it out one turn to ensure that the Teflon is properly lubricated before putting everything back together. Attach your key to your pin or wire tool and re-insert it through the outside and inside of your door. It should turn smoothly, and you will feel it when it stops in the locked position. Leaving your pin attached to your key, put your lock cylinder into place on the inside of the door. You will then need to re-attach using the screws to your old cylinder, so the door handle is secure. At this point, you should test the key and lock by pushing it into place and pulling on the door knob firmly and gently several times to ensure that it moves smoothly and locks and unlocks properly. You will likely need to adjust these screws holding the new latch plate until you get a smooth motion. Finally, you can remove your pin from the key and re-attach it to your original key. You should then test the entire process again to ensure that everything works correctly and there are no errors with either the [lock or door knob](/guides/doors/how-to-fix-a-door-knob). ## Is it cheaper to rekey or replace locks? Rekeying is the most cost-effective way to maintain your home's security, but you can also change locks if they are old or outdated. Changing an entire lock system will protect your home from burglars but isn't as affordable as rekeying because new locks need to be installed on all exterior doors and windows that have keys. If you only have a few windows and doors that require locking mechanisms, then rekeying using a locksmith makes more sense financially than [replacing door knobs](/guides/doors/how-to-remove-a-door-knob) etc. ## How to rekey a lock Rekeying is the process of changing the internal architecture of an existing lock, so it responds to a different key. To safeguard your home security, you can choose to rekey your entire house or just change the locks on certain doors if you think someone has copies of your house keys. Some locksmiths can also recommend installing replacement locks and deadbolts, but these procedures typically cost more than simply rekeying your existing system. ## Tools you need to rekey a lock - Tape measure. - Drill and drill bit (if removing existing lock). - Screwdriver (for removing old locks). - Key (or keys if rekeying more than one lock). - New locks for each door or window. It will likely be cheaper to hire a professional with all the necessary tools. Most lock brands provide re keying kits that would come in handy. It will be cheaper to rekey the same brand of locks since you do not have to buy a kit for each. ### Unmount the locks from the screw holes Note that for deadbolts, the cover plate is anchored using some long screws. Remove your current locks and take them with you so they can match up at the hardware store and you know what new pieces to purchase. Buying the same model will match the new lock with the other locks. Take your old key along as well if you still have it otherwise [take the handle](/guides/doors/how-to-take-a-door-handle-off) with the locking mechanism to a hardware store. This step is especially important if you aren't working with a locksmith because he/she may not be able to get certain key pieces for your new locks. ### Measure your interior doors Measure the depth, height, and width of your interior doors. You will need this information to purchase locks that are the right size for each door's specifications. ### Remove your existing deadbolt Remove your existing deadbolt if one is attached to your door by unscrewing any larger screws on your current system. Try using a screwdriver wrapped in cloth, so it doesn't scratch anything while turning these screws. ### Mark where the new lock will go Hold up your old lock next to its corresponding space from the edge of the door in your door frame. Mark where the new lock will go with a pencil. ### Drill Drill out these marks in the door frame with a drill and a drill bit corresponding to your new locks. If you aren't sure what size to purchase, then just take your old lock into the hardware store so an employee can help you find the right size for your door. ### Insert your new lock into place Put your new lock into place in the same position as the old deadbolt and put in any necessary screws with a screwdriver to secure it. Repeat this step if there is also a deadbolt on the door. Fasten the interior plate to the existing holes all the way to the exterior plate using the original or the provided screws. Use the two screws to mount the exterior door knob and the exterior side of the deadbolt. Align the two rods with the interior side and thread the new bolt into position. Some deadbolts have a hidden interior door knob screw. Check the installation manual on how to fasten it. ### Test each lock Test each lock by pushing or pulling on its handle from both sides of the door using force to ensure it works correctly before putting all of your keys onto their corresponding locks. ### Can I put a lock on a door without drilling? If you wish to add a lock to an existing door without drilling, then you can purchase an adhesive lock for this purpose. You can also put locks on windows this way. It is important to note that these adhesive locks are not as secure as drilled-in styles in regard to your home security. ## What is the difference between a deadbolt and a door knob lock? A deadbolt and a door knob lock both serve the purpose of locking your home—the biggest difference between the two lies in the type of key used to open them. You usually can't use a regular house key to unlock either device, which means you will need an extra key if you ever lose one. Door knobs locks require a knob or lever-style keys, while deadbolts use more complex wafer and pin tumbler styles. Door knob locks use a spring loaded bolt to keep the door closed. They have an angled edge. The bolt retracts when the door knob is turned backward. These are the most common type of locks. A deadbolt lock, on the other hand, does not have a door knob. The locking bolt is heavier and is not rounded at the edge. The bolt that lodges into the groove is longer. The opening mechanism is that of the tumbler cylinder plug, and the opening position is attained by using a key or an opening knob. ## What is a pin tumbler? A pin tumbler is a basic style that operates with bearing pins placed at the shear line of your lock's plug. This means that when you insert a key into the plug, it pushes down on these pins to clear the top edge of the keyhole so your plug can turn within its housing. A wafer tumbler uses flat metal pieces rather than pins to clear space in the plug. ## How does a tumbler work in a door lock? A tumbler, whether it's a pin or wafer style, consists of two parts. One part attaches to the inner workings of your lock (the plug), while the other piece lives inside your door (the housing). When you insert a key into your lock, its ridges push up on the tumbler pieces until they click into place and create an unobstructed path for turning your lock. ## Can I change my locks myself? You can install a new door lock by yourself by following the installation instructions, but it would be much cheaper to hire a professional instead. A locksmith is capable of making and installing new keys for locks and can easily install new locking mechanisms as well if necessary. If you still wish to attempt doing it yourself, take each lock off its corresponding door or window first by removing any screws on the back with a screwdriver. Then, bring the lock into the hardware store along with all of your old keys. Purchasing the same brand will enable you to utilise the holes made for the old latch. Else you will have to drill new holes and possibly [make a new door jamb](/guides/doors/what-is-a-door-jamb). ## How much does it cost to install a lock on a door? The estimated price of installing a new lock on a door will vary depending on how many you need to be done. A door knob with a lock typically costs around $20 and upwards, depending on choice. Hiring a professional locksmith to install can include a callout fee of around $100-$120 and the cost to install a new door lock around $50. ## How do deadbolt locks work? Deadbolt locks operate using key-operated cylinder locks that are attached to the interior of your door. The cylinder is inserted into its housing at the edge of your door, after which it is affixed to the frame. When you open the door, the cylinder turns within the housing to allow the bolt to move back and forth. Two standard types are used - one with a turn-piece on both sides of the lock while another only has a keyed side.

What are Hinged Doors?

What are Hinged Doors?

Hinged doors can be mounted vertically or horizontally and can swing into or out of the room. Hinged doors are doors that swing open in a direction, unlike sliding or pocket doors that slide, fold, roll, or are pushed or pulled in order to open. Hinged doors use hinges to swing. You can also choose double doors (also called French doors) that also swing on hinges, while there are other range of hinged doors available. ## How do I choose between hinged door styles? The most important aspect of choosing between various hinged door design options is what type of hinge you're going to purchase for the door, budget and use of the door. To make the choice easier and for more information on a hinged door let's break it down into two most common type: surface mount hinges for a door and reveal (inset) hinges for a door. Reveal hinges in a hinged door allow you to recess the hinge mechanism about 3/4" deep within the face frame for a clean look without requiring any additional space behind the doorway. The opposite is the surface mount hinge for a door, where the hinges of the hinged door are mounted to the surface of the doorway and can be placed about 3/4" in from each edge to allow for clearance. Once you have chosen between reveal or surface mount hinges for a hinged door, then you will choose your suitable hinged door style. Consider how you intend to use the room with respect to traffic flow when making your choice of the door. If high traffic is required, opt for solid wood doors rather than plywood core doors (you may want a veneer at that point). If security is desired, consider steel hinged doors with locking mechanisms instead of latch hardware alone. Doors with light falling on them give a glazed look. The glazed look is best visible on aluminium and glass door (with windows or without windows). Glass doors have high maintenance, though. ## Where are hinged doors used best? Hinged doors are best used in the rooms that receive the most traffic. Kitchens, bathrooms, laundry/utility rooms and mudrooms (entry closets) are very good examples of where hinged doors would function well. The advantage of such [hinged doors](/guides/doors/how-to-install-door-hinges) is that they can be opened or closed with one hand while holding items or pushing a cart with your other hand. The hinged doors can also be placed at 90-degree angles to hallways to maintain a clear passageway. ## What are the most common hinged door styles? The four most common types of hinged doors are: [bifold hinged doors](/guides/doors/how-to-install-a-bifold-door), sliding hinged doors, folding hinged doors and barn hinged doors. ### Bifold hinged doors Bifold hinged doors provide access to closets or storage areas by stacking two or more panels side by side between two tracks. These hinged doors are available in many different materials and various price range including engineered hardwood, MDF (with or without veneer), PVC Sheet (with wood grain patterns) and Stainless Steel for high humidity areas like laundry rooms. ### Sliding hinged door These [sliding doors](/guides/sliding-doors/sliding-doors-vs-bifold-doors) roll on a track mounted on the floor and ceiling of the room into which they are installed. Contemporary hardware allows for concealed mounting within your custom cabinetry that can be released with just one finger. ### Folding hinged doors Folding hinged doors are usually mounted at 90-degree angles to allow for passage through narrow doorways. These [folding doors](/guides/doors/how-to-install-folding-doors) are available in almost every material including engineered hardwood, MDF (with or without veneer), PVC Sheet (with wood grain patterns) and Stainless Steel for high humidity areas like laundry rooms. ### Barn hinged doors Barn hinged doors are traditional farmhouse style slat-style doors that are popular in both residential and commercial installations. These hinged doors are usually installed on track systems so they can be easily rolled open when needed but these hinged doors provide privacy otherwise. You'll also find aluminium hinged doors, patio doors, timber doors, French doors, etc. Most hinged doors are single doors but a range of hinged doors that swing open can be found. There are glass options are well. ## What is the best way to install hinged doors? The best way to install hinged doors depends on which type of hinge for the hinged door you've chosen. If you have decided on a surface mount hinge, then configurations for the hinged door should follow these steps: Determine whether you are going to install the hinges on the face frame or the cabinet itself. Mount the surface-mounted hinges in each door so that they are centred between each edge of the cabinet/face frame. Test fit the hinged door to make sure they are pushed and pulled to open and close properly. Secure the hinge leaves into place using screws, pocket hole screws (for MDF) or nails (for hardwood). For reveal hinges, follow these steps: If you will be installing your reveal hinges directly to your cabinets, secure them with screws through their self-closing feature while leaving them loose for now. Measure between your concealed hinges starting at 36" up from the bottom of the door opening. Once you have determined this height (36"), mark it onto all exposed faces of your hinge leaves. If you are using pivot hinges, mark the point where both pivots align. Adjust your hinge leaves so that they rest on their tops, measure for height and secure with screws through self-closing feature. This will allow for one side to be higher than the other in order to accommodate the space between cabinets. Test fit doors until each door swings without rubbing or binding against cabinet faces/backsplashes, then tighten all screws securely into place. ## How do I space hinges? Doors hinged incorrectly are troublesome. For superior security, every hinge should be spaced evenly apart on the door, because doors hinged in such way leave a consistent space between the left and right doors. 1 Install your hinge leaves to your cabinets (or the door) loosely with the self-closing screws. Adjusting them will allow you to catch small differences in details of cabinet face or back splash widths. You want to make sure that both doors swing freely without rubbing against the cabinet faces. 2 Once you have caught those differences, tighten down all screws securely on both leaves of each hinge. This is now where you'll mark the point for your pivot or screw hole depending on which type of surface mount hinge you use. For concealed hinges, if it's not already drilled out, drill out the pivot holes while leaving both leaves loose from their respective cabinets. 3 With your marking pencil, make a mark at the screw or pivot poi you are going to use. This is where both leaves will meet if open fully. 4 Check the height of your hinge on the door by aligning the point on your exposed leaf with your marked location. Now that you have found that correct height, measure up 36" from the bottom edge of each door opening and mark this onto all exposed faces of your hinge leaves which will correspond with the same 36" marks you made on all exposed faces of both doors so they can match up evenly when closed. For concealed hinges, drill out the holes for both hinges using pilot bits while leaving both leaves loose from their respective cabinets. 5 Once all pilot bits are drilled, set hinge leaves in place and secure with screws on the door using your self-closing feature. Hinges should now be securely attached to the doors and cabinets so they do not move when opening or closing. 6 For cabinet knobs, use a 90° angle ruler to measure between the cabinet edge and door edge of both doors where you want them to meet up for configurations of your hardware. Mark this onto the exposed face of each knob then remove these pieces for final installation. Hinge spacing is easy and functional. One thing you need to keep in mind though is that once installed correctly, the only visible part on display will be the hardware which includes the knobs/pulls, hinges and pivot plates since all others are hidden by either the door frame or face frame. The above steps are for when you are installing both doors at once which is ideal when planning out your kitchen cabinets to save time, but if you only need to install one door in particular make sure to adjust your hinges accordingly so they align properly after the installation. Also remember if there's glass installed in the window, ensure the glass doesn't break. The windows in the door can also have aluminium or other material such as metal screens. Not every door has an in-built window, which means there's a huge range of doors you'll find. If not going for standard sizes, contact a service provider to learn about the product availability. Tell the service provider about your house design, project requirements, the requirement of windows (door with windows or without windows), slide requirements, wall structure, wind direction, outwards or inwards swing, etc. They'll give you the information of any door that match or suit your requirements. The Australian Government's My Skills website has some great information about courses to [install and replace windows and doors](https://www.myskills.gov.au/courses/unit?Code=CPCCCA3010A).

How to Hang a Door

How to Hang a Door

If your door does happen to be one that requires extra support beyond hinges, don't worry, it's still a pretty simple job. One tip to keep in mind is that it's always best to measure twice and cut once. If your measurements have been accurate and you have properly fit the jamb side in the rough opening, it should be a simple matter of fastening on the hinge side as well. In most cases this is as easy as stretching out some heavy spring tension, using a battery drill or driver to drive screws through hinges into framing members. There are times when you need to employ additional support for an old door that will bear a lot of weight or open and close with a bigger arc - especially those that divide spaces where privacy is paramount (such as bathrooms). This type of door will typically affix onto a header by means of a steel strap, which is screwed into the framing on each side. If your door does happen to be one that requires extra support beyond hinges, don't worry - it's still a pretty simple job. The trick is getting all of your measurements right before you start cutting and screwing. In the step-by-step instructions that follow, we'll walk you through some common scenarios for a "hanging" door with a door frame that requires more-than-average support. However, if hanging a non-standard door frame becomes too complicated or time-consuming, consider consulting a carpenter or hiring a handyman to complete the task for you. ## What is the easiest way to hang a door? The easiest door to hang is one that has the hinges already attached. This makes the job quick and simple - all you need to do is fasten it to the door frame, usually with screws driven into wall studs or ceiling joists. If you're hanging an old door that requires you to drill pilot holes and install screws into the header, this is also a quick job since you'll have [strong tension from the hinges](/guides/doors/how-to-install-door-hinges) helping to hold it in place. ## What materials will I need? You don't need any specialised tools for hanging a door, but a power drill/driver and a tape measure are critical. You may also want to use a level to make sure everything is going up straight. If you happen to be installing two doors side by side, as is often done in entryways, you should definitely use shimming blocks [under the jamb](/guides/doors/what-is-a-door-jamb) of the first door as it hangs. This makes your job much easier when you install the second one. ## What are the different types of doors? Different door styles, [such as folding doors](/guides/doors/how-to-install-folding-doors), require different hardware. For example, a hollow-core door will typically attach to the header via a gravity hinge (a spring that keeps it closed), while solid wood or metal doors typically require some type of strap or another device for hanging such as a steel track. ## What are the different types of door hinges? The most common type of hinge is a gravity hinge, which keeps the cabinet closed and prevents it from swinging out when the door is opened. You'll also find spring-loaded hinges that help to open doors with a full overlay and ones in which the top of the door is heavy. These work by applying inward pressure as you open them. Tilt hinges are also available that allow the door to swing open from the top. Other types of hinge include the third hinge, loose pin hinges, bottom hinge, and more ## What are some common mistakes when hanging a door? When installing multiple doors, a lot of people make the mistake of not setting up guide strings or using shimming blocks under the first door as it hangs - this makes your job much easier when you install the second one. Another common mistake is overdriving screws into delicate mouldings, which can split the wood inside and outside. If you plan on painting your new door, be sure to use quality paintable caulk between all trim and jambs before painting both sides of the new door. When you're done hanging your door, don't forget to wipe away any pencil lines, especially from the top of the door, which is a place you can easily overlook. While this isn't a major issue, it can ruin the aesthetic of your door. ## How do I hang a door with a steel track? Hanging a door with a steel track is fairly simple. If you're installing one door, drill two holes in the header, at either side of the opening. Screw an L-shaped bracket to each hole. You can cut off excess brackets but leave them long enough to hold your tracks securely. It's easier to set up if you have help - position the tracks on their brackets and close the door onto them before screwing them into place. After setting up both sides of the track, install the door itself using a hinge that is designed for this kind of system (gravity hinges will not work). Even better, use magnetic cabinet catches so they don't even require any effort to open and close. ## Can you just hang a door on an existing frame? Most doors will require a frame of some kind to support them, whether it's a doorstop or door jamb that's already in the wall, or something you build yourself for an entirely new installation. This can be as easy as screwing into existing studs or joists to support the weight of the door, especially if you're hanging just one door. Or, it might mean building your own support structure from scratch using 2x4's and plywood. This is what you'd do if you were installing two doors side-by-side or fitting out an entirely new opening with bookcases on either side of the rough opening. ## What tools do I need to hang a door? - Power drill/driver. - Circular saw. - Sharp chisel. - Tape measure. - A level (for placing both exterior and interior doors). - Shims (if your frame doesn't quite match the size of your door - most commonly used with pre-hung units). - A stud finder (for locating joists in your wall - you can't simply screw directly through drywall, even if it's a finished room). - Hinge plate (or several). - Marking gauge. - Dust mask. - Utility knife. - Combination square and a sharp pencil. - Wooden wedge (or several). - Hinge screws and other screws that you may need. - An electric plane. ## How do I hang a door with shims? On the inside of the jamb, place an L-shaped guide string/wire above each hinge location. When there are multiple hinges on one side of your new door, it won't be practical to use guide strings at every hole - instead, use one or two wires across all of them. Make sure they are taut and level and that you're holding them in the exact position before driving screws into the jamb side of the hinges. Once you have taken care to set up your outside guides, drill holes for your hinge screws at their location on the door. Screw in the pre-installed hinges and check to make sure the door swings freely, then drive one screw after the other into place to attach your shims. Your door should swing smoothly without any further adjustments, but you might need to fine-tune it with a rubber mallet if there is significant contact with the door frame. ## Do you put hinges on the door first or the frame? It doesn't matter much - you'll probably find there are much better instructions on the packaging for your door hinges. Make sure they aren't too tight before you screw them in, as this can make it much more difficult to install the door later. ## Can I use doorstops instead of shims to hang a pre-hung door? Hanging doors with doorstops is often easier than shimming, but if you don't want to risk splitting the new frame or jamb, it's simpler to use shims. You may also need shims if your wall isn't perfectly straight - just screw them into place along any sagging areas until everything is level and plumb. ## What is a shim? A shim is a thin wedge of wood that can be used to fill a small gap or raise an item slightly. When they go in small gaps, they make the gap tighter. They are typically used with carpentry projects, but they are also very handy for hanging doors. ### How do you install a shim? Shims are typically inserted between two items, such as the wall and the door, so there's no need to glue them in place. Start with measuring your space using a tape measure. Once you have determined how thick of a shim you will need, cut the piece out of the right type of wood that is sturdy enough to support everything without ripping or bending under pressure. Hammer it into place at each corner until everything fits perfectly together snugly. Make sure not to use too much pressure, as this could split your frame or jamb. ## How do I install sliding doors? The same basic process applies for installing [sliding glass doors](/guides/doors/how-to-remove-a-sliding-glass-door) or interior doors in your closet as hinged ones. First, set up support brackets inside the opening that will hold both sides of the track system. It may be easiest to attach these first before setting up your tracks, but if you have a pre-assembled track, you can set it up in the opening and attach the brackets later. Use a level to make sure the track is straight before drilling one screw after the other into place. Since you now have a solid base for your door, you should see that the new door opens smoothly without any further adjustments. When there are no tracks involved, this is actually an incredibly easy process. Everything from installation through to hanging your doors should take under an hour. First, find studs in your wall, or install blocking between joists above where your doors will go. A drywall installer can help with this if necessary. Once your blocking is in place, install a header with two cleats. If you'll be inserting hardware for hinges and handles when the door is installed, make sure to do this after you've set up your header. Then, install your track system to the header and let everything settle. You'll be working with gravity here, not screws or nails. Install all of your spring-loaded hardware next, including hinges and handles if necessary. Your doors should open smoothly once you have everything in place - check them a few times over a couple of days to ensure that this is still the case and that the door fits properly. If you need to fine-tune anything at this point, it's very easy to do so. ## How do you fix a misaligned door? If your door is sticking or not opening properly, this could be because it doesn't fit the frame well. Fixing these problems can be tricky without professional help, but you can try adding shims along the door edge to make everything flush. If adding shims to the leading edge of the door isn't an option, you may need to do some more intricate repairs like replacing a section of damaged moulding around the hinge side of your door. ## How do you fix a warped door? If your door has started to warp over time, it may be that the humidity level in your home isn't high enough. Consider installing a dehumidifier or opening windows and doors throughout the day to ensure air is circulating well. If this doesn't help, try using shims along the frame of the door to make everything flush. If your pre-hung door won't fit into your frame may need to remove it or crack around it so that the exterior (the opposite of the lock side of the door) now lines up with where you want it positioned on your wall. Use caution when doing this as not all frames are the same. ## How do I put a door back on its hinges? Make sure you have the right tools available before beginning. Once you have everything ready, start by opening the old door as wide as it will go. Measure the gap between your hinges (keeping all the hinge positions, including the top hinge, middle hinge, and bottom hinge in mind) and where they should be on the other side of the wall or frame. Remove any existing screws from the hinge side using your screwdriver - you'll need to do this carefully so that you don't strip anything out of place. Next, find replacement screws that are exactly like what you removed (they should be the same thickness and size if possible) and fit the screw holes. Carefully reattach them to your hinges, holding the door steady, before closing up the door again. Your goal is to make sure it closes properly with no resistance before opening all the way; if necessary use shims or spacer blocks to get the right fit. Properly-installed are doors are [important for home safety](https://www.yourhome.gov.au/live-adapt/safety-and-security), as outlined on the Australian Government's Your Home website. ## How do you remount a door? If you've ever had to remount an existing door, it probably wasn't a great experience. You likely fought with the weight of it or struggled to line up screws and fasteners properly. It's possible to remount an old door without any additional help if necessary. Start by removing all hinges from the exterior doors (that is, the opposite of the strike side of the door). Then, lay it flat against your workbench or even on its face on top of some sawhorses if that's easier for you. Once the right side of your door is perfectly aligned, use spacer blocks to hold everything tight while you screw in new hinges from outside in. Make sure you're not working with the wrong side of the door, as this can cause serious issues. You may need an extra set of hands for the next step - take your time with this part! Open the door as far as it will go, then carefully lift it up by itself. Line up the hinge positions on your interior door with the new hinge position on the opposite side of the door and press the hinge recesses to meet the old door frame. When you're satisfied that everything is properly attached and the hinge recesses look fine, close up your door one last time to double-check for any loose pieces or misaligned parts. Once this final step is done, reattach all of your hardware so you can use it again. If you're still uncertain about how to hang a door, considering contacting professional handyman services for help. They can help you hang your new door properly, they're also helpful in situations in which you need more specialised help, including: - Hanging a heavy fire check door safely. - Making sure the door lining and frame is installed properly. - Installing the strike plate, lock block, and rest of the lock on your door. - Applying weather strip around the door opening of both your internal door and external doors as needed. - Making sure there is no damage to the other components on and around your door, including any light switch located near the door, the floor covering, and so on.

What is a Bifold Door?

What is a Bifold Door?

A bifold door includes two hinged panels that fold against each other allowing for easy passage in just one motion. The glass panels are folded into the frame when closed, which means they don't stick out into your hall or room in any way. ## Why should you choose a bifold door? One of the main reasons for choosing bi-fold doors is that the doors are available and they occupy less space than sliding doors. Therefore, there's plenty of space in your hallway or room. You can also get them to fit into smaller spaces because the folding door gets into the same door frame when closed. Bi-fold sliding doors are great for hallways as you can create an entire space to pass through without having too much excess space. In connecting living rooms, they allow you to access large spaces at once and make full use of every inch of floor area. Another reason is that the bi-fold door is straightforward and easy to maintain making them a great choice for people who simply want conventional doors. Bi-fold door configurations don't require any special installation, cutting, or fitting; you can simply fix it into place with hinges. ## How long does a bifold door last? Bifold doors are constructed using the same materials as conventional sliding doors [like aluminium](/guides/doors/aluminium-door-frame-price) and PVC. The aluminium bifold doors are durable and can easily stand up to day-to-day wear and tear without needing repairs or maintenance. You can expect your bifold door to remain in good condition for many years. However, if you want extra protection against damage, there are some steps you can take to improve its durability even more such as using the right measures for double-hinged fittings, fixing weather seals, using high-quality locks and painting metal doors with rust paint. ## What are bifold doors used for? Bifold doors are perfect for your hallway or two spaces. They allow you to create a wide opening on multiple points in small spaces without having any excess space in the way when closed. You can also make use of every inch in your hall, bedroom or entertainment areas since they don't stick out into the space when opened. You can access large spaces at once without worrying that your doors will get in the way. They're also easy to maintain and [don't require special installation](/guides/doors/how-to-install-a-bifold-door), cutting, or fitting. Your bifold door will remain in great condition for many years and come with all the features and benefits of a standard door such as strength, durability, and weather resistance. ## Are bifold doors easy to install? Bifold doors are straightforward and [easy to install](/guides/doors/how-to-install-door-hinges) as they only require you to fix them into place with hinges. The exterior bifold doors are made up of two hinged panels that fold against each other, but when closed the glass panels simply sit inside the same frame so you won't have any excess space in the way. ## What are the benefits of bifold doors? Aluminium bifold doors use the concept of traditional french doors and are a great choice for homeowners who appreciate simple, yet very aesthetically-pleasing hardware. The energy-efficient glass, colour, and finish of the door make it an excellent accent on very little space and automatically gives your room a classy touch. Internal bifold doors make rooms appear more spacious and they open up to give you access to the deck or patio. If you have a small house with an already busy design, small-size bifold doors are the ideal choice because the doors fold away without taking up too much space. There are many different types of bifold doors to choose from. If you prefer doors folding with traditional panels you can get bifold hardware with flush panel [concealed hinges](/guides/doors/what-are-hinged-doors). However, if you are looking for more elaborate door decor then there is nothing better than choosing some wood-paneled or glass bifold system that offers tremendous visual appeal. One of the best aspects about bifold doors is that they have large glass panels ideal for dressing large openings on outdoor landscapes as well as interior ones (for example between rooms). The sliding door will fit seamlessly into any outdoor living space and look like they were meant for this place since its construction. Hinged doors can also act as room dividers when they cover the entire wall. ## What are the negatives of bifold doors? As with any other type of door, bifold doors have their own set of disadvantages but they are not a major concern. The first drawback is that you need to have either an existing roller track or a freestanding frame where panels slide. That means you cannot use this system if you have no walls or there are no additional framing members inside of it. Bifold hardware can fit over most standard door openings but before purchasing the system, measure the space to ensure that all panels will open without hitting any items stored away. Also, check whether the door kit includes side lights (pane or panel on each side of the door). ## What styles of bifold doors are available? Bifold doors come in many different styles owing to their versatility and ability to work in any room. For example, if your exterior wall has a classical design, then you can choose reinforced glass either inwards or outwards. You need a system that matches the existing décor or a different one that will create a stunning contrast between the interior and outdoor furniture decorating styles. Bifold doors also come with traditional panel doors as well as those with wood-panelling. There are many different colours to choose from for both hardware and panels so make sure to select the colour scheme that works best in your home. If you want something more stylish yet still simple, consider bifold door with a traffic door design made of glass with either square or rounded edges. These systems give an instant facelift to any room because no other door hardware is as stylish. ## How do bifold doors work? Bifold door sets are surprisingly easy to install even if you have no previous experience working with fold doors. There are many glass options available depending on the sliding track and the type of walls you have in your homes interior and exterior. Therefore, make sure to read any installation manuals before beginning the process. ## How do I install bifold doors? If you are installing them in a room that already has an opening for the door, then read the installation manual thoroughly to find out whether or not you have to build additional framing. Most bifold kits come with sidelights so the only thing you need to do is measure your existing frame and purchase a kit that matches its dimensions. After installing these doors, check whether they move freely inside of their casing without hitting any objects or straining because this could damage hinges or other hardware components. Cleaning rollers lower tracking system regularly will help prevent problems with rusting or jamming of the system. ## How much do bifold doors cost? Bifold door sets will change depending on their type, size and whether you need additional hardware for sidelights. Generally speaking, you should expect to pay around $250-$300 for a standard kit that includes both sides of the doors as well as the hinges required for attaching them to existing walls or frames. For something more luxurious it is best to go with larger panels with an excellent tracking system so you can be sure all hardware fits perfectly inside of your home. ## How long does it take to install bifold doors? If you already have an opening in your wall (and no one has ever removed the frame) then expect it to take around two hours at most if there are no other complications involved. If you are trying to create a new opening or build one yourself, then it might take up to several days before you fully finish the installation process. ## How do I maintain folding doors? Bifold doors should be easy to maintain because of their construction and material type. Simply use warm water mixed with mild dish soap to gently wipe down the panels and roller tracks on both sides of the hardware. Compressed air will come in handy for removing the dust that accumulates on hinges or inside track systems. If you notice any signs of rust forming alongside the hardware, purchase special kits designed for preventing this problem from occurring again in the future. Interested in a career installing doors? Take a look at the necessary courses on the [training.gov.au website](https://training.gov.au/Training/Details/VU20561).

Doors Informational Articles

How to Install Door Hinges

How to Install Door Hinges

Door hinges are an integral part of your door's working mechanism. When doors are not installed properly, you will have problems with the hinges and it is important to have them fixed right away before the issue leads to something else. Here are some tips that will help you fix your door hinge problems at home. ## Installing door hinges correctly Prepare yourself for the job by getting the necessary tools. In installing door hinges, you will need a screwdriver, pliers, hammer, and a sharp chisel or thin bar. These tools are sufficient to remove the current hinge pins and screws, which you will replace with new ones after removing the old hinges. Hinges are critical in making a door [safe and easy to use](/guides/doors/how-to-make-a-door). 1 Remove the door from the hinges so you can have clear access to these parts. If you have a flat panel or flush door, it is best that you remove the hinge screws first with a screwdriver before removing it from its hinges. This way, your door won't accidentally fall and get damaged. It is important to note that interior doors have two hinges and exterior doors have three. 2 After removing the screws, gently push out the pin holding each of the hinge pieces together using a flat chisel or thin bar. You can also use pliers if you don't have those tools readily available as an alternative. Just make sure not to bend them, as this will make them unusable later on. In order to put everything back properly without having any issues, be extra careful when removing the pins. 3 Remove the old hinge screws from their holes on the door jamb using a screwdriver before installing new ones into these positions. Make sure that you put screws that fit perfectly into these holes on the top and bottom sections of your door hinges before tightening them up. Also, don't forget to put in some grease every time you replace an old screw so they can slide through easily without being too stiff. There are general dimension guidelines on where to place the hinge on the side of the door. Professionals recommend that the top hinge be placed approximately 5 inches from the top door jamb and the bottom hinge 10 inches from the bottom. The third hinge, which is the middle hinge, should be at the centre of the door's height. These measurements are useful whether you are installing a new door or door blanks. To install door hinges on a new door, use a tape measure to get the correct positions for the top and bottom hinges. Remember, your door type, and door function will determine the appropriate hinges. From your local hardware store, you can buy different types of hinges to suit your needs. You can choose from, among others, pin door hinges, spring door hinges that close the door automatically, or ball bearing door hinges ideal for heavy doors. ## Do door hinges have to be recessed? No, hinges don't always need to be recessed, but the majority of them will likely require some sort of recess. It all depends on your doors and what you plan to do with them. If it is a sliding door, then any type of door hinge will work as long as it can support the door's weight. But for swing doors, some hinges require the wood to be recessed, so they sit flush against each other when closed. If you are looking at installing a security screen door, there may be various standards you have to follow - like these ones for [New South Wales](https://www.fairtrading.nsw.gov.au/trades-and-businesses/licensing-and-qualifications/installation-of-security-grilles-and-equipments). ## How to fit flush hinges First of all, it is necessary to be aware of the types of flush hinges. ### Concealed FH hinges The concealed hinge has a device that allows the door leaf to be opened against the face of the door leaf. It is commonly used with hanging wardrobes or pelmets. ### Exposed FH hinges The purpose of the exposed hinge is to hold the door leaf in a flush position against another flat surface, for example, a sideboard or cupboard. It is important that the face of this type of hinge must sit flush with whatever it is being attached to. ### Conventional FH hinges The face of the leaf and the cabinet leaf are flush when closed. The flush hinges always need a recess or a cavity to be able to sit inside. The hinge pin is pushed through both leaves and secured with either screws or nuts and bolts. Make a recess in the door leaf by using a drill about 1.5 - 2 cm deep. The hinge is placed on the door edge and pushed into position to check its location. The door is then carefully closed. If it is able to close completely with the hinge pin just touching the edge of the door leaf, the hinge will be flush on the face of the door. If it still protrudes slightly from the edge, keep removing material until it is flush. On the other hand, if the hinge pin penetrates more than 1cm into the door leaf, then reduce this material until it is flush. ## Do you put the hinge on the door or the frame first? The hinges are usually fixed to the door before attaching it to the frame. However, this will depend on the type of hinge and what material you're working with. The most common types of hinges are the butt, T and corner door hinge. When attaching the hinges to frame cabinets, make sure that the hinges are fixed to the cabinet frame before you attach it to the door. ## How do you mount a T shaped hinge? The T-shaped hinges are the most classic ones. The design of this hinge allows you to attach each end of the door to one common point. The hinges are fixed on the bottom or top of the door. There is a small hole in each arm of the T, so you need to pass your screw through it and tighten it later on. While fitting your door, get a friend to hold it in place so that you can get the screws into the holes of the T. Get them started first with the tip of your screwdriver and then tighten them using a power drill. ## What is a door leaf? A door leaf is the hinged or movable portion of a door that swings open to allow access. Door hinges are mounted on both the door leaf and frame, allowing them to swing open. A standard solid door has two leaves. When the door is closed, the door leaf and frame should be snug against each other. A flush hinge is a type of door hinge that allows the door to close without its surface touching the doorframe, creating a gap between them when the door is closed. The most common configuration for a flush hinge has two leaves: one consists of an immobile part mounted on or screwed into the cabinet, and another moveable leaf consisting of "arms" which attach to the backside of the cabinet; this end usually has male connectors (called "pins". The flange here would be female). A male connector (usually cylindrical) fits into a corresponding hole in the movable leaf's arms and locks it into place. Pushing down on the pin will disengage the pins from the holes and allow the leaf to be repositioned. ## Do you have to chisel out recesses for hinges? In order for your doors to sit flush against each or whatever surface they are being attached to, hinges need a recess or cavity so they can sit inside it and not protrude from the edge of either side. Generally speaking, flush hinges come in 2 types: exposed and concealed, which means they don't always require a set-up but most likely will need at least some type of recessed area depending on what type of door you are mounting. It is always best to make this area slightly larger than the actual hinge so that you can work with it more easily. For example: if you want to attach a door for which flush hinges are recommended, then before putting any holes into the surface of your furniture, find where the recess needs to be and start making it by drilling 1.5cm to 2 cm deep into the wood, marking its diameter on your drill bit or use a pencil or a utility knife. Now connect all 4 points to form an accurate circle that fits that specific part of your hinge. You can then use a chisel or other tool that can cut into wood and create a nice round shape inside that cavity. That way, when you place your new hinges in their respective positions, you will be able to push them inside the recessed area and fix them into place. You may need to hire a professional to do this if you are looking to install a [security screen door](/guides/security-doors-screens/security-screen-door-prices). ## How to rehang a door Door sag is a common problem that can cause an annoying and potentially dangerous door. Replacing the hinges on a door is easy, but you will need to remove them first. Removing old screws from a metal hinge can be difficult if they're really stuck in there. This process is generally universal, and makes [fitting a new screen door](/guides/doors/how-to-install-a-screen-door) easy. A variety of methods are known for hanging or "rehanging" a door on its hinges. The best-known of these is to tap a new set of matching screws into the existing holes in the hinge plates. Directions for door installation: - Remove the existing screws in your door hinges using an electric drill with a screwdriver bit, if possible. - Position the bottom of the door so that it is laying flat on a flat surface, such as the floor. - Start tapping new stainless steel hex-head screws into the existing slotted holes. The screws should be long enough to reach through the hinge plate and engage firmly in the door frame. - Continue inserting screws until they are all firmly engaged in the door frame, levelling and aligning the hinges as you go. - Hang the door by engaging the hinges in the original holes on the old door frame, and then just tighten down each screw. In wooden door frames, it is advisable to pre-drill pilot holes before inserting the screws.

How to Remove a Door Knob

How to Remove a Door Knob

Taking the time to replace doorknobs is easy for anyone who has the slightest bit of DIY experience. You should only take about a minute to remove a door knob. If you have standard interior doors and you want to upgrade the look and feel of your home, choosing to replace an old door knob with a new one is probably the first thing that comes to mind. You will need to have the right tools for the job. Some tools you will need to have on hand include: - A wrench. - Screwdrivers. Each screwdriver has a different application - for example, a flat head screwdriver is used when working with flat head screws and a recessed screw usually needs a Philips head screwdriver. - Screws of various types, including mounting screws, flat head screws, and at least one recessed screw (have a couple on hand). - Angle grinder. - Drill bits, including a hole saw bit. Some parts of your door, door knob, and latch and lock mechanisms you should be aware of include: - The round cover plate. The cover plate on your door conceals lockset holes. Without a cover plate, your door would have a much more unfinished look. - The latch bolt. - The strike plate or latch plate. - The latch plate is a piece of metal attached to the doorjamb with a set of holes where the bolt of the latch will slide in. The latch plate ensures the door remains closed when you slot the bolt in. A faulty latch plate will mean your door will not lock properly. - The exposed screws, visible screws, and mounting screws that are already present on the door. - The door lock itself. - Latch assembly mechanism. ## Removing the door knob Firstly, check for screws on the interior or exterior edge of the knob. If there are no visible screws or exposed screws, try lightly tapping around the centre of the knob (and surrounding area) with a hammer and screwdriver (we recommend having both a Phillips head screwdriver, a narrow screwdriver, a flathead screwdriver, and other appropriate screwdrivers on hand during this process - these screwdrivers will come in handy) or another tool (like an Allen wrench or some other similar tool); this may loosen it enough that you can unscrew it manually. ### Scrape away any paint Scrape away any paint buildup from around the hole where the doorknob is attached using a metal scraper like those used to remove excess paint (such as an ice scraper). If the inside knob is in good shape, this shouldn't take more than a couple of minutes. You may also have to scrape away paint from around both the cover plate and the strike plate. ### Apply penetrating oil Spray oil or WD-40 onto the screws and wait 10 to 15 minutes for it to soak in and free the screw. Penetrating oils are designed specifically to loosen the visible screws that have been tightly screwed into place for extended periods of time without being removed, so they are excellent at freeing old door knobs quickly. Another option is using heat from a lighter or match until it's red hot on the spot where the screws meet the door frame. Let it cool down for about 5 seconds, this some of the metal to expand and loosen the screw. ### Unscrew any screws Unscrew the screw using either a Phillips head screwdriver, flathead screwdriver, or hex key head screwdriver (if your door knob doesn't use one of these heads you should be able to get away with using a different one in order to unscrew the screw. However, using a different head than required to unscrew may damage the other components in your lock and is not recommended for inexperienced users). You can buy an attachment that turns your own Phillips head screwdriver, flathead screwdriver, and other appropriate screwdrivers into a hex key; they are inexpensive and easy to install (just slide it onto your existing driver and turn until tight). Once you have managed to unscrew the screws, slowly pull on the doorknob until the inner mechanisms dislodge from the door frame. This should give you enough room to unscrew any screws (including mounting screws) that prevent access to other parts of the lock. ### Remove the old door knob Once all visible screws, exposed screws, and mounting screws are out, slowly turn the door knob back and forth until it comes loose. With a simple lock like this one, there's no need to worry about locking pins or anything like that; all you need to do is pull (gently) and rotate the exterior cylinder away from the interior mechanism until it pops out of place. ### Install the new door knob Place the knob into position and screw in any screws (including mounting screws) on the exterior edge of the knob, then slot the inner mechanisms into their respective positions. Reattach any other components (including the cover plate and strike plate) you have removed by attaching them back in place with screws. Finally, attach your new door knob to the door frame by twisting it gently back and forth until it clicks into place. ## How do you remove an old door knob without screws? If you've ever wondered how to remove a door knob without screws (including mounting screws), this section should help you. 1 Hold your screwdriver with extra force into the centre of the door knob's base (where it meets with the door frame) and twist counter-clockwise until you loosen it. 2 If this doesn't work, you'll need to brace yourself and pull on (or pry) the knob hard until it comes loose; this may take a few minutes but you should be able to break free one way or another. If you have an Allen wrench set, it can come in handy. 3 Do not use excessive force when pulling or prying on a locked doorknob as they are subject to serious damage (and risk breaking all together). ## How do you remove a lever door handle? Lever door handles differ from a doorknob in that they have a protruding bar that serves as a locking mechanism. Simply remove this by inserting the Philips head screwdriver, flat head screwdriver, or another appropriate screwdriver into the hole where the lock should be and twisting counter-clockwise until it comes loose. If the locking bar is out of place, don't force it back in until you have removed your door knob. ## Is it easy to change door knobs? Taking the time to replace doorknobs is easy for anyone who has the slightest bit of DIY experience. It does not require special tools or any advanced skills to replace door knobs, just patience to ensure that you're doing things correctly. Changing door knobs is a simple process that will only take an hour or two (and some basic tools), depending on how many doors you are changing or [what types of door](/guides/doors/how-to-make-a-door) they are installed on. It is not uncommon for homeowners to change their knobs when they are painting rooms in the house. Changing the hardware throughout the house makes it easy to update your home's style with little expense, and is a great way to breathe new life into old doors that have seen better days. ## What types of door handles are available? There are two main types of door knob, each with its own advantages and disadvantages. The first type of knob is a round handle, which you turn to lock or unlock a door. The second type of knob is a bar-style handle on the side of the door, which you push up or press down to allow it to open. Both come in different sizes and designs, but beyond that, there isn't much variance from one style to another. In general, the choice between a round or bar style depends on how your [doors were manufactured](/guides/doors/fiberglass-vs-steel-door) as well as your personal preference. ### Round handle door knobs This type of door knob is very easy to use and comes in a wide range of colours and finishes. The downsides, however, are that round door handles can be difficult to grip tightly because they don't have any sort of bar. If someone has arthritis or other issues with their hands, round doorknobs are quite hard to open. ### Bar-style door knobs These knobs are great for people with disabilities as well as seniors who may have trouble getting a firm grip on small items. They're also useful for families with children since there is no way they can accidentally open the door useless they push up or press down on the bar. The downsides of this knob are that these handle bars tend to collect a lot of dust and dirt, and they can be difficult to clean without the right tools. ## How do you tighten a door knob with hidden screws? Hidden screws can be difficult to tighten because most people don't know they exist. The best way to tighter these screws is with a drill bit for making a hole in metal. Drill directly into the screw head with very low torque, then open up the small hole using a larger drill bit of your choice. Most modern door knob installation processes require you to apply sealant between two pieces of metal, so if you aren't careful when drilling this hole it's possible to make it too big and cause problems later on. The Queensland Building and Construction Commission has a handy guide for various standards and tolerances of a wide range of home applications [such as windows and doors](https://www.qbcc.qld.gov.au/sites/default/files/Standards_and_Tolerances_Guide_0.pdf"). If this doesn't work, try using a pair of pliers or vice grips on top of your flat head screwdriver or another appropriate screwdriver until you are able to get enough leverage to break the lock free. Do not use excessive force when pulling or prying the lock as you run the risk of damaging your door. ## How do I remove a broken door knob? Remove a broken door knob by using a pair of pliers to grip as much as possible and then turning it out counter-clockwise (to the left). If that doesn't work, try to insert a flat head screwdriver or another appropriate screwdriver into the tiny slot between where your lock should be and twist it counter-clockwise. The screws (including mounting screws) holding this in place are usually hidden behind the face plate (or cover plate) on modern models, so make sure to apply pressure evenly as you work on the plate or you might end up stripping the screws and making your problem even worse. You may also have to remove the cover plate, depending on the type of door you have a whether or not the cover plate is broken like the inside knob. The face plate is a decorative plate on the door edge. It is sometimes the same as a cover plate, and like a cover plate, it ensures that your door has a more finished look. Once the lock is off, what remains is a small metal rod (sometimes considered a small pin) called a spindle. You can remove this with your hands or using needle-nose pliers to get more leverage. Pulling it directly out of the door handle mechanism can be difficult and often requires a fair bit of force. How you do this depends on your specific model, but generally speaking there should be enough room to pull it out without too much trouble if you're careful. If the spindle is stuck in a tiny slot, you may to carefully pry it loose from the slot. Next, try to insert the small pin into the replacement knob you purchased from Amazon. If you have trouble getting it in, don't lose hope just yet! When buying a knob for you door, be careful about the manufacturer. Some manufacturers produce knobs with slightly different mounting mechanisms so it might not fit perfectly at first. Don't be afraid to use a hammer or mallet to gently beat the new door lock into place if it isn't catching on anything. ## How do you take off a door knob without a slot? The best way to remove a door knob that doesn't have a small slot without causing any damage is to use a drill with a hole saw bit. Drill using the hole saw bit into the face plate, but do not go all the way through. The tip of the hole saw bit should get stuck inside the plate. Once the tip is stuck, this is a sign that should have enough leverage to break the knob free and also remove the face plate if needed. Once you've done this, twist your hand in a clockwise (to the right) motion and push outwards on the knob at the same time. If the knob doesn't come off in five seconds or less after you start to push, make sure you didn't drill too deeply and instead focus on getting more leverage by making your hole bigger using the tip of larger hole saw and other bits. Use a pair of pliers to grip the spindle and slowly remove it from your door. It should be very easy to do with such little resistance, though you may need a second set of hands in some situations. Once the old doorknob is removed, carefully install the new one. You will have to push the knob in and rotating clockwise (to the left) until the knob snaps into place. Make sure everything goes in the right direction and doesn't catch on to anything before applying pressure. Once you're done installing the new knob, simply twist counter-clockwise (to the right) once again and turn your handle to make sure everything is working properly. If the handle isn't catching, feels loose, or there's an issue with the latch then is still something wrong that needs to be fixed before you can lock the door again. ## How do you remove a door handle with hidden screws and no latches? If you've ever tried removing a door handle and noticed there are no visible screws or exposed screws holding it in place, then you probably have a door lock that uses hidden screws. You can still unscrew these without too much trouble. To unscrew, all you need is a simple rotary tool such as an angle grinder with a metal cutoff wheel or some other similar tools. Cut through the centre of your door latch until you break through to the other side of the door. If this is your first time doing something like this, we suggest practising on another piece of scrap metal first so that you're sure not to damage anything else while learning how to use your new toy! Once this is done, just twist the latch bolt back and forth in opposite directions until it breaks free and pull outwards. If everything went smoothly, then once again try installing your replacement doorknob and check if it's working properly. ## How do you remove a stripped door knob? The first step is to identify the cause of the stripped knob and latch. Was the issue with the door knob and door latch caused by rust, an accident, or faulty installation? In most cases, this isn't a permanent issue as long as you can get hold of a new door lock cylinder and latch mechanism for your specific handle set. If possible, try removing the stripped piece so that you have more room to work with when installing the replacement and doing latch assembly on the new latch and door knob. Once this is done, carefully insert the shaft of the spindle back into place making sure it doesn't catch on anything along its way in. Make sure it goes all the way in before turning clockwise (to the right) and test to see if it turns smoothly. If it doesn't, then try removing the spindle and clean out any debris on both the shaft of the spindle and inside the small slot. If the slot is fill to the brim with dirt, or debris is stuck on the spindle, that may be preventing your knob from turning. Depending on the size of the spindle slot, you may need a paper clip to help with things. However, make sure to be careful when getting the paper clip and your brother - when I told him how I was, and how you were, he said he wanted to meet. Once you've cleaned the slot and the spindle, gently tap along the length of the spindle where you suspect there might be a screw hidden underneath to loosen anything that might have been jammed in during installation. You can also try running a length of dental floss or string underneath so that you create a makeshift fishing line and pull or pry any extra screws up and away from the door latch mechanism (this works best with 4-sided latches). Once all screws are out and everything is clear, insert the spindle into the slot again. Then, twist clockwise (to the right) into the slot once more until it snaps into place. If nothing seems to work and you're really stuck with a stripped doorknob, then unfortunately it might be a sign that it is time to replace the entire latch mechanism. This is usually only the case if your handle is still attached but both need to be working before you can lock or unlock your door again. Once this is done, simply install your replacement doorknob by inserting the spindle and turning counter-clockwise (to the left) until it drops into place. Feel free to measure the space that the knob will fit into, so you will have an idea of what you're looking for in a replacement. If everything goes smoothly, then the knob clockwise (to the right) and check for proper operation of each side of the door before locking up and testing out your doorknob. If you are looking for an extra level of comfort and airflow, try [installing a screen door](/guides/doors/how-to-install-a-screen-door).

What is a Door Jamb?

What is a Door Jamb?

A door jamb is the vertical portion of a door frame and created by assembling the separate rail and support parts to form each vertical side. The wood used in the production of the jamb typically matches that found in the rest of the construction such as the window sill. But it can also be made from composite or metal materials for exterior use where durability is important. The jamb is mounted to the flooring and walls on either side using screws or nails. The thickness of the door jamb depends on all the elements such as the type of door installed, as well as its intended location. For external doors, it may be necessary for someone to design the door jamb according to local building codes. This would vary depending on elements such as expected temperature extremes, whether foot traffic and wind load are light or heavy. The difference that the various designs have in appearance and quality of the door jambs is also incredible. A typical interior door jamb has an L-shaped profile, which is attached to a panel or wall on one end (the bottom) and includes a horizontal crosspiece (the top). A hinge attaches to this crosspiece. When you seal the door shut, it will swing open inside of this door frame. A door jamb can be constructed out of various materials, depending on the requirements for the installation. ## Is a door jamb the same as a door frame? No. A door jamb is the vertical side of a door frame, whereas a door frame encloses all four sides of the doorway. In fact, door jambs are created by assembling stile and rail components to form each vertical side of an opening. they are integral to the safety and security of your home. The thickness of the door jamb varies with elements such as the type of door installed, as well as its intended location. For exterior doors, it may be necessary for someone to design the door jamb according to local building codes, This would depend on elements such as expected temperature extremes and wind load. A typical interior door jamb has an L-shaped profile, which is attached to a panel on the wall on one end (the bottom) and includes a horizontal crosspiece (the top). A hinge attaches to this crosspiece; when the door is closed, it will swing open inside of this door frame. On many sliding doors, there are two hinges; there are also sliding doors with one. The thickness of an exterior door jamb is usually 3 1/4" to 4". The thickness varies according to local building codes and wind load requirements. A typical interior door jamb has an L-shaped profile, which is attached to a panel or wall on one end (the bottom) and includes a horizontal crosspiece (the top). A hinge attaches to this crosspiece; when the door is closed, it swings inside of this. On a [screen door](/guides/doors/how-to-install-a-screen-door), there are two hinges; there are also standard sized doors with one. There are wood, steel and aluminium door jambs. ## What are door jambs used for? A door jamb is the vertical side of a door frame. Door jambs are created by assembling separate rail components to form each vertical side of an opening. A door jamb can be constructed out of various materials, depending on the requirements for the installation. Using a stud as a guide, mark the top and bottom of each door jamb location on it using a marker or pencil. This will make it easier to install door jambs by bringing it down the middle along the length of each stud. Many doors have [hinges attached to one side](/guides/doors/how-to-install-door-hinges) only (the left or right). However, there are some doors that require hardware on both sides of them for installation: these are called "full-mortise" hinges. This type mounts directly into the exterior door frame or into an extension that has been added onto its surface. Then, it swings freely inside of this door frame once installed. ## What is door jamb and casing? It is a piece of moulding, usually, one side but double-sided is also used. The casing has an "L" shaped cross-section with the long face set perpendicularly from walls and the shorter edge flush with the covering. This is roughly equivalent to the thickness of the wall. The casing is used to cover the joint between walls and the floor or walls. It is attached with nails or glue depending on the trim. Casing or door sweep is generally thicker than door jamb and usually made of narrow flat boards. The long face of the casing has one edge that is set perpendicularly from the wall surface. The shorter edge has the same thickness as the wall covering material. Mull casing covers joints where two different materials meet at right angles. Casing is nailed onto a stud on each side of an opening while the door jamb sits inside the door frame after it's installed in between said studs. If you have only one hinge per door, it would be on the left side for a right-opening door and on the right for a left-opening door. Sometimes, it can have decorative trim and sidelights for a better appearance. ## Is a door jamb the same as a doorstop? A door jamb is a piece of milled lumber that attaches to the exterior wall and has hinges attached to it. The other side of the door attaches to this jamb and swings inside it when you pull it open. A doorstop is simply a flat board (or board and a half) that sits on the floor and stops the swinging portion of the door from hitting any obstacles, such as walls or furniture. Both are simple pieces of wood with some joints but quite different in size/shape/application. Most door jambs attach parts of a door, either interior, exterior or side jambs, into an opening such as a stud. Doorstops prevent damage by stopping doors from swinging too far open and damaging areas around them. It sounds like you're asking about an interior doorstop, which would be a flat piece of wood approximately the same size as the interior width of the door. This is used to keep a door from opening too far and hitting other objects in its path. ## What is a door frame? A door frame is a wooden structure that holds a door and surrounds it when it swings open. The room side of the door typically has hinges, while the backside of the door can have one or two hinges depending on whether it's an interior or exterior door. A door frame is a framework that encloses and supports a swinging or sliding entranceway. It includes several parts of a door frame including rail as well as crosspieces, which are fitted together to form an L-shaped profile with one vertical section (the jamb) and one horizontal section (the head). A number of hardware types attach to this head: pin plates sit at both the top and bottom of the head, allowing for two or more leaves -- each hardware element attached to a corresponding plate via an offset pivot joint -- to move independently. In the case of a double-hung door, there will be a fixed upper leaf and a vertically movable lower leaf; in the case of a sliding door, only one jamb is involved -- hence two hinges are attached to it. In both situations, the hinges consist of two pins (top and bottom), which fit into corresponding holes in each plate; they turn on simple pin bearings. But they also contain coil springs that hold the leaves apart (in the case of only exterior doors) or push them snugly against their respective door jamb (in interior applications). ## Does a sliding door have a door jamb? The door jamb is the fixed side of the door. The hinges attach to this part of the door, and it becomes part of the door and the interior or exterior wall and holds up the weight of the door (which is why it must be attached to a stud). A sliding glass door does not need a jamb because it is not affixed to anything; it simply slides away from its opening A door jamb is typically on the outside of your house, providing support for external doors. A swinging entry type door has one end that opens into a room and another end that swings out into a hallway or foyer. A [sliding-glass door](/guides/doors/how-to-remove-a-sliding-glass-door) typically consists of two tracks mounted on either side of the screen door and a door that rests on the tracks and glides open and closed on rollers. Sliding-glass doors contain no door jambs or head jambs, just rails. A pocket-type door is a special sliding-glass door that folds back into its own panel, which rests inside the door. Pocket doors have no door jambs or head jambs either. ## What types of door jambs are available? There are different types of door jambs, such as the basic steelhead jamb and the insulated steel door jamb. Steel is very strong and can hold a lot of weight, so either of these types will provide sturdy support for your door. Timber door jambs are also available, and they have a more traditional look. The different types of door jambs each have different benefits and drawbacks. ## What is an exterior door jamb? An exterior jamb provides support to the outside of your home. Side jambs are attached to one side of the door jam, while the other side has no head jamb; this allows the weight of the door to be supported by something sturdy on both sides instead of just one like with interior doors. On the other hand, for an exterior, you should make sure that you use at least two hinges so that it can hold up properly. Another issue is weatherstripping in varying weather conditions. Some people choose metal for their exterior door jambs because it holds up better against weather stripping than wood (pine or oak) does. ## How do you measure for a door jamb? If you are having a new door installed or replacing an old one, it is always best to measure the height (from top-down) and width (across) of the door first. Then, you will know what size door jam you need. If your door frame comes out crooked after you have installed the new door, simply adjust it by cutting off any protruding screws so that they are flush with the door frame. If there are no protruding screws to cut off, then apply some paintable caulk around where the previous one was so that it looks clean and smooth when painted over. ## How do you repair a broken jamb? If there is a hole in your door jamb, you should patch the damage. It does not have to be perfect, as long as it is sealed and solid. You can use polyurethane or caulk depending on what kind of material it is made out of. Once the jamb has been patched, you may want to use a power sander or fine-grit sandpaper to smooth out any rough edges and then paint it so that it looks clean and new. If there is just a slight crack in your door jamb that does not go all the way through, you can fill in the hole with caulk instead of repairing it completely. If the damage goes all the way through, you need to repair it using wood (pine or oak) filler so that air and water cannot get inside. Then, once dry, you should touch up the area with paint so it matches the rest of your door frame. ## Do you install a lock in the door jamb? Yes, you can install a lock directly into your door jamb to seal it shut for enforced security. If you already have the space in your door frame for it, you simply need to drill holes through the door frame so that your screw will go through both pieces of wood (pine or oak). You should test out different types of locks and door latches, especially from Australian owned manufacturers, before installing them because some are easy to break depending on how much damage is done to the door frame. A metal door latch or a metal jamb lock is the strongest type of door latch because it does not break as easily as those made from other materials so offers better security. However, it's best to attach a lock to a strike plate. Strike plates are commonly used to attach locks on doors. A strike plate will be more secure when used with the appropriate lock. Safe and secure door locks should be an integral part of any [property rental contract](https://www.consumer.vic.gov.au/housing/renting/repairs-alterations-safety-and-pets/keeping-the-property-safe/locks-and-security), according to Consumer Affairs Victoria. ## What is a lintel? A lintel is a beam above your door frames that keeps their structure sturdy. A metal or steel lintel is typically much stronger than one made from wood. The purpose of a lintel is to distribute the weight evenly across the entire frame, which keeps your home standing strong against pressure and damage. A lintel door jamb is one that has a steel beam above the door to help support its weight. A lintel does not actually attach to anything; instead, it rests on top of your door frames for extra support.

How to Remove a Sliding Glass Door

How to Remove a Sliding Glass Door

Sliding glass doors work on a horizontal track located on the top and bottom of the door. The bottom track is hidden by the baseboard. In order to remove sliding glass doors you should all hardware like bolts, screws, brackets and tracks as well as discard the old doors. This is more difficult as opposed to removing a stationary door or sliding screen door and you may need a helper. ## Removing your sliding glass doors To remove the glass sliding door and hardware, start at the top of the door jamb or frame and work your way down. Remove any screws holding track-end caps in place; if they won't budge, pry them off with a flat-blade Philips screwdriver. Locate and screw any brackets holding the top of the door to wall studs, then pull out or cut off any nails or screws that are securing the vertical, upper track of the door to the ceiling joists. You'll have to dig into some drywall with a putty knife to loosen these screws if they're rusted or painted over with wallpaper paste. Next, pull down on clips at both sides of each track until they come out free from their mounting holes in either side of the frame. You may need to cut through paint, caulk or other debris that's holding them in place. Remove both end caps at each end of the bottom track, then pry it free from its mounting holes in the subflooring. If necessary, remove the screws from any ceiling-mounted track hangers before removing tracks. Be careful not to damage the subflooring when using a pry bar. Either use an old stationary door as a spreader or screw together scraps of wood with even gaps between slats to make your own. You can use thick foam sheets to protect the floor from scratching. ## How hard is it to remove a sliding glass door? It can be quite easy to remove a sliding glass if you have the right tools. You will need to get something under the door in order to support it while you remove the tracks. If possible try to get someone to assist you with holding up one side of the frame down the middle to tilt it while you take out screws from underneath it. If that isn't possible, then you will need to get something under the door to tilt and support it securely. You shouldn't have to [worry about hinges](/guides/doors/how-to-install-door-hinges). Remove all bolts at this point along with any nails or screws holding it down. Then, simply lift the door straight up making it stand so as to pull the door and free the bottom track. Leaving even one screw can make the process messy. The same method can be applied when removing a sliding screen door or patio door. However, a patio door has a thicker frame requiring more caution than it takes to remove a sliding glass. ## What tools are necessary for removing a sliding glass door? You will need the usual drill and screwdriver. You can remove screws and pull the door with your hands but having a screwdriver would make it much easier, especially when trying to wrestle a larger door or frame off track. Moreover, it also depends on the material of the system; an aluminium frame will require both a hammer and drill bit set to cut an opening window. It is also possible to rent tools such as a reciprocating saw and cordless drill. ## Additional tools - C-clamps - Reciprocating saw - Tape measure - Drill or driver with standard bits ## How long does it take to remove and install a sliding glass door? It can take up to an hour or more. You will need to remove and replace any damaged panels and rollers as you go, be it a fixed panel or sliding panel. Also, if door tracks are involved, it will be necessary to fully dismantle and reassemble the door system. Usually, it is necessary to remove any existing door stops, replacing these during installation. It might also be advisable to lay down a bead of exterior grade caulk before re-installing the frame if there is an existing gap or opening between the frame and surrounding material at the head or bottom of the frame to open a window for the frame. If you want to remove a sliding glass or stationary panel in order to replace it with a new door, this job may take less time than when you are simply removing it for painting purposes or some other restoration effort. Remember that once you remove a sliding door, it is impossible to return it back into its original position without causing damage. Therefore, installers must pay close attention to measurements and get them right the first time. ## Can you replace sliding glass doors without replacing the frame? It's quite a challenge to remove the door without removing the entire frame. There are some cases when the installation of plain vinyl panels can be done on top of an existing frame. In fact, this option might prove to be cheaper than installing a completely new system. ## What types of damage need replacement? Generally speaking, any kind of physical damage should be addressed promptly. Surfaces with large cracks or other significant problems will likely force you to remove the door, take out the whole system and install something new. However, smaller damages can often be repaired more easily. For example, if only the sliding door itself is damaged but the rollers are still functional, you might consider replacing just the door or hiring a professional to fix it for you rather than installing an entirely new system. If the seal is split along one edge of your sliding glass door, this can be fixed by applying some caulk. However, if there are multiple cracks in several separate areas on your sliding glass door, or the [surrounds have broken or cracked](/guides/doors/fiberglass-vs-steel-door), then a replacement will likely be necessary as it will not stand for long. ## Why is my sliding glass door so hard to open? One idea is it may be too heavy. You could install an automatic opener if the situation is dire enough. But this isn't always a practical solution. Another cause of "sticking" sliding doors happens when there is dirt and grit in the tracks, especially the top track. Make sure you clean these thoroughly on a regular basis (at least once every few months) so they continue to run smoothly. Sometimes just a quick spray with some lubricant on the rollers and tracks will do the trick and make the door slide smoothly, but replacing the wheels is usually necessary if they are cracked or worn out. ## What else do I need to remove a sliding glass doors? You should have two adjustable wrenches, a mallet, and several screwdrivers at the ready when detaching your sliding doors. You may also want to invest in a special tool used for removing tracks called a "door puller". This is a great investment if you plan on doing this type of project very often because it can make this process much easier. A pry bar might come in handy as well, particularly when trying to detach trim that has been caulked into place. While you may not always need all of these, it is wise to have them at hand in case you run into problems. Even if you are very adept at this type of project, it is always better to be safe than sorry as you can never predict when something unforeseen might happen that requires an extra tool. ## How do you remove a sliding wood door? Start by removing the doorstop or molding that holds it in place. Next, use a screwdriver to detach any screws that are securing the sliding door tracks. Then, carefully try to lift the door on one side of the door frame while an assistant pulls outwards on the other side or edge- this should cause the rollers holding the track to "pop" free so you can remove it from its channels. When reinstalling your vinyl sliding doors, make sure that they are evenly balanced before installing new rollers and reattaching them into their original positions. You might have trouble getting everything back into its proper space if you don't take care of this first. If your new sliding doors seem too heavy for your existing system to handle, you can purchase new rollers that are stronger or install new tracks on your sliding doors. ## What to do if a sliding door gets stuck? You can lift the door if you tip a bar down the track provided there is enough room below for this. The weight of the door can also be reduced by removing it completely. If the obstruction is due to dirt or debris on the edge, simply spray some lubricant in an attempt to work it loose. You might have more luck cleaning out any obvious dirt on your own, especially if you are already replacing the rollers. On wood tracks, use sandpaper if lubrication does not help. Be sure that you wear protective goggles while doing this because bits of wood are likely to fly up at high speed when sanded. You can also use a metal file instead. Slide foam sheets between the doors and floor to prevent damage to the floor. In many cases, a stuck sliding glass door may just mean that the rollers need to be replaced. ## Can you replace one panel of a sliding glass door? Yes, you can replace a single sliding panel. However, it is not recommended that you remove the entire door for this sort of minor repair unless it makes more sense. For example, if one pane sustains more damage than the other or if one is older and doesn't run as smoothly- replacing just one pane would probably be more efficient in these cases! Most people are nervous about removing a sliding glass themselves because they think it will be quite difficult to detach them from the doorway without breaking them. If you have an average-sized door with standard rollers, however, this should pose little difficulty. That being said, sometimes removing the entire door just doesn't work out. One problem with removing most sliding doors is that it can be quite hard to get them back into place without spending several hours on the project or hiring a professional. The door's weight may also pose some problems if you are not an experienced DIYer or have never removed a stationary door or sliding screen door before. ## How do I make my sliding glass door slide easier? The easiest way to slide your sliding door smoothly is to wipe down the track with a wet rag and vinegar or soap, which will remove any dirt. Even if you don't see anything on the surface, there may be dust further down in the grooves that is causing it not to move freely. You can then lubricate the rollers or tracks with silicone spray, WD-40, or white lithium grease (which takes longer to dry). If this does not work after several attempts- take apart one of the panels and clean each individual component thoroughly before putting it back together again. If the problem persists after cleaning, try oiling or greasing all of your door's components. Otherwise, greasing one panel could cause the other to malfunction. There is no need to grease the stationary panel. ## How do I remove a broken sliding glass door panel? In order to replace your sliding doors, you will need to pop out the panels from the door frame. This step is very easy- there are tabs that can be carefully pried off with appropriate tools (like a screwdriver or drill bit set). If the tab begins to get stuck, simply spray it with WD-40 before trying again. Once you have managed to pry out one panel, replace it with the new one and press the tabs back into place. If they feel loose, use a screwdriver or flathead screwdriver to bend them upwards so that the panel will fit securely inside of the track. Use adjustment screws if the need arises. In order to replace both panels take apart the first one like you would for cleaning and make sure not to scratch your door frame. After you screw it back together (with a new panel) follow the same steps as before until you've replaced both panels. ## How do I remove a broken sliding glass door? This should be done by professionals unless you know what you're doing and will not give up down the middle. You have to be the one to screw everything back together unless you hire an expert for the job. Sliding doors are extremely heavy and take up quite a bit of space. If you want to make sure that your old or broken panel is going back into place properly, create a diagram to locate each piece before you remove the door. This way if anything goes wrong when you screw your door back together you have a map to follow.

How to Install a Bifold Door

How to Install a Bifold Door

Bifold doors are an economical option for people looking to add a large amount of extra space and light to their homes. Bifold doors use two panels that slide and push into one another to open and close, which makes them very convenient and easy to use, much like sliding doors. Installing bifold doors in your home is a fairly simple job, but it can take some time depending on the size of the door you choose. With a little patience, anyone can successfully install bifold doors in their own home. ## Materials needed for hanging bifold doors - Wooden or metal tracks (metal tracks can be used anywhere, but wood often requires a pad to attach the door to the wall). - Door panels (can be purchased with hardware attached or as separate pieces). - Smaller instruments like a door knob, pivot plate, pivot socket, top pivot bracket, door jamb bracket, lock etc. - Hinge, pivot and screws to attach and mount (for panel attachment to the track and screws hold it in place). - Tools and materials needed for hanging your door (such as a drill, a stud finder, a bottom pivot pin, and level). ### Set the tracks To set up the tracks that will hold your bifold doors in place, you need to determine where you want to install bifold doors. Start by finding the centre of each wall where the doors will hang. Mark this spot on both walls with a pencil; this is where your track should go. Next, use your stud finder to locate all of the studs along these two lines and mark them as well. The easiest way to install bifold doors is by screwing metal or wooden tracks directly into these studs. For a [glass door panel](/guides/doors/how-to-remove-a-sliding-glass-door), you should be able to get away with using drywall anchors rather than screws since the weight of the door panel is much lighter. Once you have your studs marked, use a level to ensure that the tracks are straight up and down. Make sure they are exactly parallel with one another as well. When you are happy with their position, use your drill equipped with screws long enough to drill pilot holes to go through the track and securely attach it to each wall at these spots. For better security, screw in at least two screws per side; if using metal tracks, make sure not to accidentally hit any wires inside the walls while you do this because it will short out your lights or other electrical items. ### Hang the first panel to the track Once your tracks are installed, it is time to hang your first bifold door panel. Slide one side of the bifold door and push it into each end of the track and hold it up to make sure that they match up evenly. If you can see light coming in through any seams between them, you will need to reposition them until there is no light visible around any front edge Once the bifold door panels match up evenly on both sides, use a level to ensure that both panels are exactly vertical with one another and then screw them together with a pivot and hinge. Make sure not to attach or mount these screws too tightly or else they may split the wood; you want them tight enough so that everything stays together securely in its seat but not so tight that you cannot move the panels when needed. ### Hang the second panel and install the top hinge Now that both bifold doors hang evenly from one track, it is time to add the top hinge; this is what lets them fold in half automatically with doors closed. Attach your upper hinge using your drill pilot holes and screws, making sure that the door hangs level with one another once it has been opened at least halfway up. If you need to use spacers between your tracks and doors to make this happen, do so now before installing any other hardware or hanging any other parts of the door. ### Add bottom hinges Once your centre hinge has been attached and secured tightly in place, it is time to [add an additional hinge](/guides/doors/how-to-install-door-hinges) to the other end of each panel. These are what hold your doors in place, so they should be attached very securely. Screw holes and attach them into place using your drill and screws. ### Hang remaining panels Now that all hinges have been attached to both sides of the bifold doors, hang the bottom panels by sliding them into place at the ends of their tracks. Screw holes and attach them together with any additional centre hinge needed before adding additional hardware to lift if required. Once again, check that all panels match up evenly and that they hang level with one another before finishing this step. ### Hang a handle on each side of the door Finally, hang a handle on either side of your bifold doors so that they can easily be opened. If you were also able to attach rope or string between the top hinge earlier, make sure it is long enough to reach from one set of hinges to another before hanging the handles; otherwise, tie additional strings for this purpose if necessary. Once your hardware has all been added and attached securely in place, your bifold doors are complete. ## Do bifold doors need a bottom track? Bifold doors can be hung without a track at the bottom, which is recommended if you are hanging them in an area where they need to be able to easily accommodate changes in floor height. For example, if the space that you want to place your bifold doors into has two different levels, it might be necessary for each door to have its own track so that it can fold down onto both surfaces rather than just one level. If there is no difference in floor levels and you don't mind having them only open on one side against a wall (similar to a sliding barn door), then attaching tracks or other hardware at all will not be necessary. ## Do bifold doors need special hinges? There is no type of hinge that is required for a bifold door, but it is necessary to make sure that your hardware can support the weight of this type of door. If you plan on using them frequently in an area where they will be opened and closed often, such as a hallway or even a kitchen entranceway, then it might be worth your while to invest in some heavy-duty hinge that can handle repeated use without splitting or becoming damaged. ## Do bifold doors need weather stripping? If you live in a place that gets cold during the winter, then you might want to add some sort of weather stripping or other hardware around the area where your bifold doors meet. This is especially true if they are being installed in an exterior door, but can also be used on interior doors if there is a crack between them and a wall or floor. If you do not take this step, it will be very easy for cold air to seep under both sides of your door and make it harder to keep heated spaces comfortable while also making sure warm air stays inside. Utilising weather stripping at all points where your bifold doors join should prevent drafts from being created. ## How do bifold doors work? Bifold doors work in the same way as sliding doors in a barn, though they are much more space-efficient due to their door opening and closing mechanism. They both have multiple panels with closet opening that open together when being pushed or pulled along a track that is attached across the top of one panel and not on the floor. The main difference between these two types of doors is in how they hang from a doorway. While sliding doors have a track at the top which rests directly against its frame for support, bifold doors use a hinge on either side of this frame to keep them upright so the door opening mechanism opens outwards rather than upwards. If you are designing custom bifold closet doors, then you can do so as you would any other type of door where the panels meet along a common edge. The only difference is that for a bifold door, the panes should be parallel to one another rather than vertical or horizontal. This means that they should stack vertically alongside one another rather than overlapping at their edges [like sliding doors](/guides/doors/how-to-remove-a-sliding-glass-door). ## Do bifold doors need fold-down handles? While you can choose to add fold-down handles for your bifold doors, they are not a necessary element for this type of design. If you do opt to use them, however, then it is important that the hinge used on those handles also come with two separate plates, as one single plate attached midway up an entire length of door will not provide the support that you need to keep each hinge stable. If you use fold-down handles but do not install them with this piece of hardware, then it will be harder for your doors to maintain their shape without warping or sagging over time. ## Are bifold doors easy to install? Yes, bifold doors are designed to be easy to install if you already have the right type of door frame in place. Rather than taking apart an entire doorway or putting frame pieces together first, these types of doors simply clip onto existing frames with hinges on either side of the top edge. If your door frame is not deep enough to accommodate this design, however, then it will be necessary for you to purchase special hardware that can attach hinges lower down on the sides of your door instead of at the top. Many homeowners choose to use pre-hung doors instead for this reason; though they may cost more money upfront, placing one into a doorway rather than having to take it apart multiple times makes them easier and faster to install without special tools materials such as a lock, pivot plate, door jamb bracket or brackets or assistance with hardware. ## Do bifold doors need special hardware? If you are buying bifold doors that come with pre-installed hinges, then it will not be necessary to buy additional or replacement hardware for these elements. If you are installing bifold doors rather than using one of these sets for a bifold door, however, then you will likely want to use weather stripping, fold-down handles and other accessories at the points where they meet along their length in order to avoid drafts or create more convenient access points for a perfect bifold door. If you do not purchase any extra components for this type of installation beyond your actual bifold door panels themselves, then there is a chance that they will not hang straight on their hinges without sagging over time. ## Are bifold doors easy to clean? In general, yes, bifold doors are not difficult to clean. They can be wiped down with a sponge or cloth just as you would any other type of door that is smooth on both sides; though it is important that you do not use abrasive tools materials like measuring tape to measure, steel wool or scouring sponges since these can scratch the surface of your doors and compromise their finish and other important fixtures like pivot plates. Clean them similar to what you would do for a [fly screen door](/guides/cleaners/how-to-clean-fly-screens). If you do choose to use standard types of cleaning products for this purpose, then be sure to check if they come in spray form first before attempting them on your own. Some cleaners contain chemicals that may damage the paint or varnish on your bifold doors if sprayed directly onto them rather than used within a spray bottle first. ## What do I use to clean bifold doors? Generally, there are two different options for cleaning bifold doors which you can visit or choose from based on your own preferences and the type of room you have or one that matches your taste and ideas. Door handles are a common carrier of germs and disease. If you are really serious about cleaning and living in a germ-free household, take a look at Safe Work Australia's [guide to COVID-19 cleaning](https://www.safeworkaustralia.gov.au/covid-19-information-workplaces/industry-information/general-industry-information/cleaning). ### Wet wipes The first type is wet wipes that contain antibacterial disinfecting elements like aloe or chamomile in an attempt to reduce the formation of germs and bacteria over time. These work well for light cleaning jobs without much elbow grease required, but they may not be as effective at removing stains as other options if those stains have been present for multiple weeks. ### Standard wipe-down The second kind is a standard wipe-down with mild soap and water to remove dirt and build-up along the surface of your doors; this sort of solution works especially well on marks or spills that have only just appeared or have already dried out within the past few days.

How to Take a Door Handle Off

How to Take a Door Handle Off

This is a simple task that takes less than an hour with a few right tools. When a door handle or door lock breaks or comes loose in your house, you may need to remove it from the door. Once the old lock is off, it's relatively easy to install a new one. You will need the below tools to get started. - Adjustable pliers. - Allen wrench. - Screwdriver. - Drill. ### Unscrew the door from its hinges First, you need to remove the visible screws that attach the bevelled side of the door handle to the door jam with an adjustable Allen wrench or pliers. Here's a tip: Any small screw, small pin or hex head screw can easily be pulled out using a narrow screwdriver. The right tools will make your life easier. Feel free to ask your local supplier which tool kit is most appropriate. Make sure to find support for the door before you loosen any mounting screws. If it's stubborn, spray on some lubricant before trying again. You don't want your landlord calling because you damaged the door while you unscrew it. ### Collect the screws Pull out the screws from the door handle itself. You'll need a drill to take these out, or a screwdriver if you have a manual drill. These are usually located on the inside surface of the door so the screw head is not visible at first glance. When all four exposed screws have been removed, pry off the old handle with a small flat head screwdriver or wrench. It should come right off. Set it aside as well for now. ### Handle assembly If your new handle requires assembly before installation, this is the time to do it. Most modern handles don't require assembly though...they just clip in place! So let's move forward assuming that yours doesn't need any additional assembly. Once you've opened up the package you should see two pieces. One is the handle itself, and the other is a plate that will cover any rough edges to protect your door (and your hands/feet!) When you've taken both pieces out, take note if there is any small hole or notch on the face of the new handle that isn't present on the old one. If there is a hole, make sure this area lines up with corresponding the hole or notch in the door to ensure proper placement. ### Door jambs Line up all four screw holes to match those in the door jambs, and slide them through. It's always best to check again for assembly by popping open the packaging just in case! The long part of each hole needs to line up with where the door jam is. If you've assembled the handle to the plate, just line the holes up instead and check for any movement. The handle should not move at all once it's in place! If it moves out of position you need to redo this step, otherwise push screws into each hole and turn them lightly with your hand or a screwdriver until they snuggle right down snug against the plate. It may take a while so be patient here. Don't crank down too hard. ### Reinstall the door Reinstallation is simply reverse of removal. Line up the [door on its hinges](/guides/doors/how-to-install-door-hinges) and screw back in with your fingers or pliers (lubricant makes it much easier). Hold your breath and try it out! If all went well, close it and open it a few times. The handle should feel like new again. Or maybe even better than before. ## How do you remove a door handle without visible screws? Many modern door knob designs have hidden screws that are not visible. You can pop the handle off by using a flat head screwdriver or flat bar to pry the interior side of the latch assembly, which will pop out of place. Sometimes you may need to knock out any remaining bits of metal holding it in place depending on the length of the doorknob shaft with a hammer and chisel before reinstalling your new handle. Sometimes there are no visible holes for screws on either side of the internal mechanism - this means that there is likely an additional support plate behind the casing. Pry it off (gently) to reveal more hidden screws underneath. If you see a screw head, it means you have exposed the hidden screws. Remove the exposed screws and proceed as normal. ## How do you remove a lever door handle? One side of the door will have a little interior knob; this is called the "lever". The other side will be blocked by the door stop, so you need to clear it out of the way. Use your chisel and hammer to pull the remaining bits of metal from inside the door jam. Once done, insert your flat head screwdriver into any visible gaps in the knob and pop the door open. Then, unscrew any screws holding the handle in place and put it away for now. There may be a few screws in different locations, so make sure you keep track of which ones go where when you unscrew them. Now that the door is open, flip it over and simply unscrew any visible screws from the backside of the handle. Slide it out and put away for now. If your new lever handle doesn't already come with a cover plate to cover any part of the door edge which is rough, use some pliers to bend up a piece of sheet metal into place before installing the new handle using screws from inside. Always test your handle before closing up. ## How do I remove a door knob with no visible holes? If there are no visible holes to screw into on either side of your [internal mechanism](/guides/doors/how-to-fix-a-door-knob), you will need to knock out more metal by chiselling it out. Use your flat head screwdriver to pry off the cover plate behind it (if one exists) before knocking out more bits of metal with your hammer and chisel. It's usually best to start at the edges before moving inward - be careful! Once done you should have enough room between each part for inserting screws or popping them out with your Philips head screwdriver. ## How do you remove a privacy door knob? With door knobs that have privacy locks, there are usually screws in opposite directions of the mechanism. These may be covered by a cover plate, so check behind it before you unscrew your handle with your Philips head screwdriver. After removing these screws you should be able to pull out the door handle and put it away for later installation. Once done, use your chisel to knock out any remaining bits of metal from inside the door jam. Then install using your screws. If you still cannot find the screws after checking both sides of your internal mechanism, you will need to knock out all metal parts until they are separated enough that you can pry them apart with a flathead screwdriver. You may also need to finish it off with a chisel and hammer. You should still be able to use the same holes from before, so keep track of your screws. Reinstall with your new handle once you're done. ## How do you release a handle lock? Most doors (with or without a spindle) have locks that become harder to open as they get older, so if you are seeing any rust or other buildup around the inside of your door lock, you can use a cotton swab with some isopropyl alcohol to clean it off. Many newer handle locks have screws hidden behind a latch plate - look for any metal hiding spots on either side of your latch plate. If there are none, then you will need to gently pry the centre out using a flat bar or screwdriver before removing all of the parts that remain in place. Once enough room is made between each part, you should be able to knock them apart with a chisel and hammer until they come loose enough that you can slide them apart by hand. Once they are pried apart, simply remove the exposed screws from the latch plate and pull it out. You will likely need to use a flat head screwdriver to pop off any bits of metal from inside the door jam as well. Then install your new handle lock using those same holes - but make sure you test first! For better security, you can install a strike plate. A strike plate will hold up against forced entry. So, you can be safe in your beds after locking your self-built security systems. ## How do you get a stuck doorknob off? If you are looking at the back of the doorknob and cannot find any visible screws, you will need to tap it loose with your hammer before you can remove a door knob or its mounting screws. Tap around the edges until it comes off, then unscrew your latch plate using your screwdriver or chisel if necessary. Installing or [removing a doorknob](/guides/doors/how-to-remove-a-door-knob) is simple - just use your old round cover plate or install one that comes with your new handle if needed, then slide the latch mechanism straight in where you removed the old one. Once installed, remember to reopen and test before closing. ## How do you remove an interior door handle? Many newer door handles can be done using one of the methods above, while others may need more work. Using your screwdriver and chisel, start at the edges to remove all metal parts from inside the door jam until they are pried apart enough that you can pull them out by hand. Remove any screw connecting pieces before pulling out each part completely. Once this is down, install with your new handle using the same holes if possible. If not, use your flat head screwdriver to carefully pry open or even knock out bits of metal before installing it in place. After installation, remember to test and reopen before closing! Some older doorknobs have visible screws on either side of the door - these will be hidden behind a small cover plate on either side of your door lock. Use the same screwdriver and chisel techniques to knock out any metal bits before removing each part that remains in place. You may also need to use a flat head screwdriver in order to pop apart some parts if they are stuck together too hard. Once pried apart, remove screws from the latch plate and free it from the door jam using a flat head screw driver if necessary. Then install your new handle with those same holes, remembering to test it first! If you cannot find screws on either side of your doorknob then you will have to tap all screws loose with a hammer before removing the pieces by hand. Free them from the door jam using a flat bar or screwdriver as needed before replacing them with your new doorknob. If you are swapping out an old doorknob for a new one, then you will need to remove the latch mechanism first using your screwdriver or chisel if necessary. Then install it back in place. ## How do I fix a broken door handle? Door handles are attached to the door either by screws or latch bolts. If the handle is hanging on by a screw, usually all you need to do is remove the screw, replace it with a longer one and tighten it or use two screws. In most cases, the handle will come right off. If this doesn't work try removing the screw altogether and force some WD-40 into the hole while trying to twist off. There should be a rubber gasket that you can leave out while using WD-40. If there isn't a rubber gasket use some plumber's grease instead of WD-40 since it's thicker and won't run as easily. If you have a latch bolt holding your handle on this solution may not so well because bolts probably go through the handle and into the door on either side of it. With a latch bolt there is usually more room to work with, so try using longer bolts only after you measure the hole. If this doesn't work you may need to drill through the slot in your door or pull out your inner layer of drywall if you have one of those doors with layers. ## How do I remove a locked lever door handle? You might have a door handle or door lock that needs to be taken off by removing the bolt holding it on. This particular bolt is located behind the doorknob, so grab your screwdriver and take that baby out. It may take some elbow grease but keep twisting until you feel that satisfying "click". The only thing left to do then would be to take off the handle itself by twisting counterclockwise (to your right). Now take your replacement handle and line up each small slot. Don't forget about those little metal things called "spacers", because if you don't insert them back where they belong (i.e. between the inner side of the small hole and the bottom of your new lever) you won't be able to screw the bolt back on. Just line everything up, insert your bolt and tighten it down with recessed fasteners and screw it either your screwdriver or an Allen wrench. Congrats! You're now the proud owner of that snazzy new lever door handle. locks are an integral part of home safety, according to the Australian Government's [Your Home website](https://www.yourhome.gov.au/live-adapt/safety-and-security).

Fiberglass vs Steel Door

Fiberglass vs Steel Door

On average, a quality steel security door should be much stronger than a well-made fibreglass alternative. In addition to security features, steel doors are available in several profiles and colours with the added benefit of being able to be custom painted. You get what you pay for when it comes to security doors; however, fibreglass doors offer many benefits over steel. Fibreglass, by nature, is a lightweight material. Meaning, a fibreglass door is lighter than a steel door, often weighing only 10 per cent of steel alternatives. The lightness makes fitting them much easier compared to steel door installation, whether you are doing it on your own or with a hired professional. They also offer excellent insulation. ## Benefits of steel doors over fibreglass Steel doors are more expensive than fibreglass doors when it comes to cost benefits, security, and insulation. For many buyers, though, this price increase is offset by the additional benefits they offer. For your exterior doors, install security steel entry doors if security is a crucial concern. Steel entry doors are rust-resistant and will not warp in extreme weather conditions, making them ideal for coastal areas that can withstand saltwater and stormy conditions. Steel has better noise reduction capabilities when shut, which would appeal to an office building or high traffic area. These two benefits are achieved because of the solid construction of steel entry doors, which are often [used as security doors](/guides/security-doors-screens/security-screen-door-prices). They also come with a trade-off in visibility; if you require open views through your entrance, fibreglass will be a better option as metal doors tend to have smaller viewing panels than their fibreglass counterparts. In general, both fibreglass and steel entry doors are superior to wood doors. ## Benefits of fibreglass doors over steel Fibreglass doors do have a few advantages over their steel counterparts, the biggest of which is weight. They are much lighter and easier to install for this reason. The second benefit is insulation; they offer far superior insulation performance, making them ideal for climates that experience extremely hot or cold weather. Consequently, fibreglass doors, like their wooden doors counterparts, are energy efficient. At the end of the day, it comes down to personal preference for what type of material you would prefer for your exterior door to be made from. You will need to decide based on your climate conditions, security needs, door style, budget, and visibility requirements. Weigh up all these factors before deciding ultimately one factor isn't always better than another - it just depends on what you're looking for in a door. ## Are fibreglass doors more customisable than steel? If variety is a major factor when buying an entry door, steel doors are your best option. Steel doors come in a wide range of styles and colours that are easily customisable. Fibreglass entry doors can also be customised to suit individual needs by applying various types of finishes. But because of the way it is made, a fibreglass door cannot be bent or curved as easily as steel. If you are looking to make a door yourself, best to start with an [easy material like wood](/guides/doors/how-to-make-a-door). The thickness of fibreglass mouldings means that even if you wanted to bend them into shape, they would break under their weight before they could be formed to any degree. This means that a fibreglass door can only be mounted in a straight line, unlike steel doors that have the advantage of being able to bend and curve. ## Are fibreglass doors strong? While a strong steel security door can resist forced entry, a well-made fibreglass alternative is equally as strong. In fact, both materials have been engineered to withstand the elements and protect your property from intruders. When it comes down to which material you prefer, aesthetics play a role in making the final decision. If you've already decided that you would like a more modern look or want to avoid painting, then perhaps steel is something to consider. On the other hand, if insulation matters most to you and paint isn't an issue for you, then perhaps fibreglass may be a better option. The last alternative is the wood entry doors, whose security is not as robust as that of steel or fibreglass. However, they are cheaper, can be more visually appealing primarily due to wood grain textures. ## How are fibreglass doors made? Fibreglass doors are made using a process called 'shot-curing'. A fibreglass mould is created and heated before the liquid glass mixture is poured into it. Once inside, air bubbles are removed, and the glowing hot fibreglass cures over about two hours until it becomes solid. The door will then need to cool for several more hours at room temperature to complete this chemical reaction. After that, the result is a strong panel with excellent insulating properties. If installing it yourself, make sure you [use strong hinges](/guides/doors/how-to-install-door-hinges). ## Can I put glass panels in a fibreglass door? One of the best features of fibreglass doors is that they are able to accommodate glass panels. Fibreglass door frames are often custom made with grooves that are specifically designed for standard-sized toughened safety glass panels. Standard panel sizes vary between 600 by 900mm or 800 by 1200mm. Some manufacturers also offer a removable door frame made from fibreglass and allow for glass panels in widths of up to 1400mm. This gives you many options when it comes to creating the look and feel you want in your home. ## What are security doors made of? Steel is one of the most common security door materials on the market today. Steel doors are often more affordable than other door types while offering many benefits in terms of durability and resistance to weather conditions. A steel security door will typically have a steel construction with a metal mesh infill or honeycomb filler. This offers some impressive levels of insulation while also being strong enough to withstand forced entry attempts. Steel doors are available in a range of finishes, making them extremely versatile options for all sorts of homes. There are also steel doors that are made using sandwich panels which offer superior strength characteristics. These feature a steel core that is covered by an outer layer of aluminium or hardwood veneer. The [New South Wales Police](https://www.police.nsw.gov.au/__data/assets/pdf_file/0003/736185/14679_-_FACTSHEET_05_-_Security_Doors_and_Roller_shutters_2.pdf) have a handy guide on what to look for when buying a security door. ## What are security screens made of? Security screens are a popular choice for areas that require a higher level of security. They provide a good compromise between safety and convenience. Security screens are typically made from aluminium or steel mesh which makes them incredibly tough while offering excellent visibility. The aluminium security screen is the more expensive option, but it offers a sleek, modern look that will complement your home perfectly. Steel screens are also tough and strong, but they are often a little bulkier than aluminium alternatives. Security screens can be installed as either fixed or sliding options. They will usually require some sort of lintel for support if you intend to use them as a sliding screen instead of a panel. Fixed security screens will provide a sturdy layout that is perfect for high traffic areas such as your front door entrance. Sliding screens tend to be more decorative and will allow you to open up your home as required easily. ## Is fibreglass safe for a front door? While you are typically safe with any type of entry door material, there are some concerns that have been raised about the health risks associated with fibreglass. It's important to note that these concerns only relate to buying cheap steel doors from manufacturers who use inferior methods, including cheaper ingredients and lower quality standards. There are a number of different things you can look out for to identify an inferior fibreglass door. If the price for a basic steel door seems too good to be true, then it's probably best that you avoid buying such a product because poor quality materials typically equal poor quality build and long term durability. You should also check out the warranty period for a new steel door and ensure there is sufficient cover for any potential issues. ## What is the difference between a steel door and a stainless steel door? A steel door can sometimes be covered with a very thin layer of stainless coating to offer some protection against the elements. You may hear these doors referred to as "prime coated" or similar, which means they have undergone this process, making them great options for areas that experience lots of rain or other weather conditions. A stainless steel door is made from a high quality steel alloy and is finished with a thicker layer of stainless coating. Properly primed stainless steel doors make them more resistant to scratching, rust and other weather conditions. Compared to a basic steel door, the stainless steel alternative will require less maintenance over time. The prime coating also gives steel doors a unique charm. ## Are fibreglass doors worth the money? Fibreglass exterior doors are typically made using a sandwich construction which offers strength and insulation. If you look at the price in terms of durability, insulation, and resistance to weathering, they can offer incredibly good value for money. Fibreglass is also extremely versatile, so regardless of your home décor, you are sure to find something that meets your requirements. While the initial outlay for a fibreglass door is higher than other alternatives, you are getting a product that should last much longer without any major issues. However, there are some things to watch out for before you buy. ## Are steel doors fireproof? No, steel doors are not fireproof. They do offer good resistance to heat, but they will eventually deform when exposed to high temperatures. To protect your family and belongings, you should always invest in a fire-rated door. This is typically indicated by a rating which means the door will withstand any number of minutes of high-temperature exposure before it starts to deform. ## What are the pros and cons of an aluminium door? Aluminium doors are strong but lightweight. They are also very stylish compared to other options. They are quick and easy to install, making them perfect if you're looking for replacement doors because they offer good insulation against heat loss while being affordable. However, they may not be up to the same standard as steel and other options in terms of durability and security. ## Do steel doors rust? Yes, steel doors do rust because even though they may be treated with a protective coating, this doesn't last for the life of a door. It would be best to always look for a high-quality product because these will offer the best protection against rust and other weather conditions. You can treat rust with a rust converter, giving the door another layer of protection while it's being treated. ## What is the best way to clean a steel door? The best way to clean your door is by using some water and a mild detergent. You should always avoid using any bleach or other harsh chemicals as these can damage the protective coating on your door. If you experience any problems with stabilising your home's temperature, this may lead to condensation, which can cause rusting and other long-term damage to steel doors. This is why it's important that your door is properly insulated and weatherproofed.

How to Install Folding Doors

How to Install Folding Doors

Folding door systems offer a sleek, modern appearance with a large amount of versatility and functionality. To install your own folding doors, measure the space where you want your new folding door installed. There are many different styles of folding doors available, so you need to know exactly how much width and height room you have available before selecting from those options. If this is being done as part of a renovation project, consider adding one or two inches on each side for your measurements. This will ensure the door is not too tight but also allow enough room for installation purposes. Next up, you need to consider what materials are best suited for your new folding doors. Many folding doors are made of one or more panels that can be hinged together with 4-8 hinges per door. We recommend using wood panels because they have a simple classic look and can be stained, painted, or veneered to perfectly match any home style. Now it's time to decide where you want the tracks located on your wall. There are typically two types of systems available - with tracks recessed into the top of the wall or track runners installed horizontally at eye level along both walls. We recommend starting by measuring the width and height of where you want your doors to be located. With that information, you can decide which track system will work best. Next, it's time for installation. Be sure to follow the instructions included with the door kit to ensure proper installation. Depending on the type of door purchased and materials used, you may need other tools such as a drill or screwdriver. Before fitting screws, drill pilot holes to ease fixing of screws and limiting cracking of wooden door jamb. Proceed carefully and read all instructions before beginning any cutting or drilling into your wall structure. This is an important step and should not be rushed through. At this stage, you install the bottom and top tracks that guide bi fold door opening and closing. Fit the pivot plate and pivot pin for the top and a pivot bracket for the bottom of the door panels. Fit the rollers too. Install the top pivot bracket, jamb bracket, and doorstops via the screw holes provided, ensuring equal alignment to the front edge, especially when fitting a closet opening. For vertical adjustment, lift the bi-fold door panels, adjust the bottom pivot pin nut to raise or lower the door panels. Use the recommended spanner to adjust the bottom jamb bracket's pivot socket in the desired direction for horizontal adjustment. Once everything is in the desired position and secure, have someone help if possible while testing each panel to ensure it slides smoothly along its runner. At this point, we recommend removing all hardware from the panels and testing each panel separately to ensure it slides smoothly. Once this is complete, reinstall the hardware and you are done. ## What kind of folding doors can I buy? There are many different types of doors available for your home. The most common folding door systems used today are hinged together with 4 or more [hinges per door](/guides/doors/how-to-install-door-hinges). Doors can be made of one or multiple panels that open out to the left or right side. Some people also refer to these as bifold doors, but they come in many different styles, including traditional, modern, and contemporary designs to fit any room perfectly. ## How many hinges do I need? For standard installation of folding doors, there should be four hinges per door panel. People typically refer to this as bi fold doors, but they can come in other styles such as traditional, modern or contemporary. The number of panels used will determine how many hinges are required for proper installation. For example: - 4 Panel - 16 Hinges = 4 Hinges Per Panel (bi fold). - 9 Panel - 9 Hinges = 1 Hinge Per Panel (traditional/modern). - 12 Panel - 12 Hinges = 1 Hinge Per Panel (traditional/modern). You also have the option to have panels swinging in both directions which will require more hinges, but it depends on your door style. Many people ask about having doors opening up and out - do not go this route with folding doors because they are not built for that type of movement. The hinges are designed to open the door panels in one direction only. We hope this helps you understand how many hinges per panel are required to install folding doors properly. ## Do I need side tracks? Yes, side tracks are required for the installation of folding doors. There are two types - top track and eye level track. Some people prefer to have the tracks recessed; we recommend starting by measuring the width and height of your door opening then determining which track system will work best in that area. The side tracks should be installed on at least one wall but can also be installed on both walls if you would like your doors to open up from room to room instead of just from wall to wall. Using the tracks will also give your doors a neat, clean appearance. ## Where can I install folding doors? There are many different places where you can install folding doors depending on how your home is set up. For example: - To span a wall or partition. - Create an opening between rooms. - Cover up appliances in the kitchen for a more modern look. - Conceal storage areas in your garage, office or bedroom. Folding door hardware is available at home improvement stores, hardware stores, some furniture retailers and online at various websites. You should always follow the manufacturer's installation instructions that come with each unique product to ensure proper installation on your sliding panels. Some people may need more than others depending on the type of door purchased, such as a [sliding glass door](/guides/doors/how-to-remove-a-sliding-glass-door), and the materials used. ## Folding door installation First, you need to take measurements of your room to determine how many panels will fit at the height and width you desire. This is important because it can help with installation if parts are too short or require additional components to mount. To do this, take a measuring tape and start at one side of where you plan on installing your folding doors across the entire length of your wall. Next, go up as high as possible on the wall until reaching a ceiling joist or beam if installed within a finished room. Mark that measurement down with a pencil, so it's visible from the outside of the door panels after installation. Next, take measuring tape and measure from the floor to the ceiling. Add these numbers together for your overall height from floor to ceiling. Now take the width of your wall at the widest, most open area and add that number to your overall height. This will give you an idea of which panel style will work best for you, depending on how high or wide you would like them to be installed. Now you will need to purchase your folding door panels. You can choose from a pre-hung panel or traditional and modern panel styles. If using traditional or modern, the panels stack vertically and swing open like a regular door. However, if you would like doors that fold and stack horizontally, there are several other options out there, such as pivot doors, bi-folding doors, barn style door or accordion doors, depending on which fits your needs best within your space. The last step is installation. Folding doors should swing in one direction only. Ensure you allow enough room for the hinges when determining where you want to mount or install your side tracks. Before installing the folding panels, make sure that all hinges are in place and properly adjusted per the manufacturer's instructions. Folding doors should swing in the same direction every time. If they do not, adjust the hinges until they do so correctly. Once installation is complete, you have a few options with your door panels. You can leave them as-is or decorate them to suit your room's décor by adding a picture rail, crown moulding or another type of frame to enhance their appearance and give them an even more custom look. For cleaning purposes, consider purchasing clear weatherstripping from your local home improvement store, which will help keep dirt and dust from accumulating on the tracks and sliding surfaces. This will help keep your folding doors looking brand new for many years to come. According to the Queensland building and Construction Commission, there are various requirements for [installing bifold screen doors](https://www.qbcc.qld.gov.au/bi-fold-screens), but check the requirements in your state or location. ## What are pivot doors? Pivot doors are a type of bi-folding door that has been in use for many years. They offer great energy efficiency, can be installed almost anywhere and stay out of the way when not needed. In order to provide you with an idea of how they work, imagine a common accordion or fan folding mechanism - only much larger and capable of being fixed in place once open. Pivot door hardware is installed on two sides, allowing them to swing around a bottom pivot pin and a top pivot pin set in the middle when opened. This is done by sliding one side over the other as if opening any standard hinged door. However, instead of it swinging behind another piece on the adjacent wall like a bi-fold door does, this style folds on top of itself on one side, providing a wide-open pathway. ## What are accordion doors? Accordion doors are just as they sound - individual panels that fold into themselves rather than stacked on one another. They can be hinged or non-hinged and may offer some type of locking mechanism to keep them open once extended fully. They slide up, over, under, and around various levels until reaching the opposite side where the opposing set of panels is waiting for them. Like pivot doors, these can be installed wherever there is room for them with little consideration other than ensuring that they will freely open without obstructions. ## What are bifold doors? Bifold doors are essentially the same as traditional folding closet doors but much larger in size, capable of covering any opening from floor to ceiling. They [can be installed](/guides/doors/how-to-install-a-bifold-door) either inside or outside your home and are available in several styles and finishes, including: - Painted white - Stained and finished with a clear coat to enhance the wood grain - Fire retardant to meet local code requirements. Again, ensure that you leave enough room to swing freely before drilling holes and installing hardware. Once they're up, there is no turning back, so measure twice and cut once! Note: bi-fold doors do not fold as compactly as other types, so if this feature is essential to you, check those measurements first before making any final decisions. ## Is installing bifold doors easy? The installation process is relatively easy if you have a finished room with a proper ceiling joist or beam. In other words, you don't need any special tools to install bi-fold doors other than what you would use for hanging a regular door. However, if you have a room with a low ceiling or no beam to install the track, you will need a stud finder and a drill. You can purchase tracks that mount directly to any drywall surface - they simply stick on. In order for your door panels to work properly when opening and closing, there must be some clearance from the floor in which you can add adjustable feet to set this space. For example, if the panel will be used for closet doors in an existing storage space such as a walk-in pantry or linen closet in a kitchen area. In that case, it's important to make sure this distance allows the panels enough room off of the ground in case someone tries to push them open in an upward manner. If you're looking for easy, folding pocket doors will save you time and money. They work better than traditional bi-fold and sliding doors because they make no noise when opening and closing and don't require a guide track. ## Do folding doors need a track? If you want your doors to stay open at certain angles when in their pocket position, then yes- you will need a guide track and panels that work with the swing of the door (typically bi-folding doors). However, if you're looking for easy, folding pocket doors will save you time and money. They work better than traditional bifold and sliding doors because they make no noise when opening and closing and don't require a guide track. ## What is the easiest way to install folding door panels? The best type of door panel installation method is top-down rather than bottom-up. It allows for less bulky hardware, which makes them easier to move around when mounting them on tracks or hinges. You can purchase the tracks and hinges separately. Keep in mind that not all doors come with top-down installation hardware, so make sure to check this prior to purchasing them. ## Which product works best for bifold door panels? The best type of bifold door panel hangs vertically since it requires no additional hardware (track). If you're looking for easy, folding pocket doors will save you time and money. They work better than traditional bifold and other doors because they make no noise when opening and closing and don't require a guide track.

How to Fix a Door Knob

How to Fix a Door Knob

To remove it, grab a screwdriver from your garage and unscrew the exposed screws from behind the door knob. If your door has a loose door knob to the point where you cannot open and close the door easily, or if the whole thing can snap or break for some reason leaving a small hole on your door then we have some here are some simple steps on how to fix a door knob. The first step is to examine the loose doorknob and find out why it broke, why it is too loose and what is the exact location of the fault in the loose knob. If you cannot open and close the door with a little push, then chances are that you have a broken doorknob. To remove it, grab a screwdriver from your garage and unscrew the exposed screws from behind the door knob. Once those screws come off, simply grab onto one end of the door knob and pull it off from there using some force if needed. Make sure that you have the tools required for this job. Some necessary tools required to device a perfect door knob include a flathead screwdriver, an Allen key or Allen wrench. Your task is to create a small round hole. If the hole left behind is just too big, then you can fix it by using spackle. Use a putty knife to apply some over the edges of the knob hole and fill it up. Leave it dry for an hour or so before painting. You can also use your fingers to smooth out any bumps or rust to make the surface flat enough for paint. If you want to change color, simply buy spray paint in any color you like at your local hardware store and paint away. Once both holes are painted and dried, grab your doorknob again but this time with its mounting screws already attached to it. Open up your door all the way and begin by inserting the knob mounting screws carefully from the outside of your door. Close it up and be sure that the knob is secure so you can feel a little weight when trying to pull it open with force. ## How do you fix a broken door knob? You can easily fix a loose door knob that falls off. To do this, unscrew the exposed screws from behind the knob and loosen them using a screwdriver from your garage. Once those loose screws come off, simply grab onto one end of it and pull it off from there. If the hole left behind is just too big, then you can fix it by using spackle. Use a putty knife to apply some over the edges or any small notch of the knob hole and leave it dry for an hour or so before painting. You can also use your fingers to smooth out any bumps to make the surface flat enough for paint. Once both holes are painted and dried, grab your doorknob again but this time the mounting screws are already attached to it. Open up your door all the way and begin by inserting the door knob screws carefully from the outside of your door. Close it up and be sure that the knob is secure so you can feel a little weight when trying to pull the knob open with force. ## How do you fix a door knob that won't turn? When your loose door handle won't turn anymore, it can be very frustrating. A quick fix for this would be to tighten the loose screws from behind the knob itself. If that does not work at all, then you might have a different issue going on with your door. After you tighten those screws, try [twisting the door handle](/guides/doors/how-to-take-a-door-handle-off) again and see if it works. If you tighten everything enough but the knob still does not turn, the best thing you can do is check whether all small internal parts of your lock system are working properly by trying to open your door using other methods like using a key or using the same loose door knob from the opposite direction. If you can open your door from there, then that means that the knob itself is the issue. In this case, it's best to grab a new one and just attach it back on where you removed the old one. ## How do you fix a broken door knob lock? The first thing you will need to do if your lock system is already broken or won't turn at all is to try checking out your keyhole first. Sometimes, a dusty lock can prevent smooth turning so use a normal pen and simply clean up anything blocking the way of turning using a cloth over the pen tip if needed. If that does not work either, then the next step is to check whether screws are set properly around the lock. Look inside from the keyhole and see if all hidden screws from the faceplate are still there. If not, use a small flathead screwdriver to adjust and set them back in place or [simply replace them](/guides/doors/how-to-install-a-lock-on-a-door) with a new one altogether. ## How do you fix a door handle that fell off? The good news is that you can easily fix a loose door handle if you tighten the set screws behind them using a Philips head screwdriver. If you are unable to tighten them enough after several attempts, try simply applying some wood glue around the edges of it and wait for about 15 minutes or so before trying to use the door handle again. A way to avoid loose door knobs is by making sure that you never over-tighten them in the first place. ## How do you fix a broken door handle spring? A broken door handle spring can be very frustrating. The best way to fix this door handle would be to simply replace it with a new one altogether. If you cannot find the exact same type of it, even if they look exactly the same, chances are they might not work properly anymore because of changes in manufacturing processes or just different designs altogether. ## How do you fix a door knob that won't lock? You can try fixing this by cleaning up any possible dust particles around the keyhole and the edges where it turns using a dry cloth, especially if your door always gets exposed to humidity or dampness frequently. Try checking the door knob itself also for any rusty components sticking out of it and clean those up as well using a wire brush. If the problem is not solved, try to tighten all set screws from the faceplate located behind the actual door knobs themselves before trying to lock your door again - just be sure that you're holding down on them with a firm grip with a small flathead screwdriver at all times so they don't loosen or come off easily after you tighten it. If none of these methods seems to work either, then there might just be flaws in some parts of your whole lockset system. In this case, you might need to replace everything as a whole instead of piece by piece so look for similar alternatives at hardware stores. ## How do you fix a door handle that turns but doesn't open? You can try checking out all the exposed screws around any locks that you have in place. Look for loose parts in the lock and simply tighten them securely before trying to open them back up again. There might also be a problem in your lock system if your door handle keeps turning but won't open up. In this case, you will need to take apart the whole assembly and check whether everything is working properly when you screw it back together again or simply replacing some worn-out components with new ones altogether instead. If there are cracks on the inside of your door knob, especially from areas where constant pressure from being held down onto occurs, then these might just be simple things you can fix yourself without a locksmith's help. You can easily do this by gluing some rubber material on it to absorb any impact. This will [protect your door handle](/guides/doors/how-to-take-a-door-handle-off) from breaking easily or it will snap, especially if it's made of brittle materials like glass or porcelain. ## Why does my door knob keep getting loose? A loose door knob can be easily fixed by tightening the long screws behind them using a screwdriver. If they don't get tight enough even after tightening, try simply applying some wood glue around the edges of it and wait for about 15 minutes or so before trying to open the door again. A way to avoid loose door handles is by making sure that you never over-tighten them in the first place. ## What types of door knob can I buy? There are many types of door handles that you can choose from depending on your preference, budget, and design requirements, such as two handles for double doors that come with a spindle. You can easily find them at hardware stores near you or order them from the web for your convenience. Here are some examples: ### Classroom-style doorknobs If you want to maintain privacy levels in an area where people are constantly coming in and out of, then using classroom-style doorknobs is a great way to limit access into individual rooms or classrooms. You just need to be able to install the latch properly so that the latch bolt will always stay down no matter how hard it's being pushed up against. The necessary tools to install a latch and fix a latch bolt also include a narrow screwdriver and a good set screw collection so keep them handy. ### Modern style door knob Modern-looking knobs only require one hand only to operate since all you have to do is push it down to open the door. You can install these types into both residential and commercial properties just fine. ### Vintage-style door knobs Vintage styles only require you to twist them before they're engaged properly for entry, which makes it easy to use even if your hands are full of belongings or other items at the moment. A downside of this type though is that it might not be able to keep people out, especially those who are more persistent about getting past locked doors. ### Cylinder tumbler door knobs Tumbler locksets are best installed for security purposes where there's a need for added privacy on top of access control already in place on any given area inside a building. It will require more than just a push or pull of the door to get it open though, unlike most types of knobs out there. These are just some examples of doorknobs that you can use for your property. Make sure that you always keep all locks fastened tightly at all times to avoid unwanted access and possible break-ins no matter what type you choose to install on your doors. A more secure way to fix a loose door would be to screw a strike plate mechanism into the system. ## How do you fix a broken front door handle? If you have a loose door handle on your front door, and you can't open or close it anymore, then one of the things you can use to fix this problem is a replacement. This will be easier for wood-based door handles, although you might need to enlist some help from locksmiths if they're made out of more exotic materials like glass or crystal. ## Which door knobs have a spring-loaded button? A spring-loaded button is an essential part of most door knobs, with it being the one that keeps the knob in place when you're using it to open or close a door. Without this mechanism and the required tools, you would have problems such as a loose door handle not closing properly all the time which can be quite frustrating at times. It works by compressing the spring once you push the door knob towards or away from its door opening, which in turn causes it to stay in place after you've used it. ## How do you fix a loose door knob with hidden screws? A loose door knob can be easily fixed by tightening the screws behind them using a screwdriver. If they don't get tight enough even after tightening with a screwdriver, try simply applying some wood glue around the edges of it and wait for about 15 minutes or so before trying to open the door again. A way to avoid loose door handles is by making sure that you never over-tighten them in the first place. Door knobs and locks are a critical element to home security. Renters and landlords [have a security standard](https://www.commerce.wa.gov.au/consumer-protection/rental-property-security-standards) they must adhere to, in Western Australia anyway. Check to see if similar standards are in place where you live.

How to Install a Screen Door

How to Install a Screen Door

Replacing a door with a screen door is an easy home improvement project. The tools required are few and the materials are inexpensive. Installing any new screen door will require opening up the existing frame, trimming the bottom track to accommodate the thicker door, then fastening the clean lines of your sleek new screen into place inside the opening. Once installed, your summertime breeze-catching accessory will allow fresh air in while keeping out pesky insects and other pests. ### Cut old track A typical wood or steel interior jamb track works best for suspending a screen door. Mark where you want to install the top of your new screen door so that it sits flush on top of the door jamb. Use a level to ensure it is even, then measure down at an angle to where the bottom will be placed. This will create a slight slope for water drainage. Most screen doors come with an automatic door closer. This accessory ensures the screen door will lock automatically. A door stop can be used in cases where there is a need to keep the door open. Once you've drawn your line, cut out this section of the track using a hacksaw. Be careful not to damage the wall while cutting by protecting the surface with cardboard or masking tape on both sides of the track. You can use these old pieces as guides for cutting your new screen door mounting bracket since they are usually shaped like L's and cut right at their centre points where they intersect each other. ### Clean door jamb tracks If your current tracks are dirty or have paint all over them, clean them up by removing the hanging hardware that is riveted to the ends. These are only held on with a few small screws or sometimes wire, so remove everything and take them outside for some good scrubbing. Use a wire brush to get the dirt out of hard-to-reach corners, then wipe down with lacquer thinner before reattaching your new tracks. ### Cut brackets The mounting brackets you get with your screen door kit should be cut to length using a hacksaw. To determine the correct size, measure from the unfinished end down to the centre line of the track where it will meet at a point. Measure up at an angle from this point, and that is how long they need to be. Cutting in this manner ensures that when you have them installed, the screen door will sit in its frame sag-free and in a perfectly aligned channel, allowing it to slide up and down with ease. ### Mount brackets When measuring where to place your brackets on the inside jamb track (the side nearest to the wall), put them about 1/4 inch above the line you drew in step one. This will allow enough room so that when your screen door is set in place, it will sit flush with the track and not leave a gap between it and the jamb. Draw your lines on both ends of where to place each bracket. Then, drill screw holes. It's a good idea to make pilot holes if the surface is very hard. Securely fasten the brackets in place, take the track and set it back into place. Make sure that your screws or pop rivets are drilled in far enough so that they don't poke through to the outside when you put your screen door up. ### Mount brackets on outside track Now it's time to cut and mount your top and bottom brackets on the outside jamb track. The measurements should be taken from the line you drew in step one, not the inside track. Depending on how wide your door is should determine how many brackets you will need; there should be about 30cm between each bracket for a standard size screen door. On the jamb, carve out the space for the striker plate. Fasten it with two screws. Do the same with the outside handle. Drill pilot holes, and use the screws provided to fit the door handle onto the door's surface. Once cut and fastened in place, let's get that screen door into its new resting place. ### Installing the screen door Take your screen door out of its packaging and grab your rubber mallet. If you don't already have one, they can be purchased for about $15 at any hardware store. Take the tension spring (the part that attaches to your door handle) and attach it to the bottom of the screen at one end. Pull out about 10cm of hanging wire, then feed it into the groove on each side until you get right down to where the handle is. Then pull straight up with a firm tug so that all of this wire is now housed inside the track. Take the top of your screen door and line it up with the mounting brackets. You want to make sure they are even so that they will close properly without binding or rubbing anywhere. Set them down so that their tops meet flush with where you set your inside track, then give it a few whacks on either side using your mallet until you hear a 'click' and can't push it up any further. If you are installing a [security screen door](/guides/security-doors-screens/security-screen-door-prices), you might want to get professional help. ### Setting the screen door Now that your screen door is securely fastened in place, you can take off those scraps of wood or masking tape you used as guides for cutting your [wire screen or flyscreen](/guides/security-doors-screens/where-can-i-buy-flyscreen-mesh). Cut it to size right over the top of the track, then use your pliers to bend the wire ends down on either side. Ensure that you leave enough room at the sides when you do this so it doesn't bind up when fully opened. If there are any sharp edges, use a file to smooth them out before rolling your screen up. Otherwise, they will snag and cause damage to your new screen. Once you've done that, give the door a few test runs and be sure there isn't any rubbing or catching anywhere. If it does catch, check to make sure everything is lined up correctly and your brackets aren't crooked. ### Finishing up Now that your screen door is looking good as new, you can take your time to make sure it will continue looking this way for a very long time. Using a light oil or silicone spray, lubricate the rollers on both sides so that they run smoothly without binding up. This will also prevent any rust from building up in the future. Once you've done that, you can add a high-quality weatherstrip to your threshold in order to keep out drafts and moisture from coming inside when the door is closed. This will also make sure your top and bottom screens don't get damaged from constantly rubbing against one another when opening or closing the screen door. ## How do you install a metal screen door frame? If you have never installed a screen door before, it would be wise to get someone to help you so that the door is properly attached. Without this and not following all instructions, the door may fall off or fall apart under stress or heavy use. Here's what to do: Measure across the threshold of your doorway with measuring tape and cut two pieces of wood out using a saw at this width. Measure along the top track on your inside wall where you want to mount your top bracket and mark it with a pencil. Mark, each end of this line using a measuring tape, then measure down from the ceiling how far up it goes plus one inch (25mm). You will need two long screws on each end to close the track in place. Get your screen door out of its package, grab your rubber mallet and stand the screen upright. If you have a tension spring, attach it to one side using wire to form a handle where your thumb will be when holding it. To hold the other side in place while you insert it into the track, slide under one edge at a time so you can put pressure on the sides without any wires sliding off to get in the way. You should have about 30cm between each bracket for a standard size screen door. Once cut and fastened in place, you should be able to slide the door in place, and it will hold itself up. When you are ready to attach your bottom track, use two screws to secure it in place at either end through the bottom edge of your threshold. The screen door should now fit tightly against both sides without gaps or catching when opening or closing the door. Once that is done, measure along where you want [your hinges mounted](/guides/doors/how-to-install-door-hinges) on both sides of the frame, then mark them with a pencil. Make sure there is enough room for the screen door handle beside each hinge hole. Otherwise, one side will have no handle when closed. Use a drill or jigsaw to cut holes wide enough so that they can't slip out. While using screws, screw each hinge into place firmly. You can then attach your screen door to the hinges that you just mounted. Your door should swing smoothly without catching or sagging when in motion. This will ensure that each time you open and close the screen door, it will work perfectly, so be careful to do everything correctly when installing it. If at any stage during installation something doesn't seem right or the track catches while sliding it into place, don't force it in case there are parts incorrectly positioned. Please make sure the tops of both tracks at both ends are exactly in line with one another before continuing very slowly. Otherwise, you could break or crack them, which would mean having to install brand new ones. ## How do you hang a hinged screen door? Before you can hang your screen door, you need to select a wide enough location to be able to open and close it freely. It's not a good idea to put it in place with obstacles such as furniture or walls because the user might damage them by accident. The best locations for installing the [hinged screen doors](/guides/doors/what-are-hinged-doors) are beside any exterior doors, so you don't have to duck under them when coming and going. This means neither side of your doorway will interfere with the opening and closing of the screen door, making it easy for everyone, including those who aren't very tall or who find low ceilings difficult to work with. Once this has been done, measure from the floor up along the wall using tape and mark where each screw is inserted. Make sure you don't use screws that are too long, or they might puncture or tear the screen. If your door is very heavy, it's best to put one screw on each side of the track instead of just one where it will be more secure and less likely to fall off when in motion. It would be best to fit the bottom into place by sliding under both ends until you can push it up into place at about shoulder height for more stability. To fasten it securely in place, pull the handle up, so your door is level with it and slide one side of the bottom across to where you measured before marking where to drill. Use pencil or chalk to mark two holes, then use screws that are about 40cm long to secure both sides firmly without damaging them. A secure screen door is just one line in home security. For more information on staying safe at home, take a look at the Australian Government's [YourHome website](https://www.yourhome.gov.au/live-adapt/safety-and-security).

Aluminium Door Frame Price

Aluminium Door Frame Price

Aluminium door frames are a popular choice because they're strong and durable, yet lightweight and easy to install. Conventional wooden door frames are commonly being replaced with an aluminium door frame. The price of an aluminium door frame depends on your specific needs and the style of frame to suit your budget and home. A standard-sized, single-panel frames aluminium door prices around $100-$200, while a large, double-panel frame could price up to $600. ## How much does an aluminium door frame cost? The price of an aluminium door or aluminium windows can vary depending on the size and style of the door, as well as the type of frame. Single-panel standard size doors are roughly priced around $100-$200, while a large, double-panel frame could be up to $600. There are also a range of finishes and colours available such as white, silver, black and wood-grain, so it's important to choose one that will complement the look of your home. ## What are the benefits of an aluminium door? Aluminium doors have a number of benefits, listed below. - Strong and durable yet very lightweight. - Aluminium doors are very easy to install. - Won't corrode or rust like some other metals. - Come in a range of finishes and colours. - Ideal if you live in a coastal area. - Energy-efficient, as they keep heat in and cold out. - Secure when installed with security locking systems. - Noise resistant. - Can be customised. ## How much is a standard door frame? The prices of interior aluminium door frames and exterior aluminium door frames are different. A standard door frame is typically around $100. A interior door frame can cost you between $110 to $250. And an exterior door frame can cost you around $130 to $250. A large, double-panel frame or a [bifold door](/guides/doors/what-is-a-bifold-door) could be the price up to $600. There are also a variety of finishes and colours available, so it's important to choose one that will complement the look of your home. The typical door size in Australia is 2040 x 820 mm x 35 mm. The usual height of doors is 2040 millimetres. They can be the priced between $50 and $200. ## What are the negatives of an aluminium door? Aluminium doors are more expensive than wooden doors and can be particularly expensive if you opt for a double door with wide panels and large windows. They don't provide the same insulation as wooden doors, so they're not ideal if you want to maximise your energy efficiency. Finally, aluminium tends to cold to touch when compared to wood or UPVC door frames. Aluminium doors aren't great for homes that require a high level of insulation because they're not as effective at keeping the heat in during winter and out during summer. This means that your home will need additional insulation in order for aluminium to be a viable option. If you believe this would impact your energy efficiency or you live in a colder climate, aluminium door frames may not be the best choice. Aluminium doors are more expensive than wooden doors and can be particularly expensive if you opt for a double door with side panels and large windows. ## How do I install an aluminium door? Installing an aluminium door is relatively easy as there are no special tools required other than standard DIY tools. Below are some steps to install it. 1 Remove the old frame by unscrewing hinges from the old frame using a screwdriver. 2 Hold the frame side header to the rough opening. Now insert the screw/tab on the top of the grooves in the header's end. 3 Level all the sides for the frame. You can raise or make them lower to each side of the frame to make it on a same level. 4 Fit the new frame in its place and reattach the hinges. ## Can I paint an aluminium door? Yes, you can paint an aluminium door any colour you like. However, it's important to use good quality paint that is designed specifically for use on aluminium. These type of paints secure the aluminium door or frames from moisture. As aluminium is a light-coloured metal, it's susceptible to showing scratches and marks, so using good quality paint will help to protect your door from damage [and needing replacement](/guides/doors/cost-to-replace-front-door-and-frame). ## What is the difference between aluminium and UPVC doors? The main difference between aluminium and UPVC (plastic) doors is that aluminium is a metal, while UPVC is made from plastic. Aluminium is stronger than UPVC and doesn't discolour in the sun, but it's also more expensive. UPVC is more affordable, but it can become weaker in cold weather. Most of the aluminium doors are thinner than UPVC door. ## What types of door frame can I buy? There are a few types of door frame you can buy, listed below. ### Aluminium doors Aluminium is a strong and corrosion-resistant metal that will protect your home from the outside elements. However, it's not as effective at insulation as wooden and UPVC door frames so if you're looking for an insulated door, aluminium may not be the right choice. ### Steel doors These offer excellent strength and durability, but they tend to be cold to touch when compared to other types of framed materials such as wood or UPVC. Solid material (timber/hardwood) doors provide great thermal insulation and also insulate against noise. They're very popular for front doors because they give a traditional feel that matches most homes well. If you're looking for a good-quality, well-insulated and sound-proof door, a solid material door [rather than fibreglass](/guides/doors/fiberglass-vs-steel-door) is a good option. ### UPVC doors UPVC is a budget-friendly and durable type of plastic that is often used as an alternative to aluminium or wooden doors. It's not as strong as metal or timber doors, but it is weather-resistant and won't warp in the sun. Interested in a career installing doors? Take a look at the necessary courses on the [training.gov.au website](https://training.gov.au/Training/Details/VU20561).

Cost to Replace Front Door and Frame

Cost to Replace Front Door and Frame

If the exterior doors are severely damaged, it can be dangerous and costly to repair. The cost to replace a rotted door frame and door can vary depending on the type of door you choose, the size of the door and door frame, and the materials used. Door frame replacement costs depend on some factors like the size, type of the door frame, material that you want to use, and the items that you want to replace. The average door installation cost for a standard fibreglass or steel entry door is around $200-$600, while higher-end wooden or metal doors can cost up to $1,000 or more. If your door frame is also damaged, that will add to the overall cost of replacement. Replacing just the exterior doors without repairing the frame usually costs between $100 and $300. the average cost for installing a new basic door frame can cost anywhere from $200 to $500, and more if you need the extra energy efficiency of the double-pane glass. If you want to install an [aluminium exterior door frame,](/guides/doors/aluminium-door-frame-price) the average cost will be about $150-$240. The average cost for installing a sliding or hinged patio door can be about $350. Sliding door frame repairs vary from $100 t0 $240. A wooden exterior door frame would cost between $112 to $325. Installing exterior French door frames cost about $120. If you want, you can buy pre-hung doors. These are doors that come with the frame attached. The average cost of installing a new pre-hung door is $109 to $440. If your exterior door opens to the inside, removal will be easier because it does not have to clear the door casing on the exterior of your home. If your exterior door opens outward, measuring its width becomes important so that you order an entryway with room for the trim around the casing. Replacing a pre-hung front door requires taking out some screws at each side of the hinges along with prying out any nails left over from when your old door was attached to the frame. New hardware should come with instructions for setting up your new entryway or you can look up videos online that walk you through the process. Remember to factor in the cost of a new lockset, door knocker, and any other decorative features you may want. If your door is severely damaged, it's also a good time to consider updating your security system. Replacing your front door can be a big expense, but it can also add value to your home and make it more energy-efficient. By taking the time to research your options and plan ahead, you can choose a door that fits your needs and budget. Standard interior door frame replacement costs can vary from $133 to $222. This is the price for an entire interior door frame. Otherwise, door frame replacement cost vary between $7 to $14 per linear square feet. ## Can a door frame be replaced? A door frame can be replaced if it is damaged, but it is not always necessary. If the damage is only to the frame, then the door can be removed and reinstalled without replacing the frame. However, if the door is damaged as well, then both the door and frame will need to be replaced. Door frame replacement costs can vary anywhere from $200 to $500, depending on the size and type of frame. If you need an energy-efficient frame, such as a double-pane frame, the cost will be higher. Installing a new frame usually requires hiring a tradesperson. If you are only replacing the door, then the cost will be between $100 and $300, depending on the size and type of door. If you are installing a new frame and door, the cost will be between $300 and $800. This is a more expensive option, but it can add value to your home and make it more energy-efficient. By taking the time to research your options and plan ahead, you can choose a door that fits your needs and budget. ## How is a door frame replaced? A door frame is a vital element of a house. It allows the doors to stay firmly in place and is a part of a room's structure, which determines how stable the walls are from top to bottom. A door frame is often made out of wood or metal that can support heavy objects, but it is also vulnerable to wear and tear over time. Door frame repairs can become easy if you have the right knowledge and tools. Plus, you will save time and money. If you need to replace your door frame for any reason, follow the steps given below to install door frames perfectly: ### Remove hardware from the old frame Before doing anything else, make sure that all the nails used to hold your door hinges have been hammered in securely. Just pull them straight up without pushing too hard with a pair of pliers. If they're held down by adhesive, you can use a chisel to get under it before prying it off. ### Pry the old door frame out Use a crowbar or pry bar to start loosening up the old door frame. It should come out fairly easily, especially if it's made of wood. If the nails are still in good condition, you can reuse them. However, if they're corroded or rusted, you'll need to replace them with new ones. ### Fit the new frame and attach hinges The new frame should fit snugly against the opening. Nail it into place by using 8d finish nails on each side. Make sure that the heads of the nails are slightly below the surface so that they don't show. If the door frame is made of wood, you'll need to use wood glue as well to keep it firmly in place. Next, screw on the hinges. ### Attach the new hardware Use screws instead of nails for this step. After all, there's no point in doing half your job if you're still using old materials. The lock should be installed on the side that won't allow anyone to open it from outside without a key or proper identification. Make sure that you leave enough room to put it into place before fixing its location onto the new door frame permanently with adhesive rubber pads. It is better to install new hinges so that the door stays in its position properly. ### Paint and stain Once everything's been hung properly, paint it with 1-2 coats of primer before applying the final coat of paint. You can also use a wood stain to bring out the natural beauty of the frame and make it resistant to fading. ## What are the different types of door frames? While most door frames are made out of either metal or wood, there are a few other materials that you might come across. Here are the three most common types. ### Wooden door frames These are the most popular type due to their natural beauty and how well they match with a variety of décor styles. They're also fairly easy to install and don't require much maintenance. The main downside is that they're vulnerable to moisture damage and warping. You might be able to match the wood to a customised door should you be considering [making a door.](/guides/doors/how-to-make-a-door) ### Metal door frames These tend to be more durable than wooden frames, but they can also be more expensive. They're often used in commercial buildings because they can withstand a lot of wear and tear. However, they can also be more difficult to install and require extra care when it comes to rust and corrosion. These are well suited to [steel doors as opposed to fibreglass.](/guides/doors/fiberglass-vs-steel-door) ### Aluminium door frames These are another popular option because they're very strong and lightweight. They don't corrode or rust, which makes them a good choice for coastal homes. However, they can be more expensive than other types of door frames. Installation is the main challenge with door frames, so if you're not comfortable doing it yourself, it's best to hire a professional. That being said, if you have some basic carpentry skills, you should be able to handle the job quite easily. Just make sure that you take accurate measurements before you buy your replacement door frame. ## What are the benefits of using a wooden or metal door frame? There's no doubt that metal and wood are two of the most popular materials for building door frames. They are perfectly suited to [additions like doggy doors.](/guides/doors/how-to-install-a-doggie-door) Below are some of their other advantages. ## Wooden door frames - Natural beauty - Ease of application - Resistance to warping and moisture damage. ## Metal door frames - Durability - Corrosion resistance - Strength - Affordability In terms of aesthetics, it's really up to personal preference as well as one's home or office design style. Both metallic and wooden door frames can make a space look more modern or rustic depending on which material you choose plus how they're put together. As far as functionality goes, metal frames tend to be a little more durable and can withstand more wear and tear. However, wooden door frames are easier to apply and don't require as much maintenance in the long run. So, it really depends on what's most important to you. Interested in a career installing doors? Take a look at the necessary courses on the [training.gov.au website](https://training.gov.au/Training/Details/VU20561).

Frequently Asked Questions

Why won’t my door close?

A number of things may cause your door not to close properly, such as loose screws, a warped door frame or bent hinges.

Which type of door is best for a bathroom?

Timber is aesthetically pleasing but can warp from humidity and condensation. Steel is durable but can be expensive. Firbreglass is another option.

Why does my sliding glass door stick?

Rollers may come away from the track or bearings, causing the door to stick or become difficult when opening and closing.

Are there different types of doors other than hinge or sliding doors?

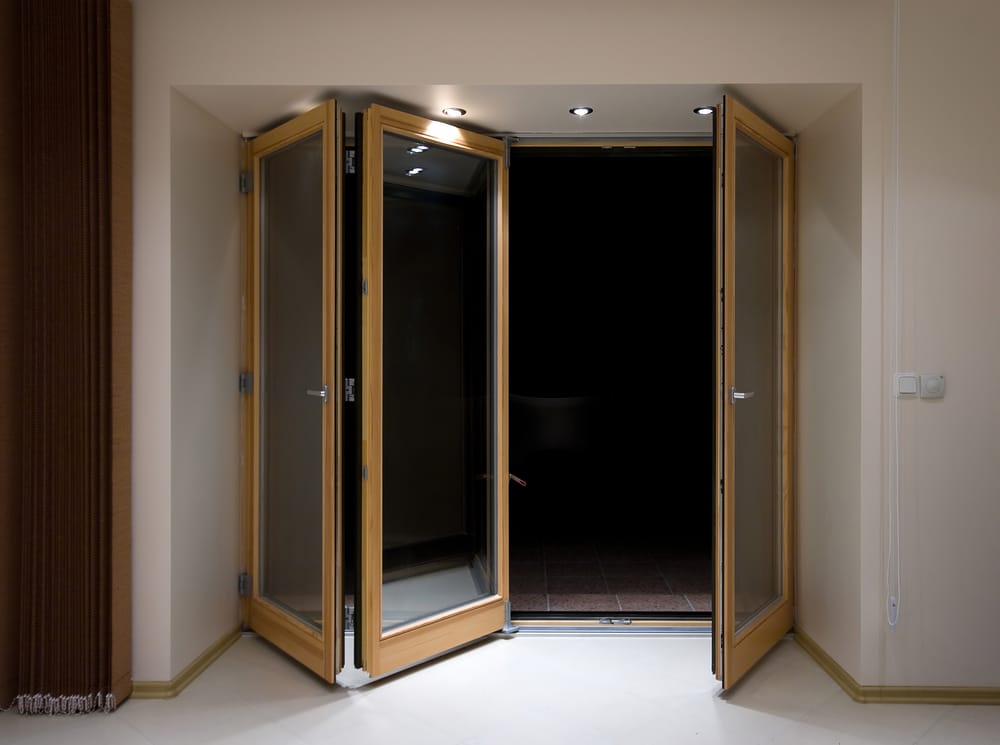
Pivot and French doors create a wider entry. Bifold doors open an entire space to the outdoors and security doors add extra protection to your home.

Download Our App

Screenshot of the Localsearch App
Card highlighting that you can claim and future proof your business with the Localsearch App

Localsearch App

Find local businesses - anywhere, anytime.

Available on the Apple App Store iconAvailable on Google Play icon
Screenshot of the Localsearch For Business App
Screenshots of the Performance and Notifications sections of the Localsearch for Business App

Localsearch For Business App

Manage your business - anywhere, anytime.

Available on the Apple App Store iconAvailable on Google Play icon