
Cleaners Guides & Resources
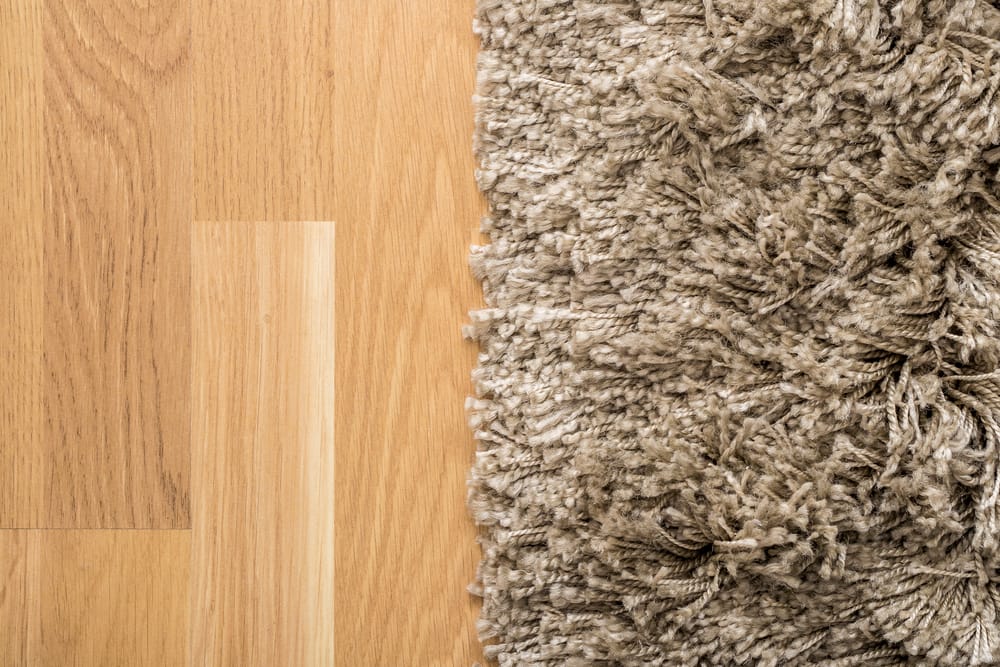
How to Clean a Sheepskin Rug
Not only does the wool ensure the rugs are soft, they also have a natural oil that helps give them dirt and odour-resistant qualities. Natural sheepskin rugs are made when wool fibres are permanently fixed to the sin of a sheep during the tanning process. The main way to clean a sheepskin rug is to have it dry-cleaned, however, there are rare instances where this is not possible. In such cases, you can, instead, hand wash a sheepskin rug with a mild detergent (you can find a sheepskin detergent meant to work on sheepskin fibres in many department stores) and rinse it with plain water after which the excess water should be squeezed out and the rug should be left out to air-dry. 1 Gently brush off any loose dirt from the skin using a soft hair or wire brush. Alternatively, you can also use a sheepskin brush from a department store for best results. If this doesn't work then use a vacuum cleaner on the sheepskin rug to clear away as much dirt as possible. 2 Mix a small amount of mild soap solution in warm water and submerge the sheepskin in this for about fifteen minutes. Gently rub the upper side of the skin with your fingers while submerged in order to ensure thorough cleansing. 3 Rinse the soap solution off thoroughly by running it under a tap, preferably using cold or lukewarm water. 4 If the sheepskin does not still feel clean enough after hand washing with soap solution, use this alternative method; Mix one part white vinegar to three parts water (the ratio may vary depending on how large your sheepskin rug is). Submerge the sheepskin in this mixture for fifteen minutes then rinse thoroughly with cold water. Squeeze out the excess moisture gently. 5 Hang up a large sheet of plastic and cover a smooth floor in a well-ventilated room before laying out the sheepskin flat on the plastic and leaving it to dry for a few hours. You can also use an outside space where there is plenty of direct sunlight to help your sheepskin rug dry faster. ## Can sheepskin be washed? The best way to clean your sheepskin is by using a vacuum cleaner and brushing off any dirt with the help of a wire brush or even a soft hairbrush. You must also avoid disinfectants and solvents during the washing process as these would badly damage your sheepskin rug instead of cleansing it gently. ## How to clean sheepskin rug with vinegar If you want to go for an alternative method of cleaning sheepskin rug, then you must create a solution of one part white vinegar and three parts water. Make sure that the solution is just strong enough to be able to submerge the entire skin in it without difficulty. Once this has been done, simply submerge your skin in this solution for around fifteen minutes before taking it out and rinsing it under running cold water so that no trace of the vinegar is left on your sheepskin rug. You can also use lemon juice if you don't have any vinegar lying around your house. After this, place your sheepskin rug outside in the sun as the ultraviolet rays will help disinfect and sterilise your rug of any dust mites or harmful bacteria since sheepskin is very sensitive to such things. Diluted vinegar also works well [cleaning vertical blinds](/guides/blinds/how-to-clean-vertical-blinds). ## Can you machine wash a sheepskin rug? A sheepskin rug is machine washable but you cannot tumble dry it. Machine washing of your sheepskin rug can be done every two to three months in order to remove dirt and dust, however, there are a few things that you will need to bear in mind before putting your whole rug in a washing machine. Place your sheepskin products into a large pillowcase and tie the end shut before placing it inside your washing machine along with some soap powder and two tennis balls. Alternatively, you can add sheepskin detergent instead of soap powder. Sheepskin detergent will help keep your rug soft and the tennis balls help agitate the water which enhances cleaning. The detergent will create a wool wash. Wool washes should be free of enzymes that could damage your rug. This is why many sheepskin detergents are infused with natural lanolin, a natural fat found in wool. A lanolin-infused wool wash will help keep your rug soft. Set the washing machine on a warm/cold cycle for small rugs and a cold cycle for larger ones. Make sure that you select an agitator-free option if your washing machine has this capability as this greatly reduces wear on the skin of your sheepskin rug. Do not put your sheepskin through the spin cycle after it has been machine washed as this will stretch it out of shape. It should not undergo tumble drying or rough handling. Even during the washing process, it should be on a delicate cycle. If you are unsure whether or not your washing machine is capable of washing a sheepskin rug, refer to the manufacturer's instructions before proceeding. ## Can you clean a sheepskin rug with baking soda? Baking soda is another great substance for cleaning sheepskin rugs as it softens the hard water which is usually present in your home and removes any soap residues that might be leftover after it has been hand washed with vinegar. Mix one part baking soda with five parts water to create a paste then scrub this into the skin using circular motions. Leave this paste on for around fifteen minutes before rinsing it off with cold water. Then, gently squeeze out the excess water and allow your sheepskin rug to dry naturally. Animal skin rugs are not that hard to clean as long as you know exactly what you're doing and keep a few helpful tips in mind. ## How do I make my sheepskin fluffy again? If you want to make your sheepskin rug fluffier then simply place it in the sun for half an hour before shaking it gently. If you have a hairdryer then use this on the lowest heat setting to melt the wool fibres slightly. After this, use a comb or a good brush to make it look as fluffy as possible. Ideally, use a wide-tooth metal brush. You should be able to find one at your local pet shop. Regular brushing will help ensure it stays soft and fluffy whenever you want to use it. ## What soap can I use to wash a sheepskin rug? You can use any lather shampoo (including wool shampoo) or even unscented baby shampoo for washing sheepskin. Make sure that there is no soap or wool shampoo residue left behind after thoroughly rinsing the sheepskin rug. Soap, or detergent works wonders for [cleaning venetian blinds](/guides/blinds/how-to-clean-venetian-blinds) as well. ## Can I dry clean sheepskin rugs? You can definitely dry clean a sheepskin rug, however, you will first need to ensure that it is free from any dirt or dust as these could be extremely damaging. It is important that the leather backing of the rug maintains its original shape during the cleaning process so that it does not become distorted. ## How do I protect my sheepskin rug? When you are done using your sheepskin then you should always put it away in a closet or on the floor where it will be safe from getting dirty which can affect its colour. If possible, use some type of cloth cover to protect your rug while storing it. If you cannot afford to buy a cover for your skin then place some old sheets on top of it before closing up the container that it is kept in securely. Sheepskin rugs are expensive and care must be taken when handling them if you plan to keep them around for years to come without want them to get worn out too quickly. When it comes to protecting your rug during storage or while not in use, there are some other things that you need to bear in mind too such as: - Keep it away from sharp objects which could tear your rug. - Don't put anything on top of it when stored. - Avoid direct sunlight as it could discolour the skin. ## What is the best way to store a sheepskin rug? The best way to store a rug properly is to roll it up tightly and place it inside a plastic bag. You should then put this storage bag inside a larger plastic bag and seal that as well. This will keep dirt from getting on the rug and keep moisture away from it as well. This storage method isn't perfect though because the rug may still become dirty over time even if you do store it properly. If your rug doesn't get damaged by dust or water for long periods of time though, storing it this way will do the job just fine. ## Why are sheepskin rugs so expensive? Wholesale prices for a good quality natural sheepskin rug are anywhere from $150-$250 on average. While you may find cheaper, lower quality rugs out there, it's important to remember that you get what you pay for. A cheap, low-grade rug will shed its wool easily and lose its shape quickly as well. The cost of processing these types of skins is very low because they don't conform to strict standards as better quality wool does. You can easily tell what type of skin you're looking at by looking at the colour of the handle on the backside of your rugs. If it's pink, then you own dyed sheepskin rugs. A natural, uncoloured sheepskin handle will be an ivory colour. Also, cheaper wool may contain excess fluff or dirt that can get stuck easily in the fibres of your rug. These things won't vacuum up very easy and will become permanent even after several cleanings. While you may not want to spend $150-$250 for a good quality rug, remember that natural skins are much more durable than man-made alternatives. They're also completely biodegradable and don't require furniture pads underneath them to keep from slipping all over the place. ## Can you put sheepskin in the dryer? No, you should not put sheep wool in the dryer because it will lose its shape over time and become damaged. To prevent this from happening, you should hang your rug from a clothes rack and allow it to dry naturally. After the initial cleaning process is done, always let your sheepskin rug air dry before storing it away or using it again. Make sure the rug is completely dry before packing it away. You can also add some type of scented oil to your skin while washing it to bring out its natural scent. Most people will choose a fragrance that smells like the outdoors such as pine needles, oakmoss, or sandalwood. Using a fabric softener while washing/drying your skin will cause the wool fibres in the pelt to mat together and become tangled which can result in a shorter lifespan for your sheepskin rug. ## How do you clean a matted sheepskin rug? You can easily spot clean a matted sheepskin rug by using a pair of scissors to remove all the matted fur. Try to match up the fur with its original places as best you can and set it aside once it's removed completely. Next, soak your skin in warm water for about 10 minutes so that the fibres have time to loosen up from each other. Once this process is done, take out your skin and brush any excess dirt or loose hair out of it. You can use a sheepskin wool carding brush to do so. You may need to use a cotton ball soaked in hydrogen peroxide for spot cleaning if there are still some stains on your rug at this point because it can be difficult to remove stains of this type otherwise. Alternatively can put some wool wash in a spray bottle and apply it to the stain before rinsing the mixture and the stain out. It's essential to spot clean spills as soon as they happen so that they don't turn into stubborn stains that take ages to get out. The final stage is drying off the pelt and then spot cleaning and brushing it once more to get rid of any remaining stains, lint, or dead fur. After the drying process, you should then lay your skin out on a towel and roll it up tightly as you would normally before placing it in a plastic bag for storage. This will keep moisture from getting inside the rug which can damage it over time if this step isn't done properly. Without regular cleaning, sheepskin can harbour mites and other nasties that are bad for allergy sufferers. The [Australian Government's Health Direct website](https://www.healthdirect.gov.au/dust-mites) has some good advice for dealing with such household issues. ## Can you use sheepskin rugs outdoors? You can definitely use outdoor sheepskin rugs outdoors but they must first be protected against water by applying a clear, waterproof sealant to them. Once this process is done, your sheepskin will have natural dirt-resistant qualities, and you shouldn't wash your rug unless it becomes extremely dirty because liquids may start seeping through the sealant otherwise. Also, place heavy furniture pads on these types of rugs to keep them from sliding around on your flooring. One other consideration to think about when using sheepskin rugs outdoors is the heat. Direct heat and sunlight can damage the pelt and cause it to crack or discolour if you're not careful, so this is also something that needs to be protected during the cleaning process. If your rug has been treated or dyed during the tanning process, there's a greater chance that it could revert back to its usual colour after a wash - however, make sure this is the case before using it outside. Finally, there's a risk your sheepskin could catch an odour. If this does happen, sprinkle baking powder onto the rug. Then, use a comb to work the baking powder into the sheepskin. Leave it overnight, then shake it out of the rug or dust it out using paper towels. It's essential to remember that no matter how well you wash your rug, the leather side will never be as soft as it was when the rug was new. Additionally, if your rug is over 15 years old, it's at high risk to wash. This is because the leather side slowly deteriorates over time. While the leather on older rugs may look fine, once you get the rug wet, the leather will fall apart. If you do choose to wash an older rug, make sure you're using a leather safe washing solution. This will help protect the leather of your rug to some extent. Additionally, if the leather backing goes hard, there's not much you can do. There's a number of reasons that the leather may go hard, including issues during tanning, the age of your rug, and the possibility that you used a shampoo that wasn't safe for leather when the rug was in the wash. However, once the leather hardens, it's time to say goodbye to your rug. If you're still concerned with how to wash your sheepskin rug, consider getting it professionally cleaned. Professionals will be able to deal with any issue that arises, including black mould, and will return your rug to you in tip-top condition.
Cleaners Guides & Resources


Frequently Asked Questions
Do I have to be home while your cleaning?
Do I have to be home while your cleaning?
No. Our cleaning team will work around your schedule—we can clean while you’re at work.
Do the cleaners use their own products and equipment?
Do the cleaners use their own products and equipment?
Yes. All home cleaners use and provide all their own cleaning supplies such as chemicals, vacuums, mop and bucket and more.
What areas of the house do you clean?
What areas of the house do you clean?
Everywhere! From bathrooms and kitchens, to bedrooms and lounge rooms, wherever you wanted cleaned, simply ask.
Can I arrange a scheduled visit?
Can I arrange a scheduled visit?
Yes. Speak to your local home cleaning staff to set up a daily, weekly or monthly visit.
Download Our App


Localsearch App
Find local businesses - anywhere, anytime.


Localsearch For Business App
Manage your business - anywhere, anytime.

